Create a new player (UI)
Player Builder is arranged as a set of menus that allows you to quickly customize the behavior and appearance of a player inside the dashboard without having to write any code.

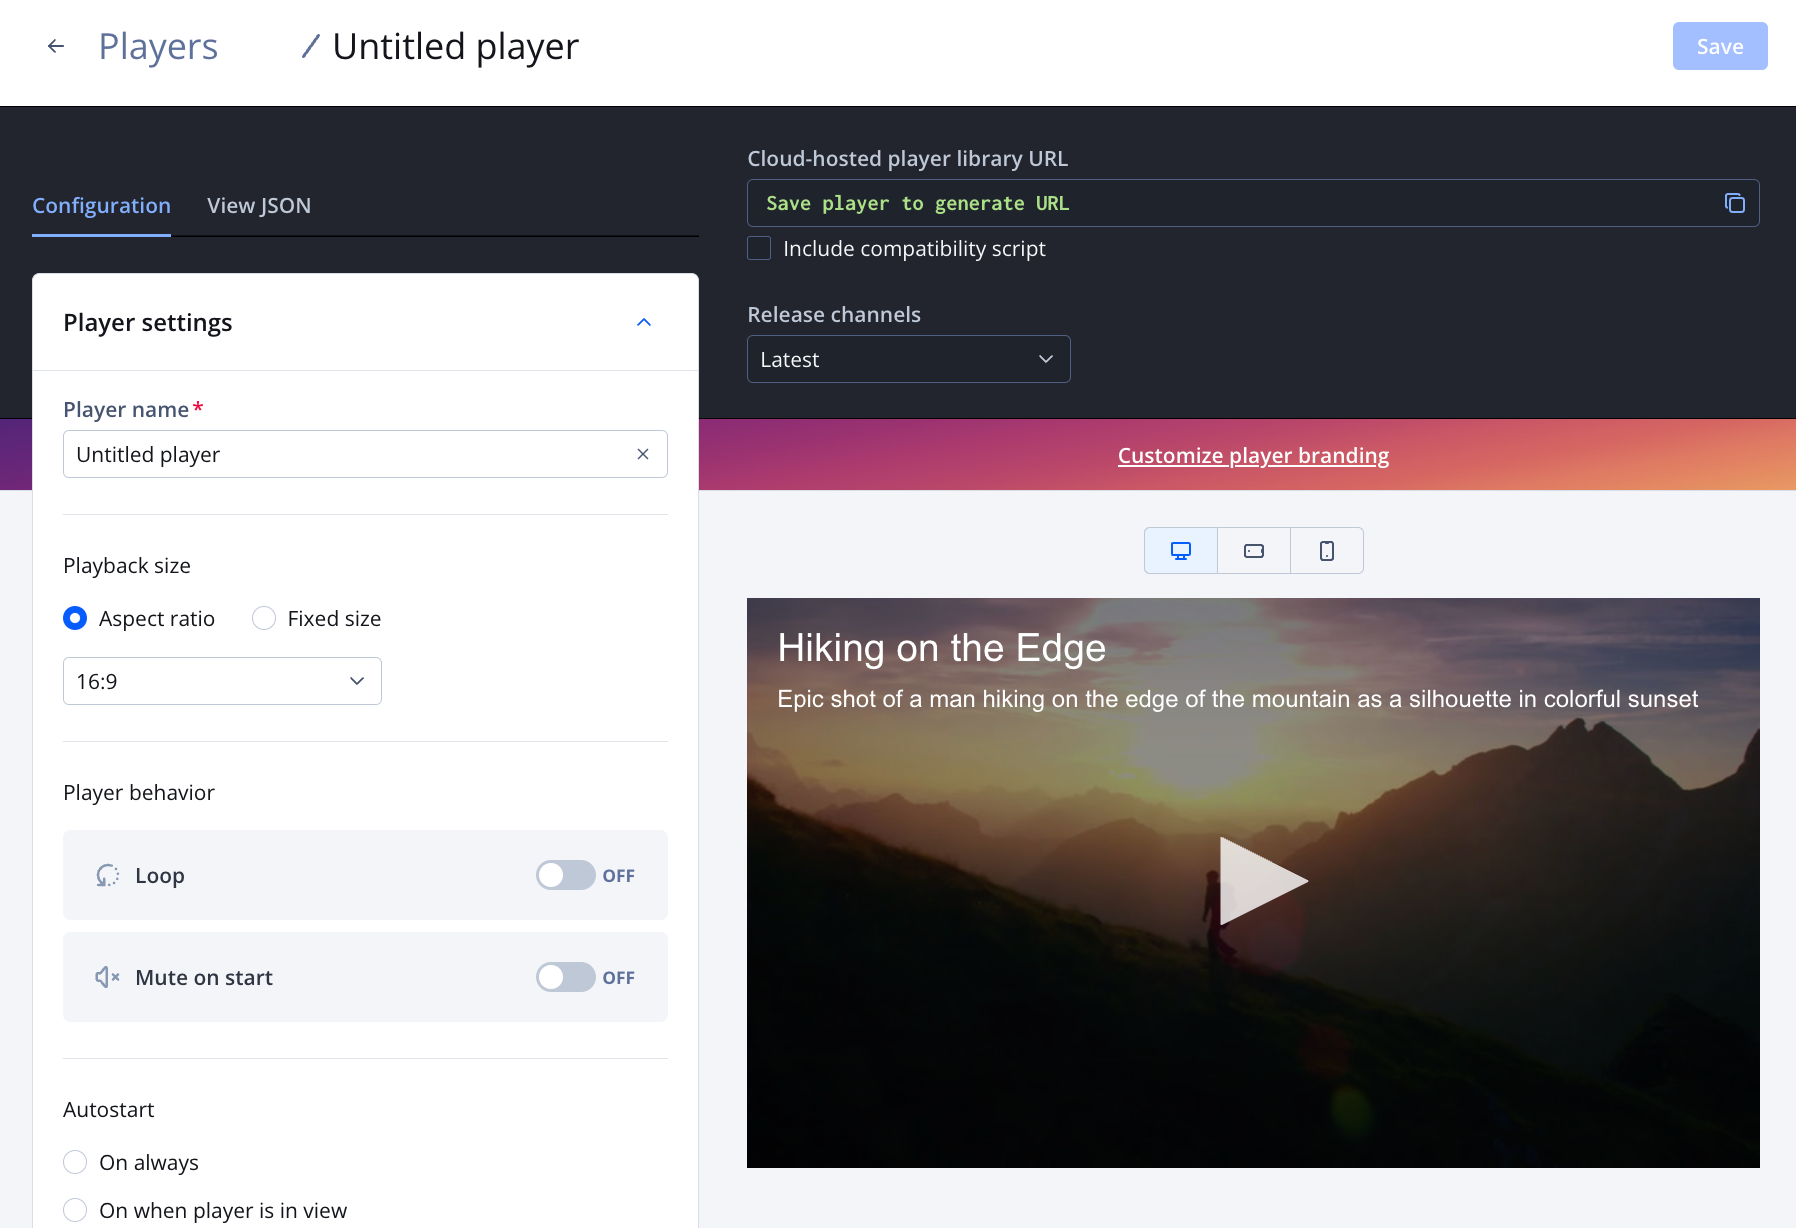
Configuration tab and preview player
Create a player
Follow these steps to create a new cloud-hosted player:
- On the Players page, click Create web player.
- On Configuration tab, in the Player settings section, enter the Player name.
- (Optional) Expand any of the remaining sections on the Configuration tab to define the player settings.
The following table explains each section.
Section Description Player settings Configure the player behaviors Display options Define if the video title, video description, and player controls appear Sharing Select the social media networks to which the player can be shared Recommendations Define the Recommendation settings Advertising Customize the advertising experience Advanced options Configure additional player options to further enhance usability and SEO viability
- Click Save.
Update an existing player
Follow these steps to update an existing player:
- On the Players page, click the name of the player to update. The player details page appears.
- On the Configuration tab, expand any of the sections to edit the player settings.
The following table explains each section.
Section Description Player settings Configure the player behaviors Display options Define if the video title, video description, and player controls appear Sharing Select the social media networks to which the player can be shared Recommendations Define the Recommendation settings Advertising Customize the advertising experience Advanced options Configure additional player options to further enhance usability and SEO viability
- Click Save.
Updated 10 months ago
