Embed a self-hosted player with JW Player for Wordpress
Without having to manually add code to your WordPress pages, the JW Player for WordPress plugin enables you to create a video experience for your viewers with a self-hosted JW Player:
- Embed videos or playlists
- Configure video player appearance and location in content
- With a JWP Enterprise license, enable advertising
You can also embed a cloud-hosted player with JW Player for WordPress.
Get the required items
Before you begin installing and configuring the JW Player for WordPress plugin, you need the items in the table below.
| Item | Description |
|---|---|
| Player library URL | URL of your self-hosted library NOTE: The URL must begin with either https:// or //.1. From your JW Player dashboard, click Players. 2. Select the player library you would like to add. 3. Locate the Cloud-Hosted Player Library section under the video preview and copy the URL. |
| JWP License Key | License key that enables access to a specific self-hosted player library. Use the following steps to locate your license key: 1. From your JW Player dashboard, click Players > Downloads & Keys. 2. In the Downloads section, copy the LICENSE KEY from the appropriate player library row. |
| Business or Enterprise license | (Optional) Account plan that permits access to premium player functionality Upgrade to a Business or Enterprise license if you plan to serve ads in the player. |
Install the plugin
You can use one of the following plugins to add videos to your WordPress posts and pages.
| Plugin | Description |
|---|---|
| JW Player for WordPress - Premium | Enables publishing videos on WordPress posts and pages and supports advanced features, such as advertising. |
| JW Player for WordPress (Free) | Enables publishing videos on WordPress posts and pages |
JW Player for WordPress - Premium
The JW Player for WordPress - Premium plugin can be purchased and downloaded from one of JW Player's WordPress Certified Partners.
Use the following steps to purchase, download, and install the JW Player for WordPress - Premium plugin.
- Purchase and download the JW Player for WordPress - Premium.
- Within your WordPress UI, go to Plugins > Add New.
- Click Upload Plugin.
- Click Choose File.
- Select the .zip file.
- Click Install Now.
- Click Activate Plugin.
Now that you have installed the plugin, you can begin configuring the appearance and behavior of your JW Player.
JW Player for WordPress (Free)
You can install the free JW Player for WordPress plugin from one of JW Player's WordPress Certified Partners. For more advanced features, upgrade to the JW Player for WordPress - Premium plugin.
Now that you have installed the plugin, you can begin configuring the appearance and behavior of your JW Player.
Configure the plugin
After the installation has been completed, you must configure the plugin. When using a self-hosted player, the JW Player for WordPress plugin enables you to override the default settings of the player library.
Use the following steps and sections to configure the plugin:
- In your WordPress UI, click JW Player.
- Use the following sections in this article to configure the settings on each tab.
The plugin has the following five tabs.
| TAB | DESCRIPTION |
|---|---|
| Settings | Basic player library information and embed settings |
| Skin | Color settings for aspects of the video player |
| Subtitles | Styling settings for subtitles |
| Sharing | Settings defining if and how content can be shared |
| Related posts | Enabling and configuring the display of related content |
| Ads | Enabling and configuring video advertising |
Settings tab
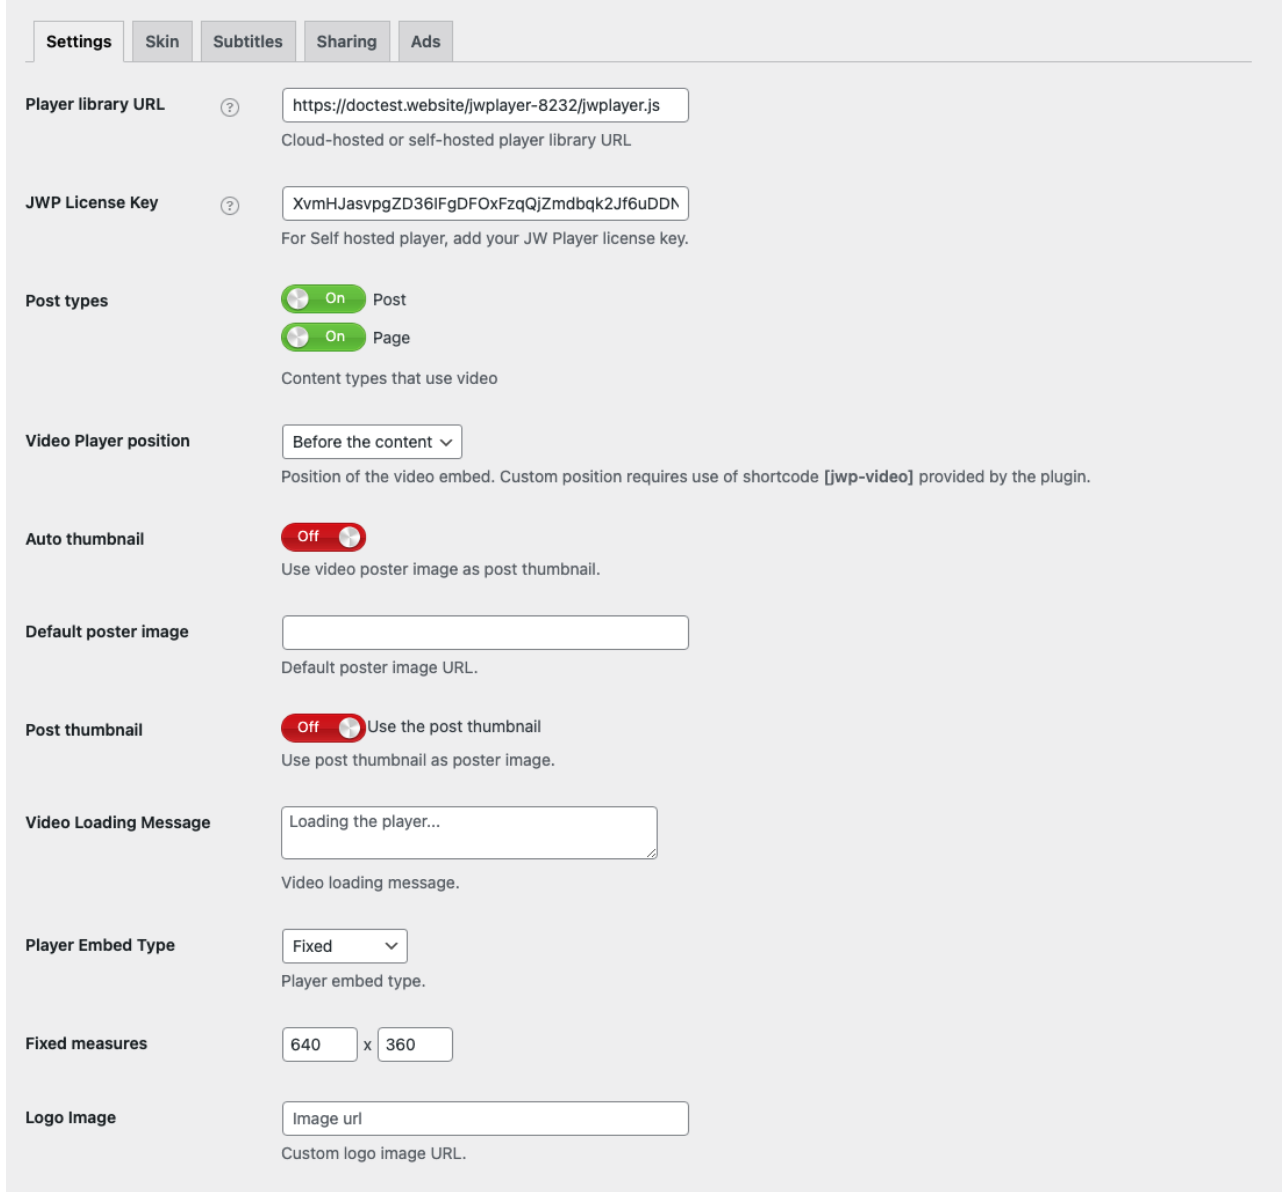
The Settings tab allows you to provide information about the player and define when the player can be used.
- Enter the self-hosted player library URL into the Player library URL field and press Enter. The plugin updates the page.
- Enter your license key into the JWP License Key field.
- Enable the types of WordPress Post types that should include a JW Player for WordPress section when you create new content:
- Post
- Page - Select a Video Player position from the dropdown menu:
- Before the content: The video player automatically appears before the content enabled for the JW Player for WordPress plugin.
- After the content: The video player automatically appears after the content enabled for the JW Player for WordPress plugin.
- Custom: The video player appears in the location specified by a Shortcode block for the content enabled for the JW Player for WordPress plugin.NOTE: The player appears only when viewing a preview or published page. - Follow the prompts in each of the remaining Settings tab sections. Be aware that customizing the Video Loading Message, User Prompt, or Playlist Tooltip sections disables automated player localization.
- Click Save changes.
Skin tab
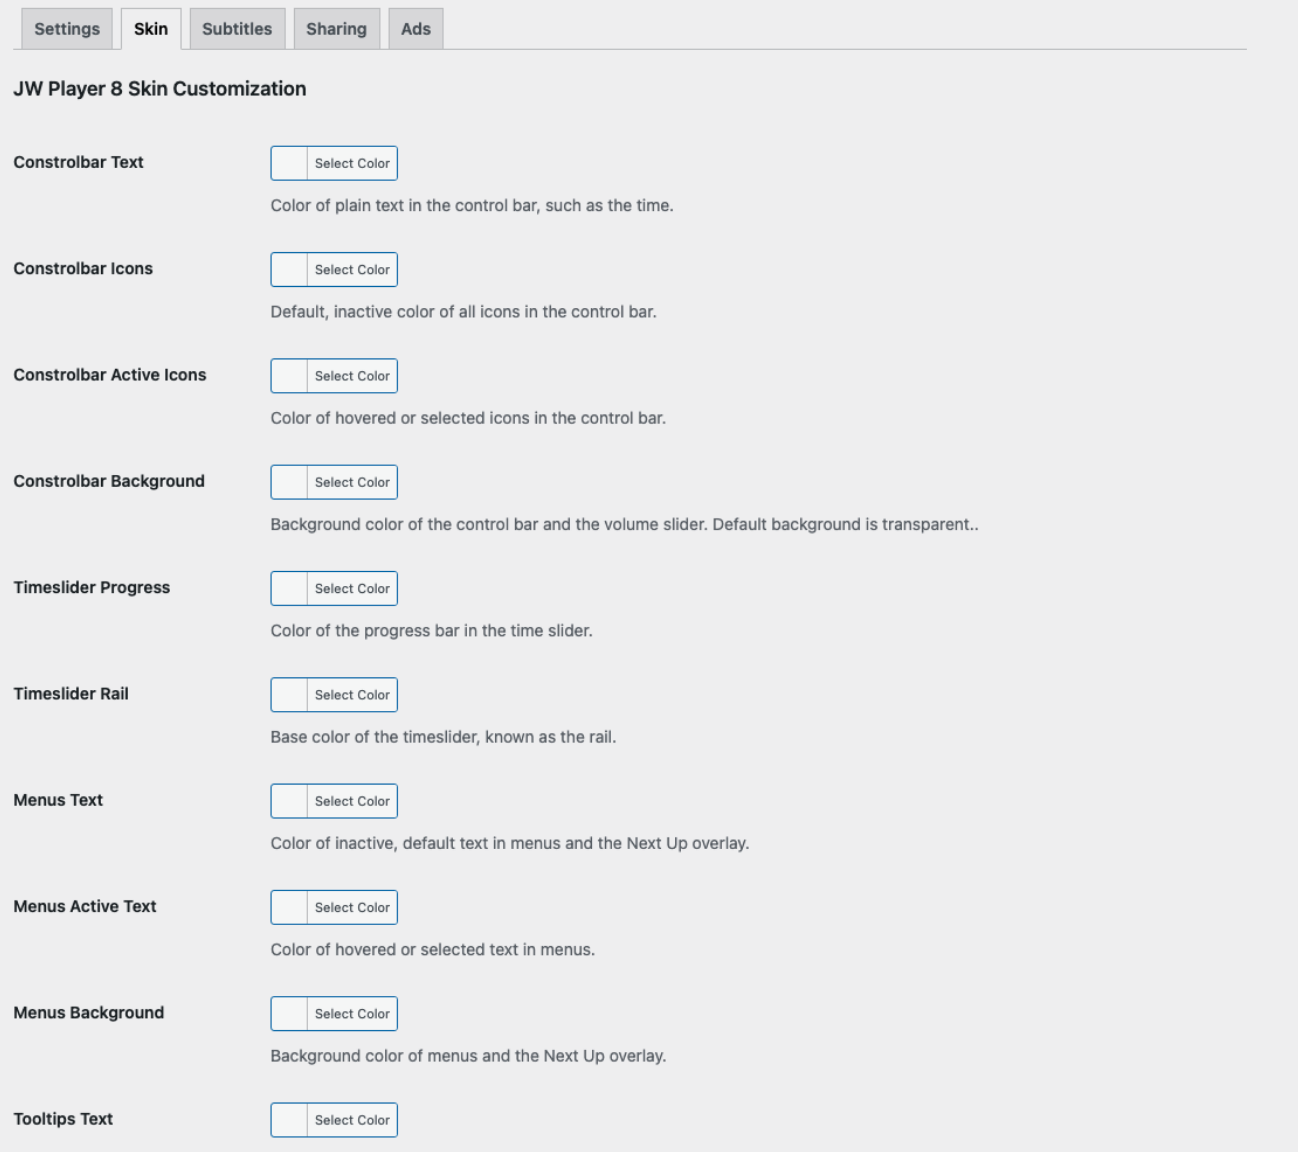
The Skin tab enables you to configure the appearance of the player. All color options accept HEX and RGB color values. RGB color values are converted to HEX color values.
- Follow the prompts in each of the Skin tab sections.
- Click Save changes.
Subtitles tab
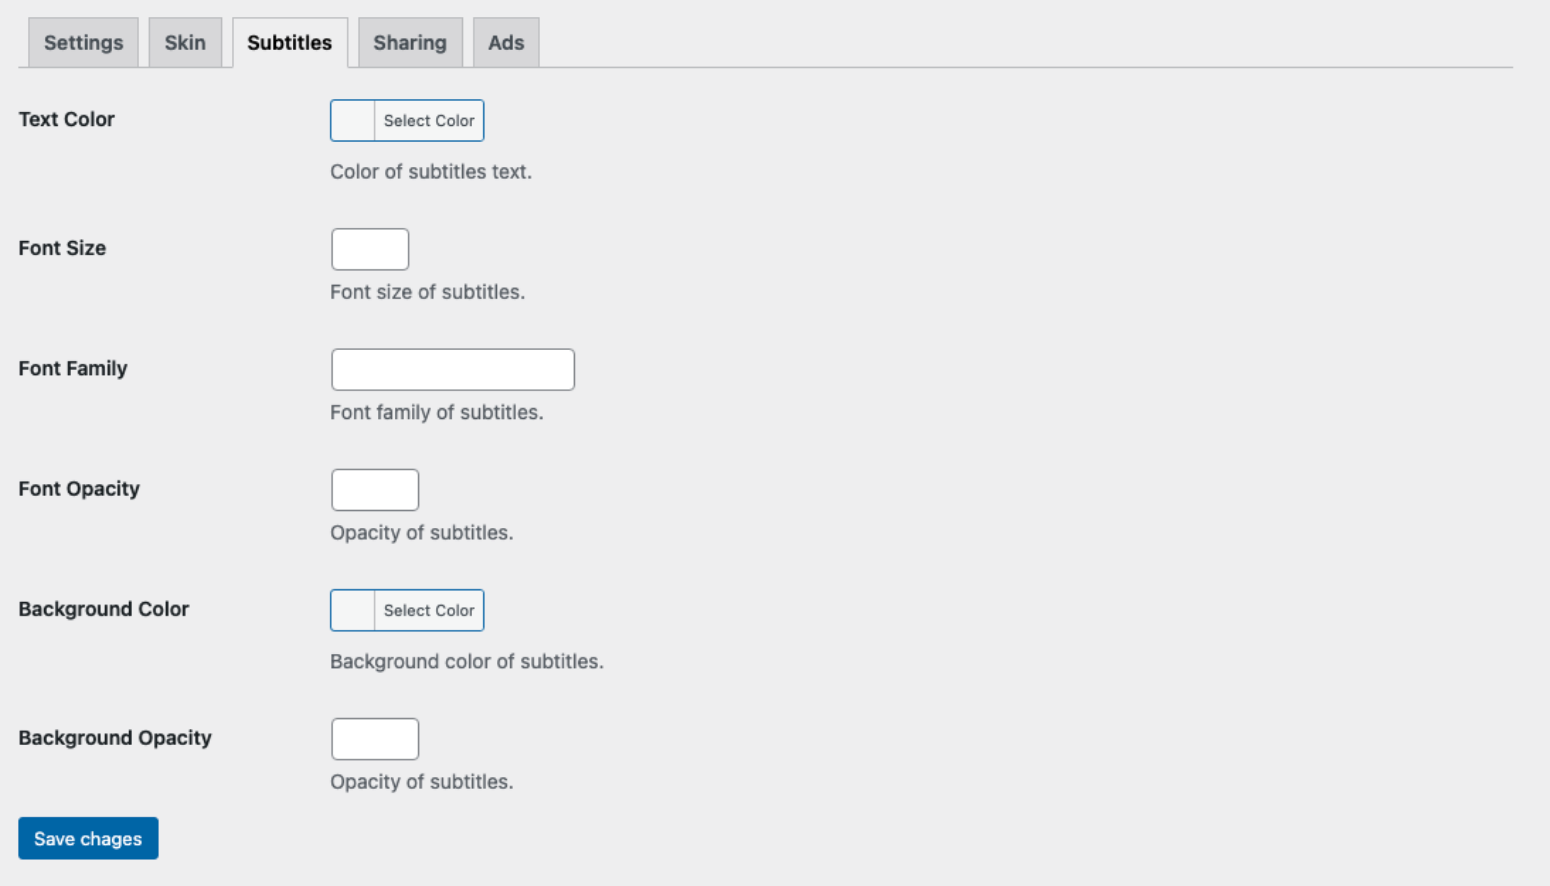
The Subtitles tab enables you to configure the appearance of subtitles in your player. All color options accept HEX and RGB color values. RGB color values are converted to HEX color values.
- Follow the prompts in each of the Subtitles tab sections.
- Click Save changes.
Sharing tab
Be aware that customizing the Heading field disables automated player localization.

The Sharing tab allows your viewers to easily share your content with others.
- Click the Activate Sharing Option toggle to On.
- Follow the prompts in each of the Sharing tab sections.
- Click Save options.
Related posts tab
Be aware that customizing the Custom field name field disables automated player localization.
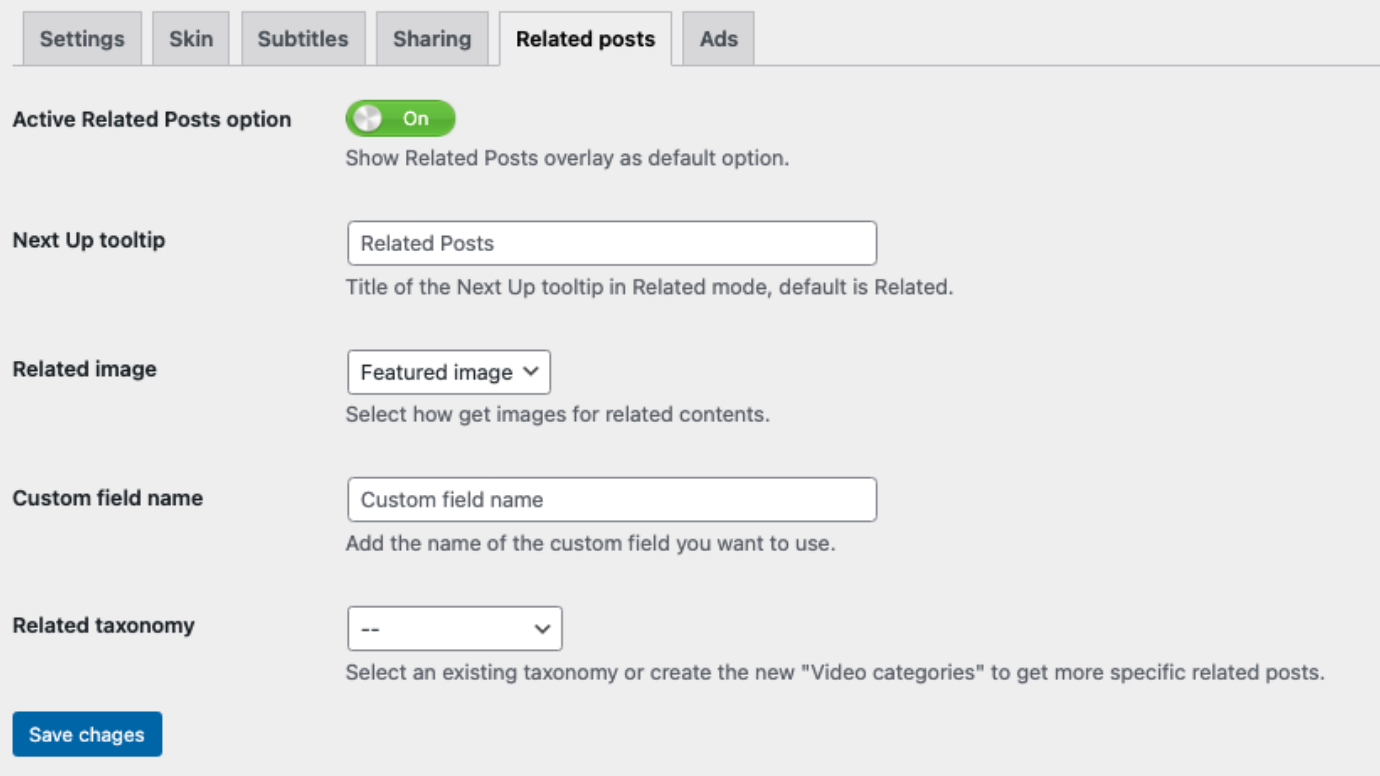
The Related Posts tab enables the Show Related Posts overlay as the default option.
- Click the Active Related Posts option toggle to On.
- Follow the prompts in each of the Related posts tab sections.
- Click Save changes.
Ads tab
You must have a Business or Enterprise license to monetize your content with advertising. Upgrade to a Business or Enterprise license now.
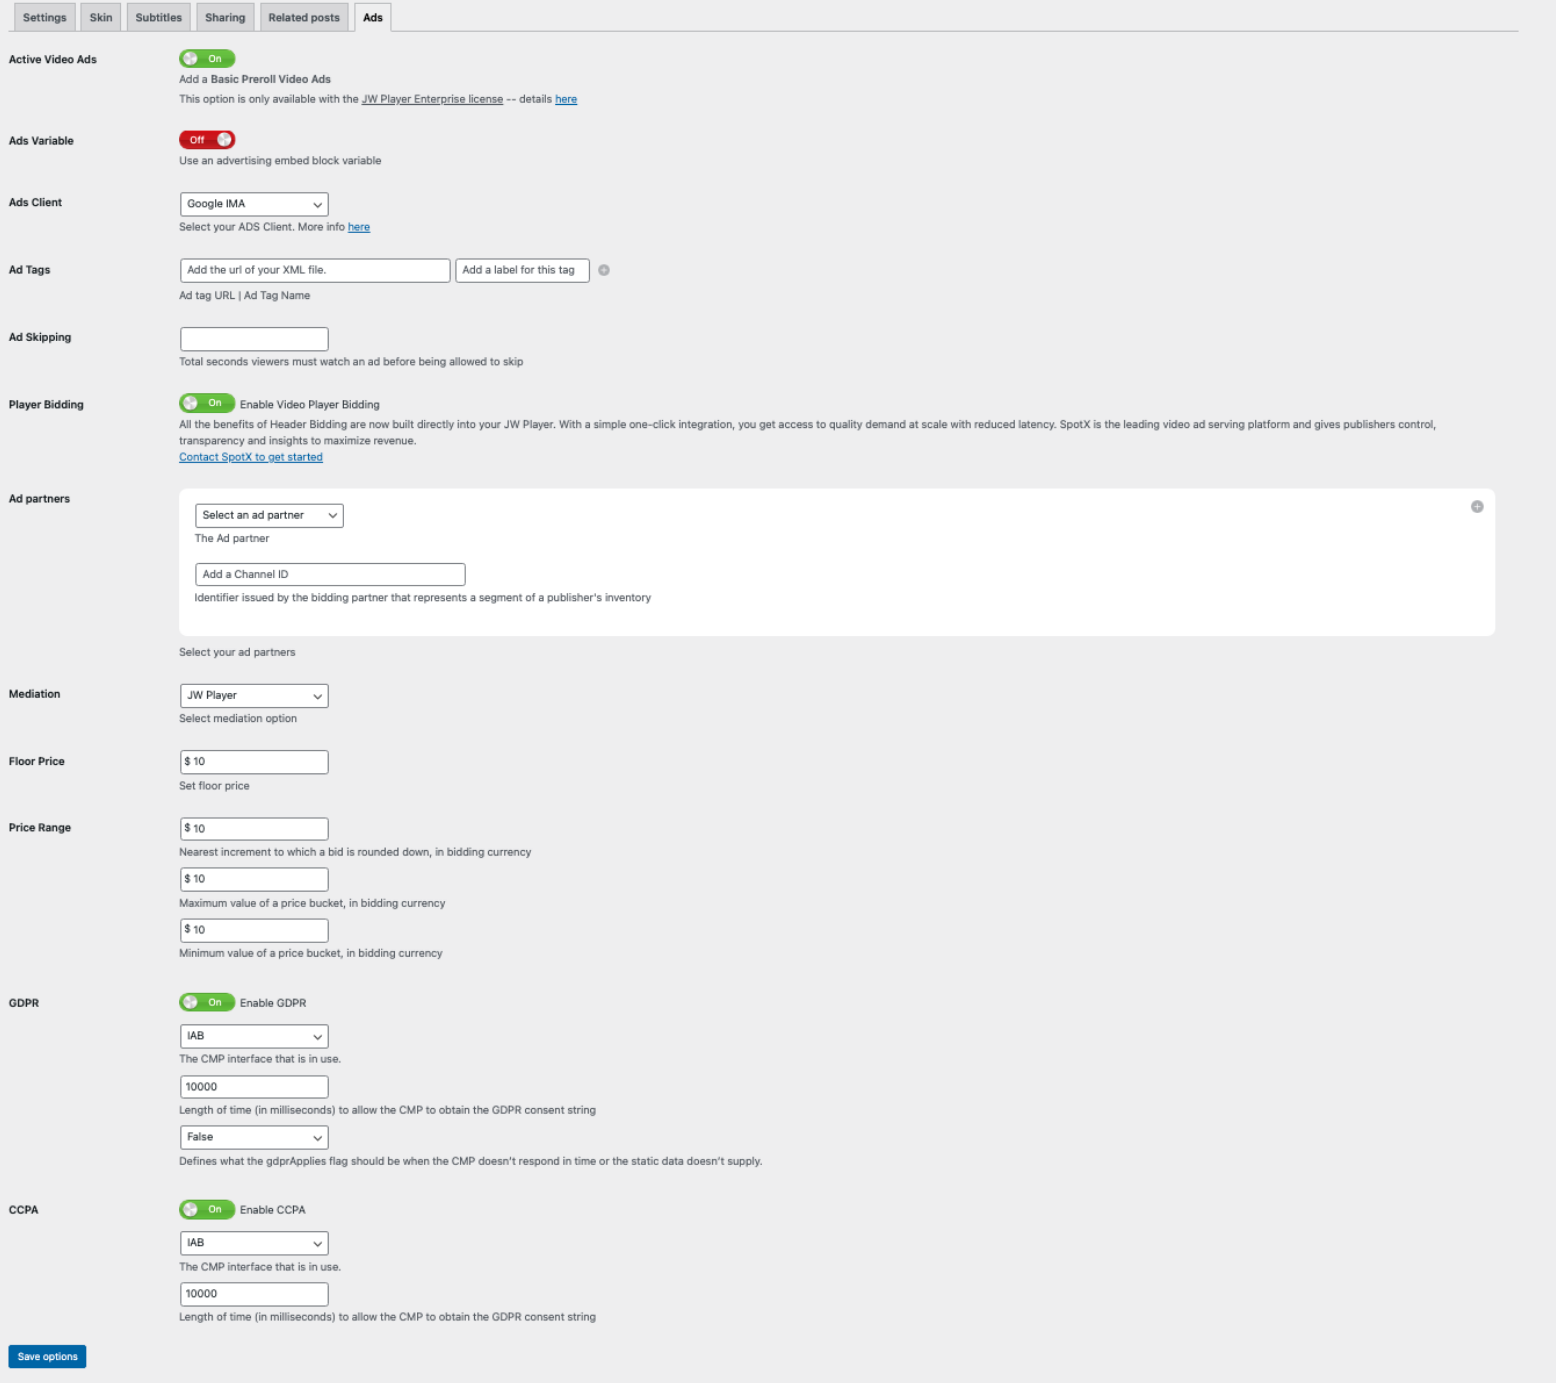
The Ads tab enables you to override the ad schedule settings configured in your JW Player dashboard.
- Click the Active Video Ads toggle to enable ads.
- In the Ads Variable section, use the toggle to determine how to configure advertisements:
- Off: Configure advertisements through the sections in the WordPress UI. Several ad-related fields appear. Continue to step 3.
- On: Configure advertisements through a JSON object. A single Ads variable name field appears. Skip the remaining steps in this section. Use the steps in the following "Manually set up advertising" section to configure this JSON object.
- From the Ads Client dropdown menu, select an ad client.
- In the Ad tags field, add a URL or .xml file containing ad tags and a label for the tag.
- In the Ad Skipping field, enter the total number of seconds viewers must watch an ad before being allowed to skip.
- In the Player Bidding section, use the toggle to enable or disable Player Bidding on the video content. When enabled, several related fields appear. Use the steps in the following "Player Bidding" section to configure Player Bidding.
- Click Save options.
Manually set up advertising
- Within your WordPress template, you must define an advertising object and assign it to a variable. (See the example below.)
- In the Ads variable name, enter the defined variable. In the following code example, ads would be added to the Ads variable name field.
var ads =  "advertising":
{ client:  "vast",
	adscheduleid:  "Az87bY12",
    schedule:  [
      { tag:  "https://www.domain.com/adtag.xml"  },
    ]
};
Example of an advertising object assigned to a variable, ads. The variable, ads, would be placed in the Ads variable name field.
Set up Player Bidding
- In the Ad Partners section, select an Ad Partner from the dropdown and add a channel ID for the ad partner. To include additional partners, click the plus sign (+).NOTE: Every ad partner can be added only once and will display fields specific to that ad partner.
- From the Mediation dropdown menu, select a mediation option.
- (JW Player, JW Player + DFP) In the Floor Price field set the floor price for Player Bidding.
- (Google Ad Manager) In the Price Range fields, use the prompts to define the range of each price bucket.
- In the GDPR section, click the Enable GDPR toggle to On and use the prompts to configure the GDPR settings that appear.
- In the CCPA section, click the Enable CCPA toggle to On and use the prompts configure the CCPA settings that appear.
Embed video within your content
Configure player embed behavior

- Create or open a post or page.
- Scroll down to and expand the JW Player for WordPress section.
- Paste or enter the URL of your video in the Media URL field.
- Select the Show Options button to reveal additional options for the video. Use the following table to configure each option.
| Option | Description |
|---|---|
| Media sources | Number of additional sources for this video or playlist If a number greater than 1 is entered, Source url and Label fields will appear for each additional source. |
| Video poster image | URL pointing to a poster image for the video |
| Video title | Custom title for the video. Be aware that customizing the video title field disables automated player localization. |
| Video description | Custom description of the video. Be aware that customizing the video description field disables automated player localization. |
| Force a media type | Force JW Player to stream your video as a specific media type 1. Click the checkbox. A dropdown menu appears. 2. Select a media type from the dropdown menu. |
| Autostart on page load | Determines if playback should begin automatically When the checkbox is selected, playback automatically begins when the page is loaded. |
| Mute | Starts playback with video muted If Autostart on page load is enabled, playback will the muted. |
| Repeat | Automatically repeats video content This will only work for single videos. Videos within playlists do not loop. |
| Add Chapters, Subtitles, or Preview Thumbnails | Enables adding chapters, subtitles, or preview thumbnails |
To add another video or playlist, click the + icon in the top right corner of the first subsection of the JW Player for WordPress section. To remove a video or playlist, click the - icon in the top right corner of a subsection.
Define the player location
If you selected Before the content or After the content during the configuration process, your video player automatically appears before or after content for post types you have selected.
If you selected Custom, use the following steps to place the video player in a specific location within your content with a shortcode.
- In the JW Player for WordPress section under Media URL, copy the displayed Shortcode. For example, [jwp-video n="1"].
- In the open WordPress page or post add a new block where you would like to place the player and type /shortcode to create a Shortcode block.
- Paste the shortcode copied in step 1 into the Shortcode block and press Enter.
- In the top right-hand corner of the WordPress, window click the blue Update button to save your updates.
Updated about 1 year ago

