Advertising (Web)
Ads help you monetize the videos your viewers watch. In the Advertising section, you can customize the ad experience. Unlike other player settings, advertising configurations do not appear in the player preview.
If no ad schedules have been created in your account, click New Ad Schedule and create a new ad schedule. Then, return to this section.
Prerequisite
| Item | Description |
|---|---|
| Valid ad tags | Ad tags that render and function correctly within the player Before enabling advertising, use the Ad Tester to verify that your ad tag functions correctly in the latest version of the JWX player. If the ad tag fails in the Ad Tester, it is unlikely to work with the JWX player. |
Enable and configure advertising

Advertising section
Follow these steps to monetize your videos:
- Create or update a player.
- In the Advertising section, click the Show ads toggle to ON.
- Select an Ad schedule from the dropdown menu.
If no ad schedules exist for the property, click New ad schedule and follow the steps to create an ad schedule.
- (VPAID) Click Show player controls on all VPAID ads to display player controls.
Player Bidding allows you to reduce latency and boost monetization by gaining access to additional advertising demand.
- (Optional) Configure ad messaging.
- (Optional) Configure additional advertising options.
- Click Save.
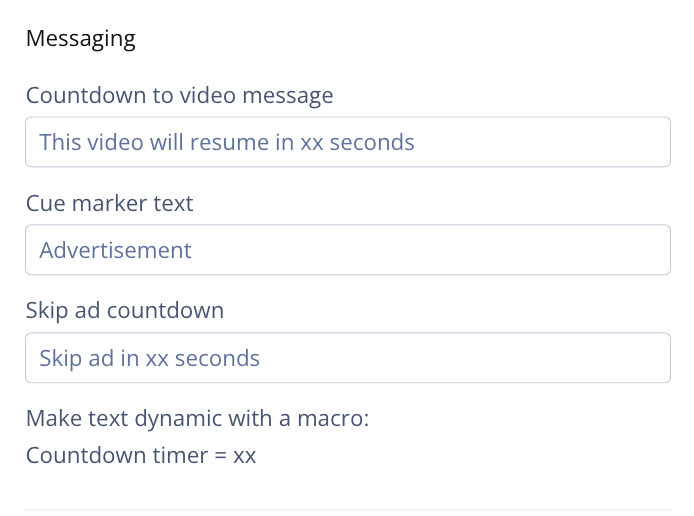
Messaging
Messaging section
Depending on your ad setup, viewers will see different types of text: Countdown to video message, Cue marker text, and Skip ad countdown. The Messaging section allows you to change the default message for each type of text.
If you are a developer, you can use the internationalization object to configure these settings in the player configuration code block.
The following table explains each option.
You can use the
xxmacro as a placeholder to dynamically populate the number in the countdown.
| Messaging Text | Description |
|---|---|
| Countdown to video message | Sets the text shown during ad playback, informing viewers of the remaining time until the video resumes Default: The video will resume in xx seconds |
| Cue marker text | Defines the text shown when viewers hover over an ad cue marker on the timeline Default: Advertisement |
| Skip ad countdown | Sets the skip button text The skip ad functionality is set when creating an ad schedule with a VAST ad tag. Default: Skip ad in xx seconds. |
Additional Options
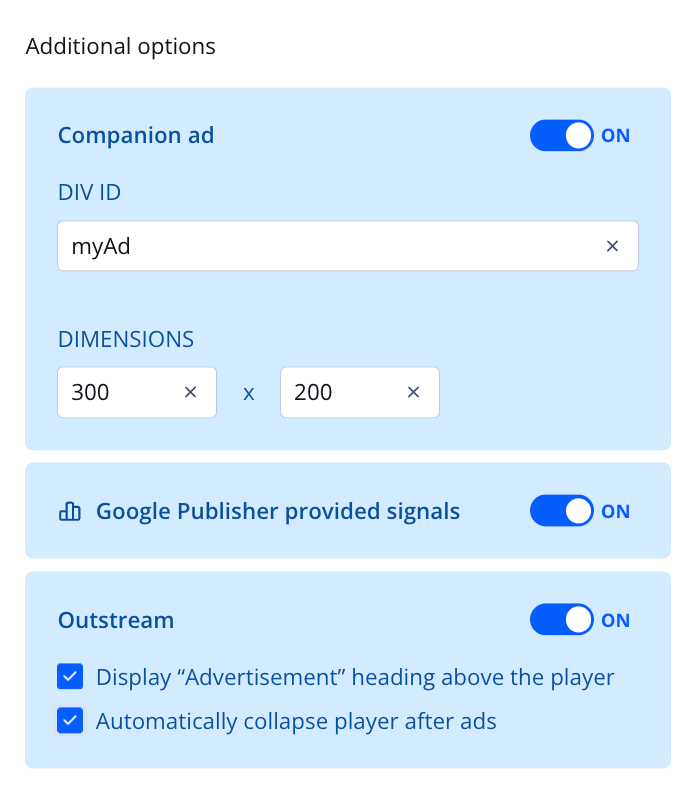
Additional options section
In the Additional options section, you can configure extra advertising options. The following table explains each option.
| Additional Advertising Options | Description |
|---|---|
| Companion ad | Shows a single display ad to a viewer while a video ad is playing Since code must be added to a page to enable this feature, developer assistance may be required. Follow the steps below to enable a companion ad:
|
| Google Publisher provided signals | Enables Google Publisher Provided Signals*, automatically passing IAB contextual segments through the ad tag to improve programmatic monetization Follow the step to enable this feature:
When using this feature, note the following:
* Google Publisher Provided Signals needs to be enabled by JWX. Contact your JWX account representative to opt in. |
| Outstream | Provides additional options for ads Follow the steps below to enable Outstream ad options:
|
Updated 6 months ago