Bulk manage tags
Learn how to add and remove batches of tags
When you have a library with a large number of media items, managing tags accurately and efficiently is essential. The Manage Tags feature allows you to select and manage the tags of up to 50 media items.
- Streamlining tag management
- Maintaining consistency of tags across media items in your library
Manage tags
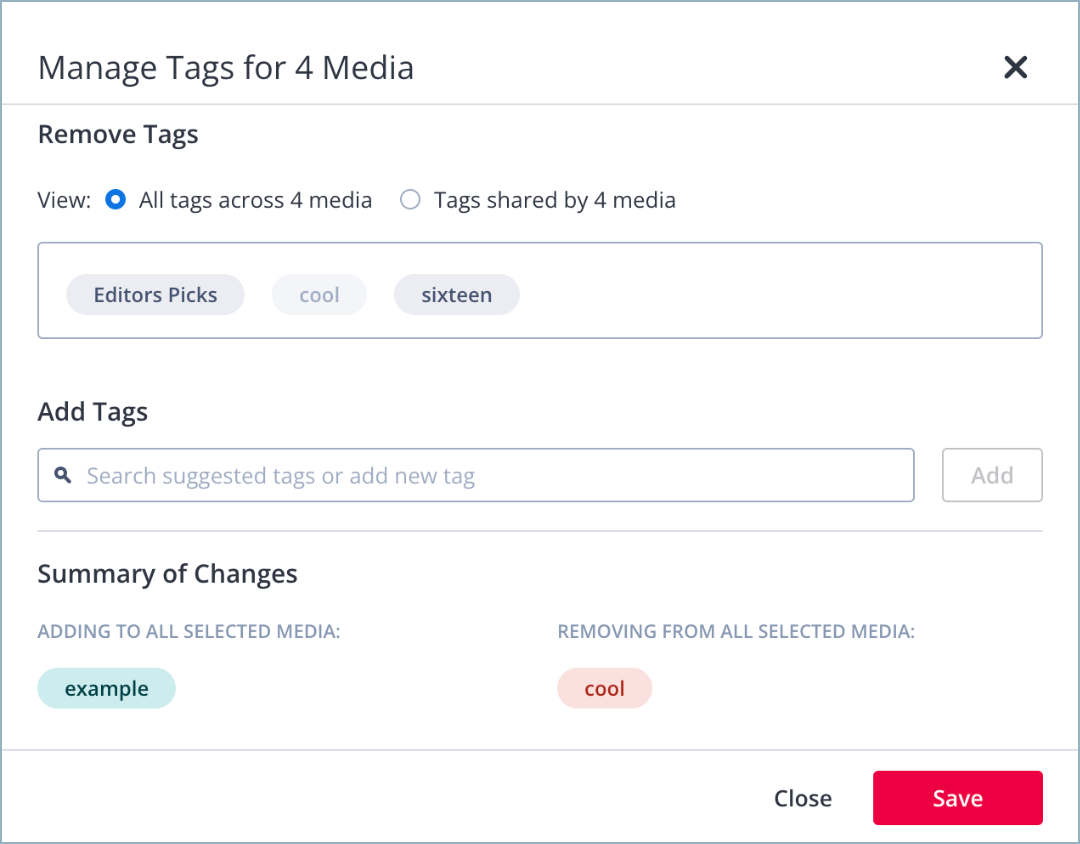
Manage Tags panel
The JWP dashboard can manage batches of tags for up to 50 media items. You can add and remove multiple tags at the same time.
For batches over 50 media items, use the v2 Management API to bulk remove tags. Bulk renaming of tags can only be done via the API.
Follow these steps to manage tags in bulk:
- From the Media Library, select up to 50 media items.
- Click Manage Tags. The Manage Tags panel opens.
- Under Remove Tags, click one or more tags that you would like to remove. Tags selected for removal are grayed out in the Remove Tags box and appear in the Summary of Changes.
Option Description All tags across media All tags associated with the selected media appear in the window Tags shared by media Only tags shared by the selected media appear in the window
- Under Add Tags, enter one or several tag names into the textbox.
Option Description Select an existing tag - Enter the tag name into the textbox. Related options appear below.
- Select the desired tag from the dropdown menu.
Create a new tag - Enter the tag name into the textbox.
- Click the return key on your device.
- Click Add.
Under Summary of Changes, you can review all tags that you have selected to add and remove.
- Click Save.
Updated 9 months ago