Manage your user account
From your profile page, you can view the services available to you, edit your profile information, and enable two-factor authentication (2FA).
The following sections explain how to access and manage these features and information.
View your services
Your profile page lists all JWX Support products available to you.
If you belong to multiple organizations, you will only see the JWX Support products available to you from your default organization.
However, you are able to create, view, and reply to requests for all your associated organizations.
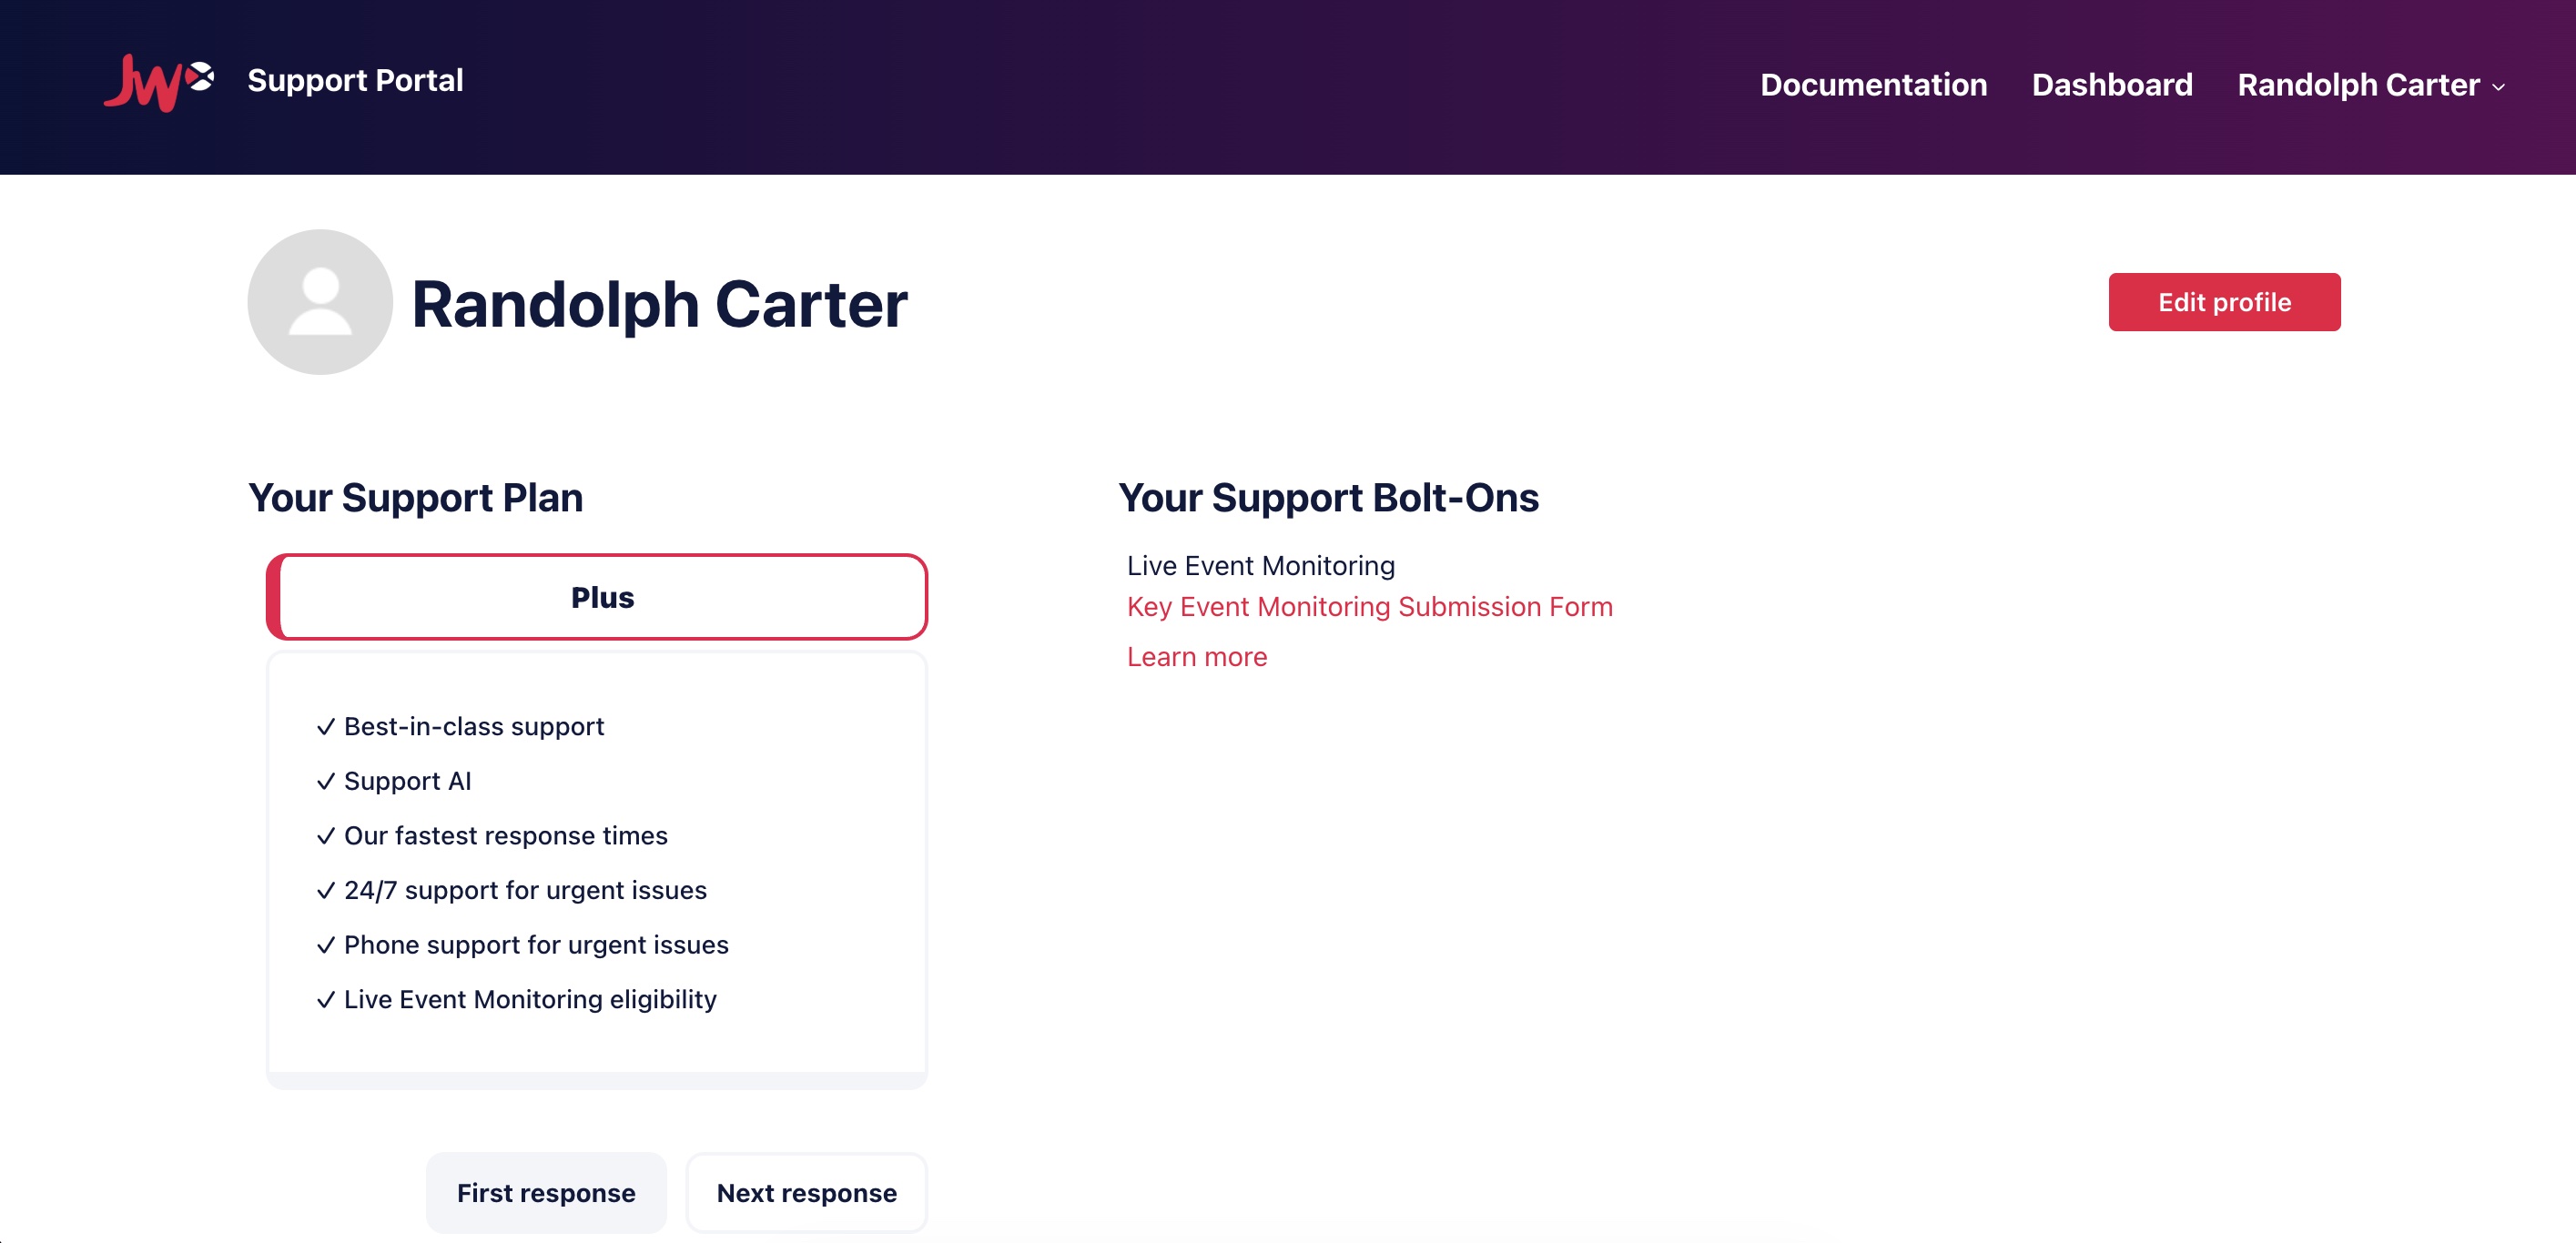
| Section | Description |
|---|---|
| Your Support Plan | Support plan available to you and the response times for each request priority |
| Your Support Bolt-Ons | Additional support products, such as Live Event Monitoring and Viewer Authentication & Payment Support |
Follow this step to access your profile page:
- Click your name > Profile. Your profile page appears.
Edit profile information
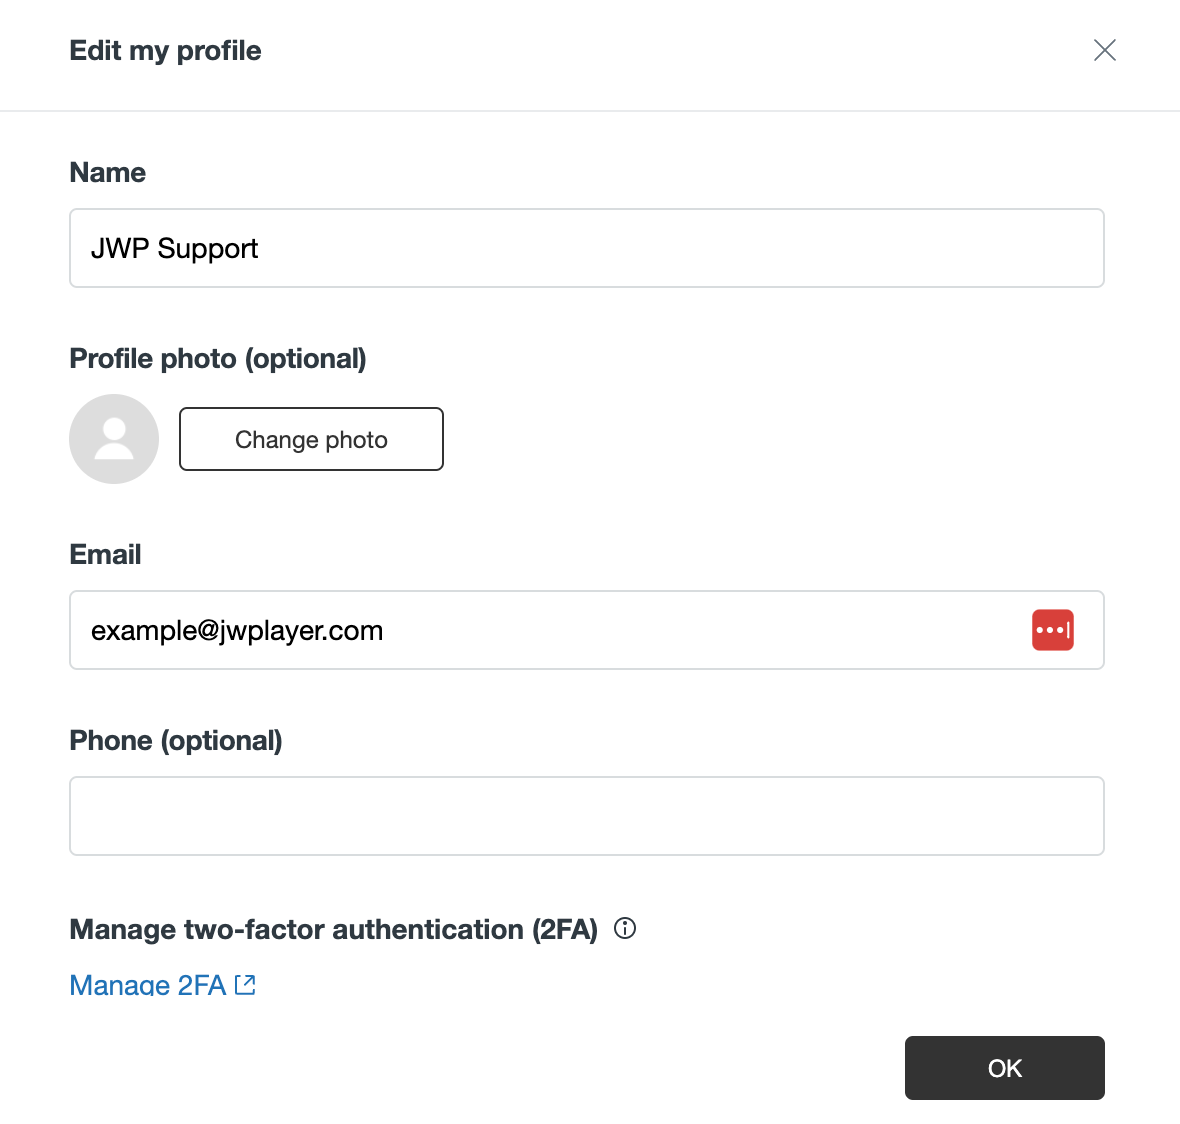
Edit my profile popup window
Follow these steps to edit your profile information:
- Click your name > Profile. Your profile page appears.
- Click Edit profile. The Edit my profile popup window appears.
- Update any of the following profile items.
Section Description Name Display name that appears throughout the Support Portal Profile photo (Optional) Image or avatar that appears throughout the Support Portal
Follow these steps to update your profile photo:- Click Change photo. Your computer's file picker appears.
- Choose an image from your computer.
Email Email address where you receive Support Portal notifications Phone (Optional) Your contact number Description (Optional) Professional information, such as company role or title
- Click OK.
Manage two-factor authentication (2FA)
Enable 2FA
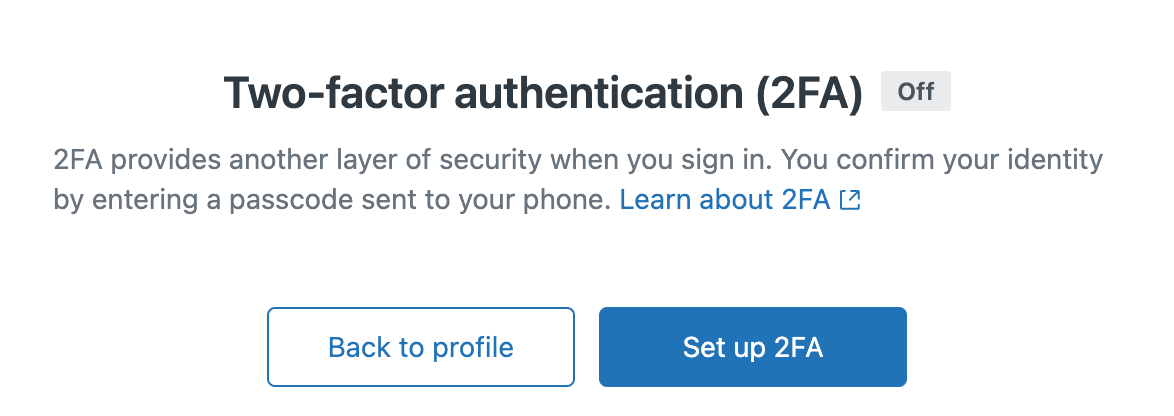
Two-factor authentication (2FA) page
Follow these steps to enable 2FA:
- Click your name > Profile. Your profile page appears.
- Click Edit profile. The Edit my profile popup window appears.
- Under Manage two-factor authentication (2FA), click Manage 2FA. The Two-factor authentication (2FA) page opens in a new tab.
- Click Set up 2FA. The Set up two-factor authentication (2FA) page appears.
- Follow the on-screen prompts to complete the authentication setup.
After enabling 2FA, you will be logged out of your account and prompted to sign in.
Change the 2FA authentication app
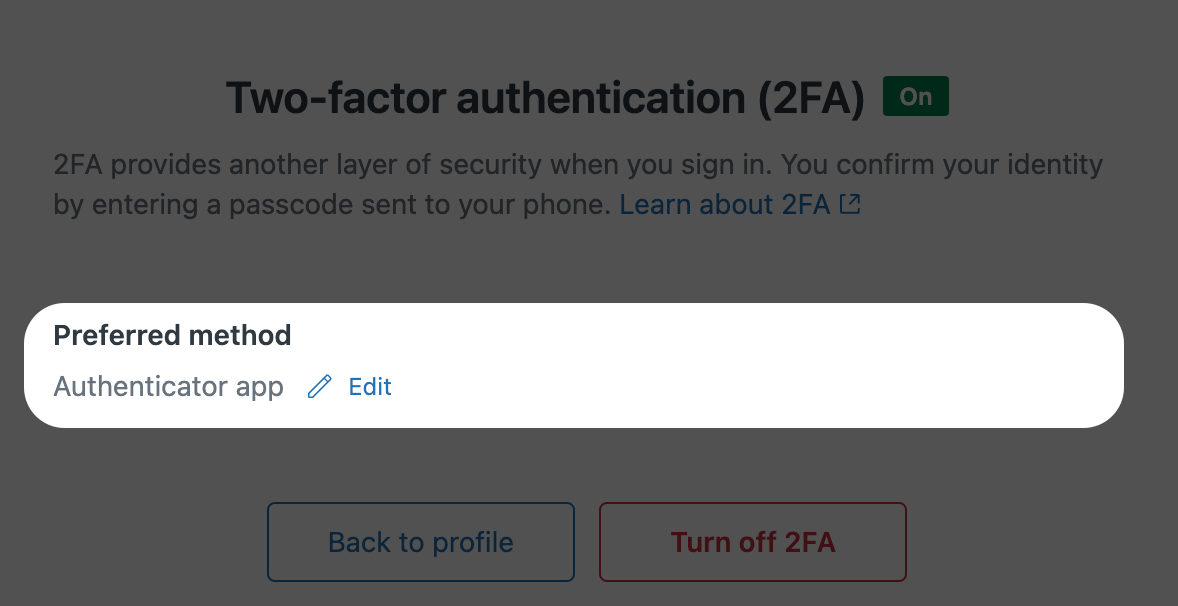
Two-factor authentication (2FA) page
Follow these steps to change the 2FA authentication app:
- Click your name > Profile. Your profile page appears.
- Click Edit profile. The Edit my profile popup window appears.
- Under Manage two-factor authentication (2FA), click Manage 2FA. The Two-factor authentication (2FA) page opens in a new tab.
- Click Edit. The Set up two-factor authentication (2FA) page appears.
- Follow the on-screen prompts to complete the authentication setup.
After changing the 2FA method, you will be logged out of your account and prompted to sign in.
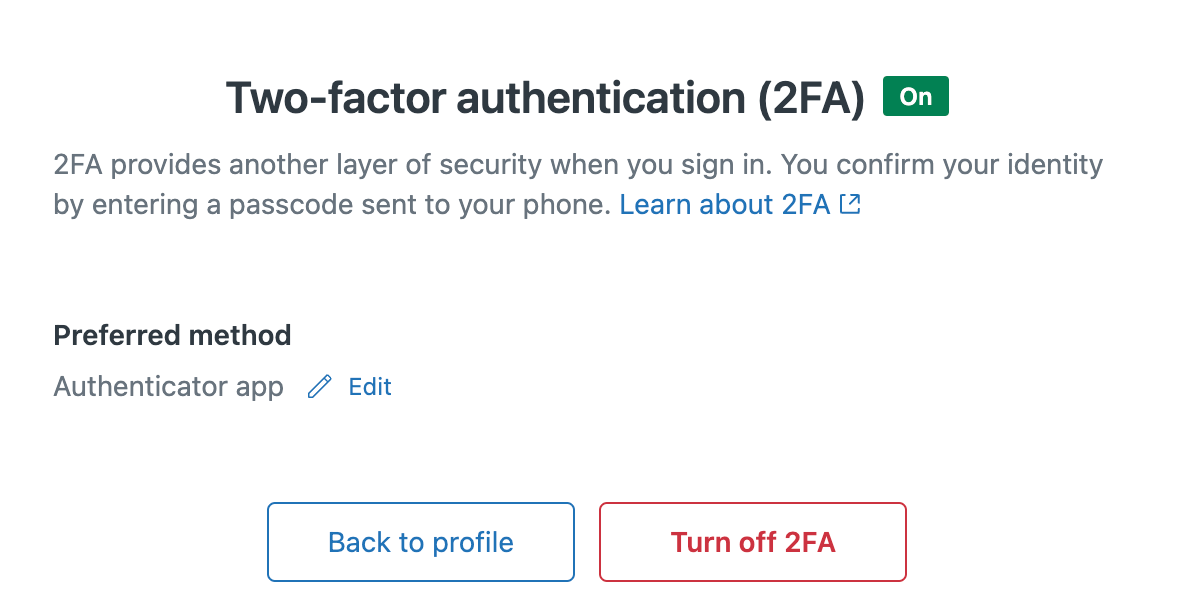
Disable 2FA
Two-factor authentication (2FA) page
Follow these steps to disable 2FA:
- Click your name > Profile. Your profile page appears.
- Click Edit profile. The Edit my profile popup window appears.
- Under Manage two-factor authentication (2FA), click Turn off 2FA. The Turn off 2FA popup window appears.
- Click Turn off 2FA. The popup window closes.
- Close the tab.