Add closed captions
Upload captions to the JW Platform or create captions with the track editor
The JW Platform allows you to add captions or subtitles to your video content.
In addition to providing your viewers with text that explains the audio aspects of your video content, adding captions to your online video content can provide several additional benefits:
- Improved video SEO
- Increased content retention
- Increased engagement with autoplay content
- Environment-independent content viewing
- Legal compliance
If you are a developer or have developer resources you can add captions directly in the player code.
Side-loaded captions
To add side-loaded captions to a video, you can either add a side-loaded caption file or create a caption track in the JWX dashboard.
Add a side-loaded caption file to your video
The JW Platform does not validate caption files on upload. Make sure to validate your .vtt or .srt files before uploading.

Tracks tab
Follow these steps to add side-loaded captions:
- From the Media library, select a video. The media details page appears.
- Beneath the preview player, click the Tracks tab.
- In the Captions section, click Manage. The Captions tracks panel appears.
- Click Upload. The file picker appears.
- Select one or several .vtt or .srt files from your computer. Once uploaded and processed, the captions appear in the Captions Tracks panel in a Published state.
JWX uses the name of the caption file as the track label that a viewer will see in the player's caption menu.
- Click Close.
Create a caption track for your video
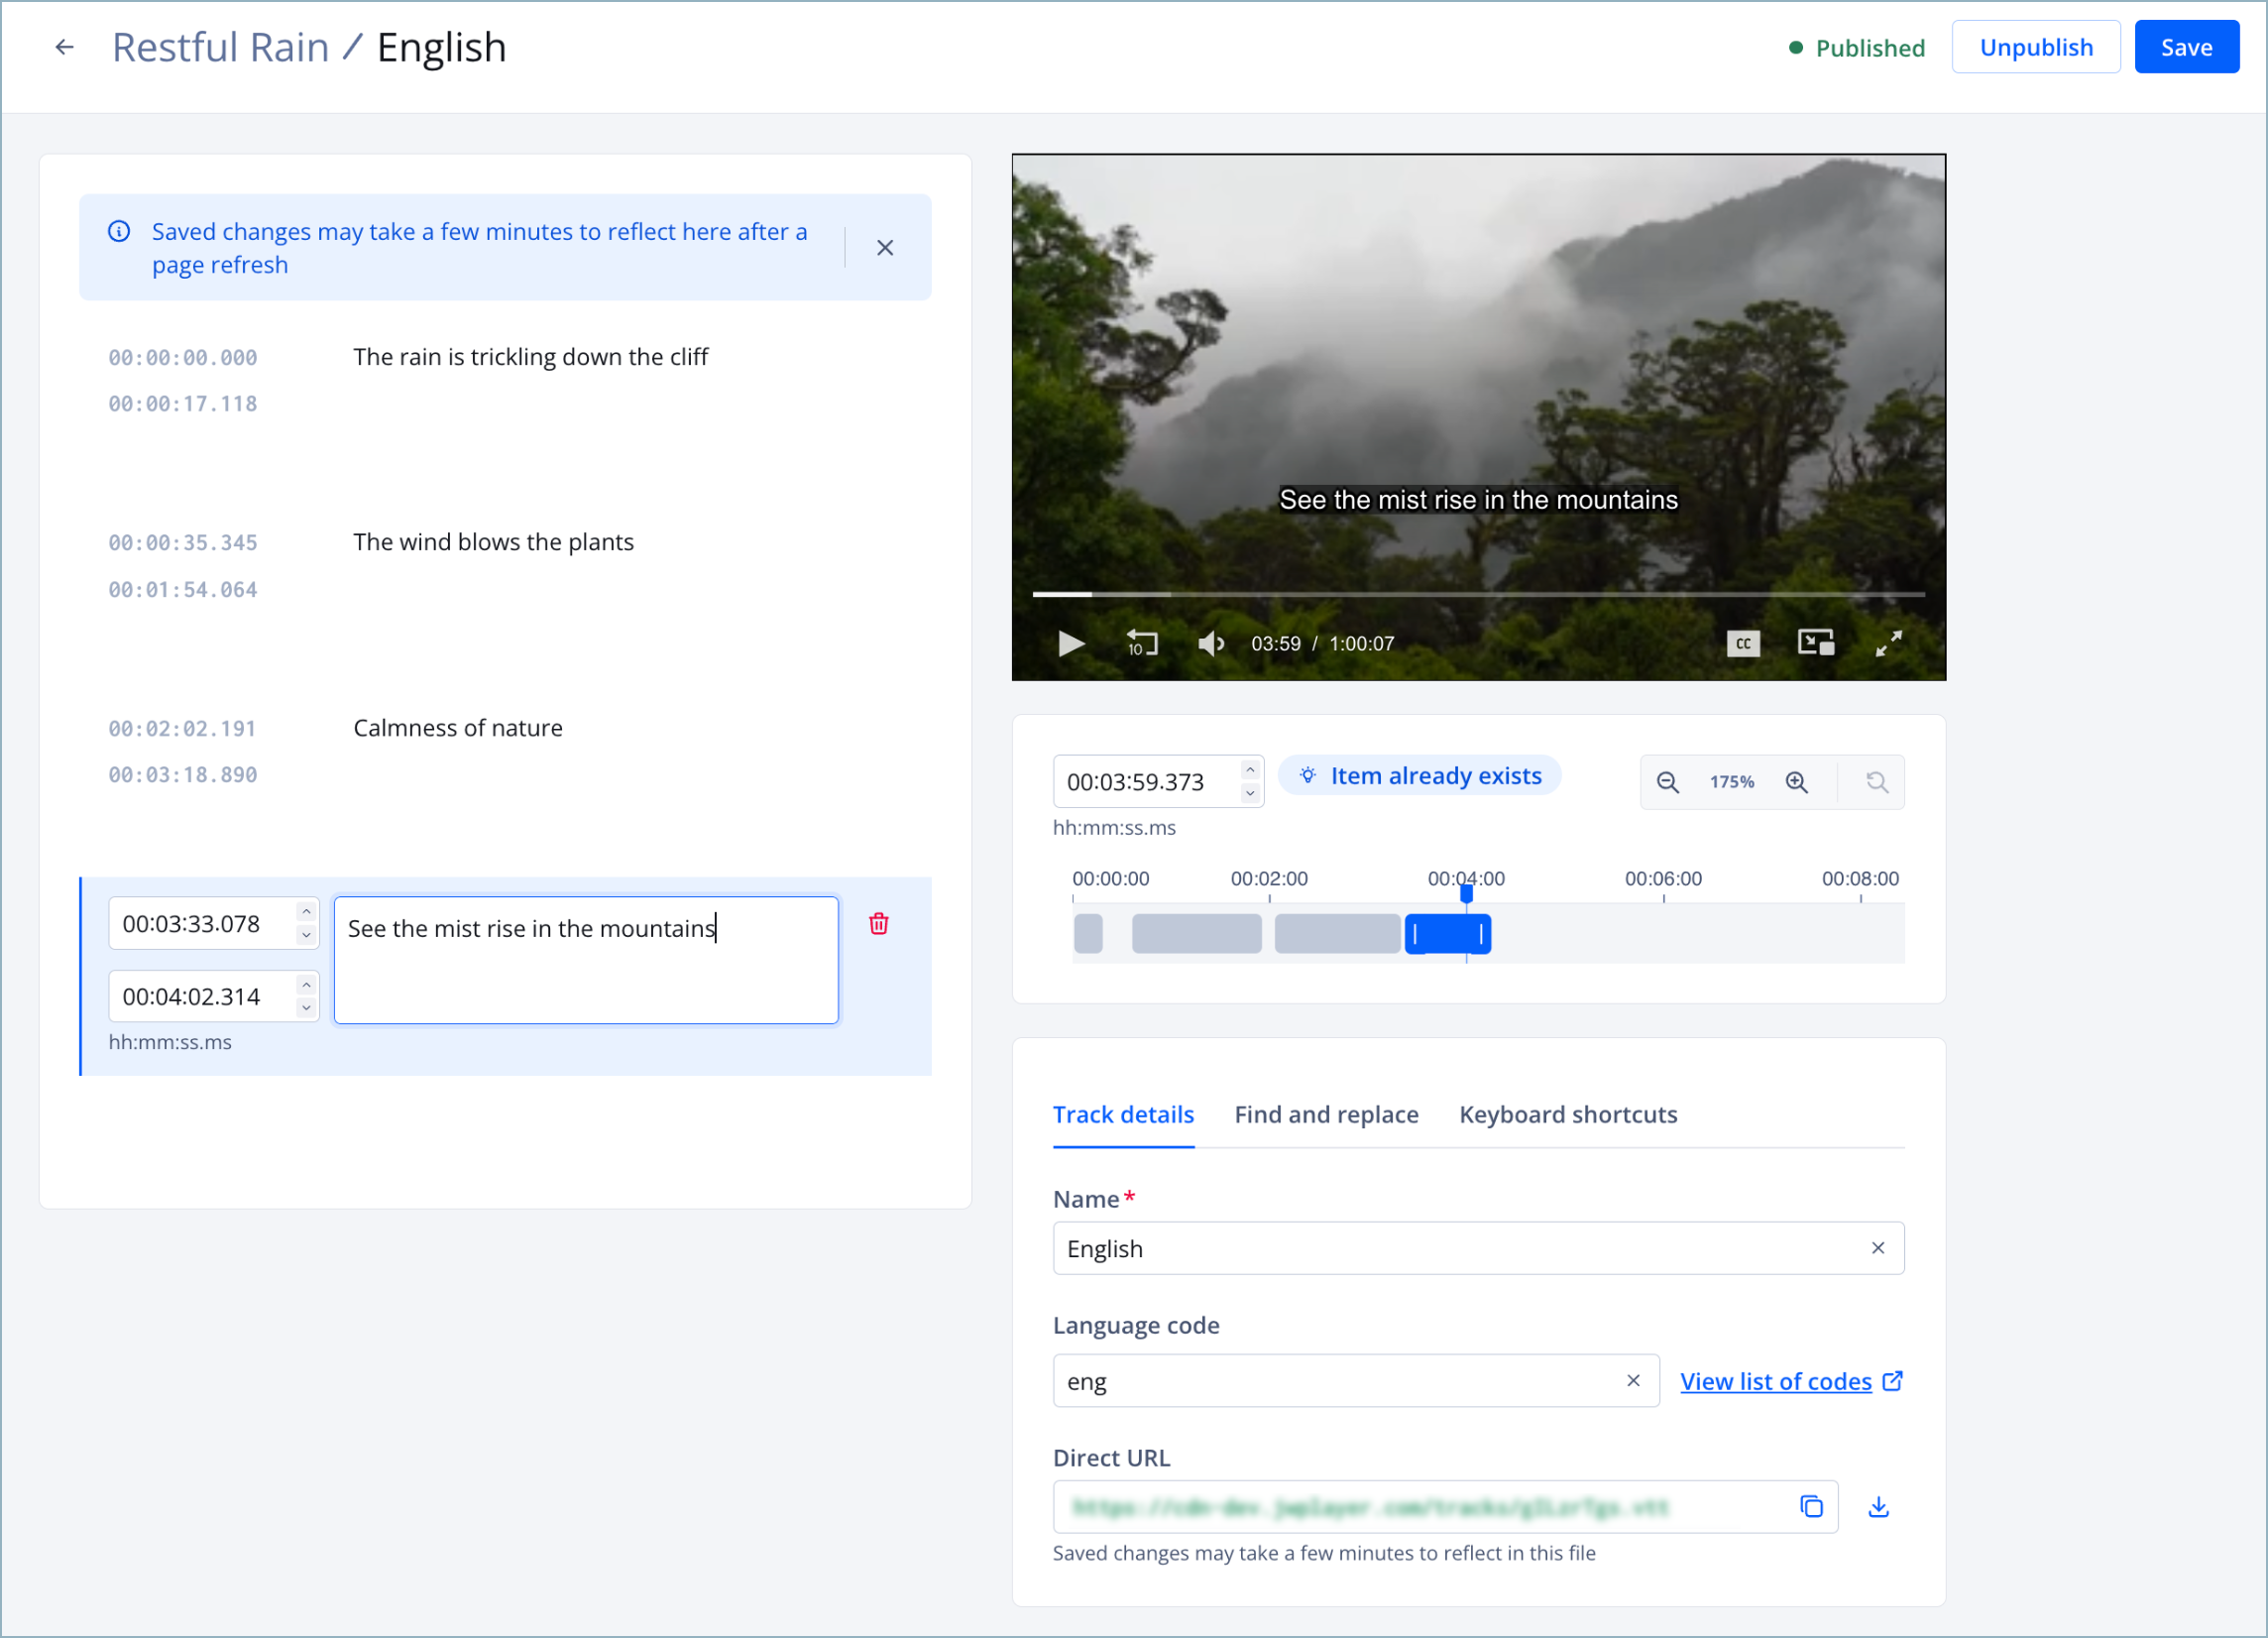
Tracks editor page
Follow these steps to create a closed captions track:
- In the Media library, select a video. The media details page appears.
- Beneath the preview player, click the Tracks tab.
- In the Captions section, click Manage. The Captions tracks panel appears.
- Click Create. The tracks editor appears.
- To the left of the preview player, click into the timestamp field. The caption settings appear.
- In the top timecode field, set the start time in hh:mm:ss.mmm format. This is the point at which the caption should first appear on the screen.
- In the bottom timecode field, set the end time in hh:mm:ss.mmm format. This is the point at which the caption should disappear.
Set caption timing with the timeline editor
Alternatively, you can define the caption’s start and end times with the timeline editor.
Follow these steps:
- Pause the preview player, or drag the playhead on the timeline to the desired start time.
- Click + Add. The caption settings appear to the left of the player with the start time prefilled. By default, the end time is set 5 seconds after the start time. The caption block also appears on the timeline editor below the player.
- (Optional) Drag the left side of the caption block to redefine the start time.
- (Optional) Drag the right side of the caption block to redefine the end time.
NOTE: If needed, click the magnifying glass icons to zoom in or out on the timeline scale. The timeline is automatically zoomed in for longer duration videos.
- In the text field, enter the caption text.
- (Optional) Click + and repeat steps 6-8 to add another caption.
Alternatively, you can move the playhead to a new point on the timeline and repeat steps 6-8.
- Below the preview player, on the Track details tab, enter the Name of the caption track.
- Enter a three-letter Language code.
Click View list of codes to see all accepted language code values in a new tab.
- Click Save.
Click ▶ in the preview player to preview the captions.
Embedded captions
Follow this step to add a video with embedded captions:
- Register your video.
In step 4, select Register only when registering your videos. If video content with embedded captions is uploaded to your JWX account, the embedded captions may be removed during the transcoding process.
Updated 7 months ago