Create a discovery video
Generate short, branded videos to promote your content
If your team regularly publishes articles or videos, repurposing that content into engaging teaser content can be difficult without an in-house video team.
Discovery videos in Video Studio automate this process by generating short (minimum 2 minutes), branded videos from a feed of articles or videos. Each item becomes a chapter in a single, continuous video. Viewers can also click a call-to-action button to open the original article or full video directly from the discovery video.
Discovery videos enable teams to create engaging, multi-segment content without manual video editing.
Discovery video
You can configure these videos to fit your workflow:
- Define chapter structure and playback order
- Add branding, colors, fonts, and a click to action (CTA) button
- Choose which metadata fields to display
- Schedule refreshes to update videos with new content
Create a discovery video
Follow these steps to create a discovery video:
- In the Media library, click Create new > Videos from feeds. The Content tab appears.
- Configure the video source.
- On the Basic information subtab, enter the video metadata.
- (Optional) On the Advanced settings subtab, define the content protection and scheduling settings.
- (Optional) Define the structure of the discovery video:
- (Optional) Customize the branding of the discovery video.
- Click Save.
Configure video source
Configure the feed that supplies content for your discovery video. You can import article or video data, add headers, and set credentials if needed.
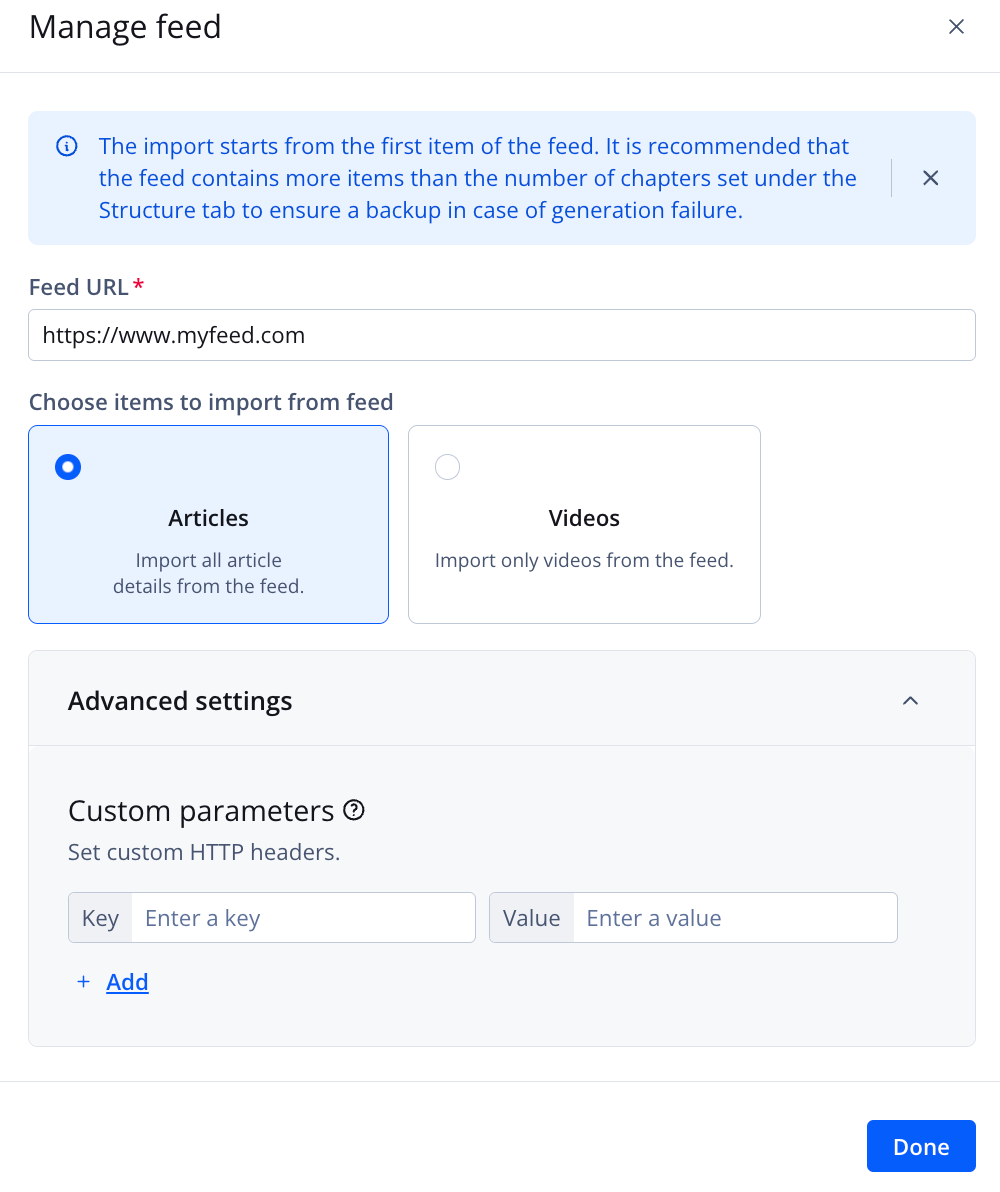
Manage feed panel
Follow these steps:
-
On the Content tab, under Configure video source, click + Add feed. The Manage feed panel opens.
-
Enter the Feed URL of an RSS or MRSS feed.
-
Under Choose items to import from feed, select either Articles or Videos.
Item Description Articles Generates a discovery video from only articles within a feed Videos Generates a discovery video from only videos within a feed -
If required for your feed, add custom HTTP headers:
- Expand Advanced settings.
- Enter a Key.
- Enter a Value for the key.
- If multiple header values are required, click + Add and repeat steps b-c.
-
Click Save. The panel closes. The Feed URL field populates.
-
If authentication is required to access the content, set the credentials:
- Click Set credentials. The Set credentials popup window appears.
- Enter the Username.
- Enter the Password.
- Click Submit. The popup window closes, and the credentials are applied.
Define the structure
The Structure tab lets you control how often the content is refreshed, the length and order of each chapter, and the information displayed in the video.
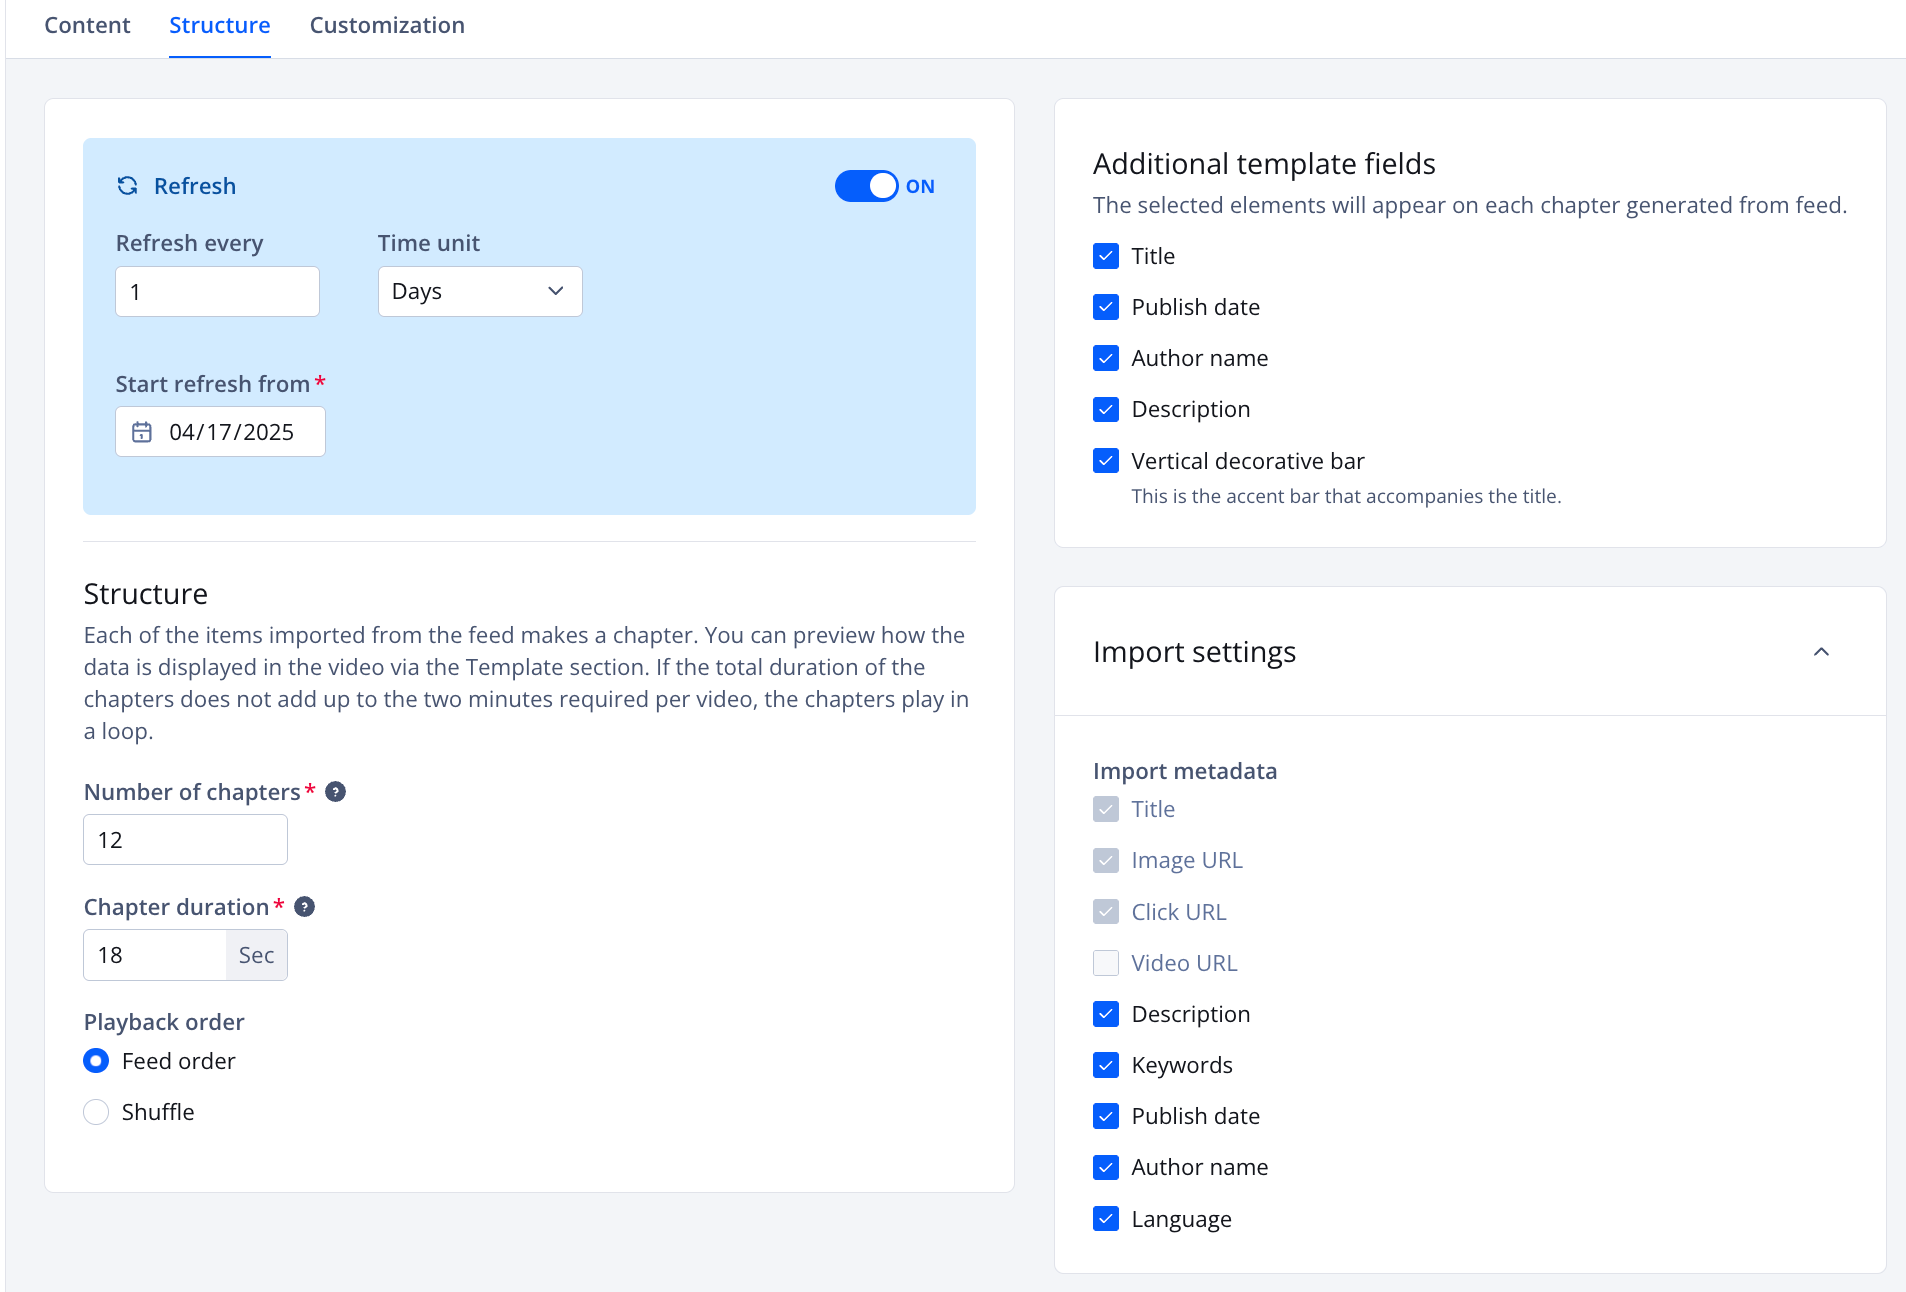
Structure tab
Refresh
Set how often the discovery video refreshes with new content from your feed. By default, discovery videos refresh daily, starting from the creation date.

Refresh section
Follow these steps:
- Toggle Refresh to ON. The section expands.
- In the Refresh every field, enter a time interval less than 51.
- Select a Time unit.
- In the Start refresh from field, choose the date the refresh schedule should begin.
Structure
Set the length and order of chapters in the discovery video.
| Setting | Description |
|---|---|
| Number of chapters | (Required) Number of segments in the video Follow this step:
If the feed contains more items than the number of chapters, the Playback order setting determines which items are used. Use a lower number to create a shorter video. Default: 12 |
| Chapter duration | (Required) Length of each video segment in seconds Follow this step:
Notes:
Default: 18 seconds |
| Playback order | Determines the order of feed items in the discovery video Follow this step:
|
Additional template fields
These options control the information displayed in each chapter.
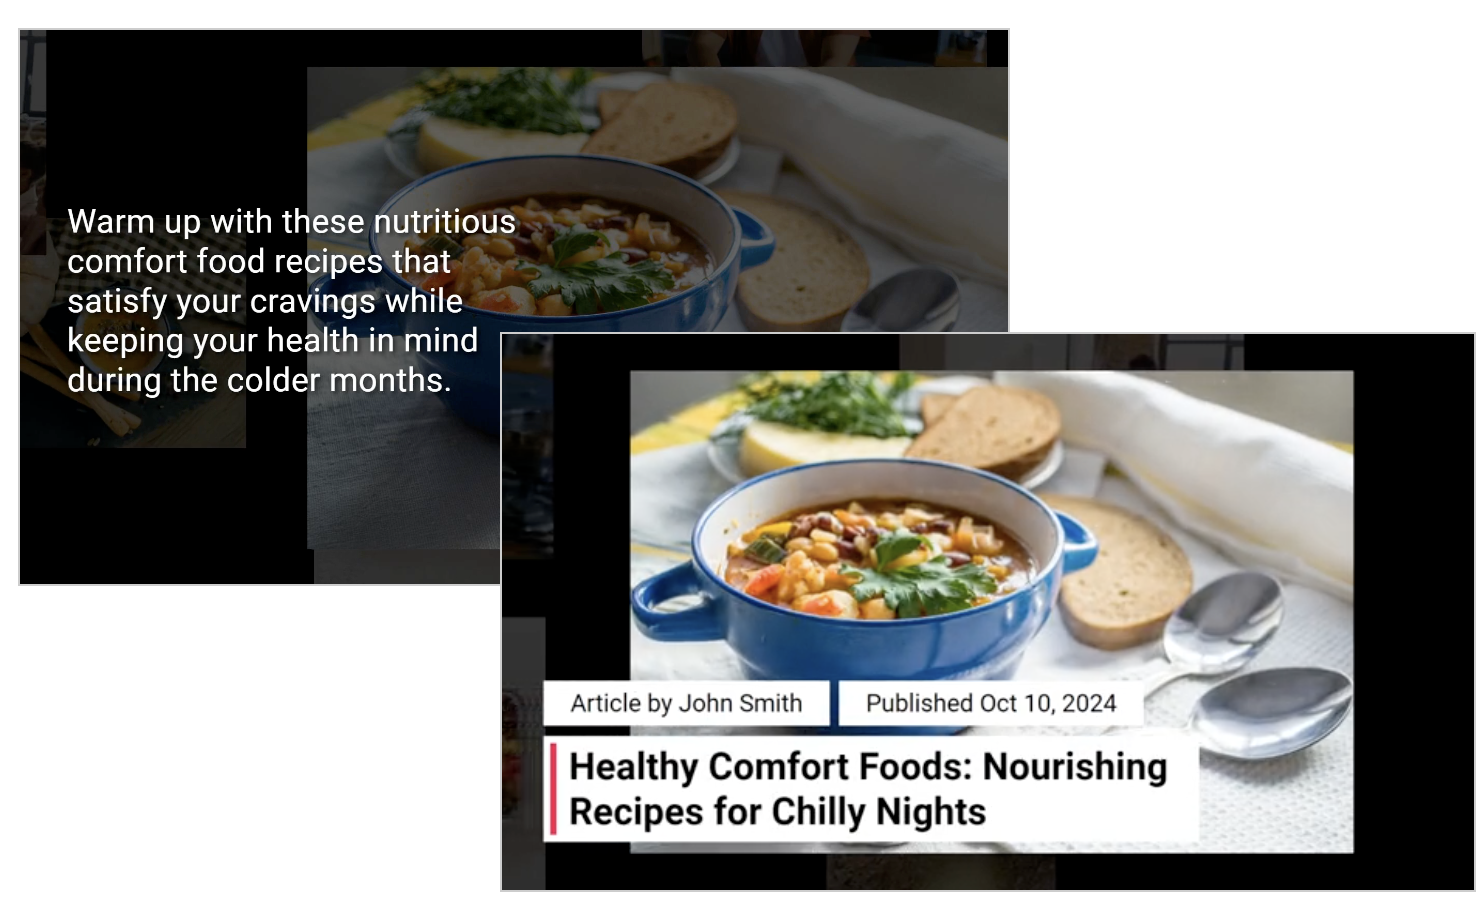
Discovery video with all template fields selected
Select the feed-derived elements to include.
| Field | Description |
|---|---|
| Title | Title of the content |
| Publish date | Publish date of the content |
| Author name | Author of the content |
| Description | Short explanation or summary of the content |
| Vertical decorative bar | Accent bar that appears to the left of the article or video title |
Import settings
Select which metadata fields to pull from your feed. These are required for displaying elements like title, author, publish date, and description in the video.
Follow these steps:
-
Expand the Import settings section.
-
Select or deselect the information to import.
Field Description Title Title of the content Description Short explanation or summary of the content Keywords User-generated labels used to classify a media item Publish date Date the content was published Author name Name of the content's author Language Determines left-to-right or right-to-left text direction based on the video language setting
Customize the discovery video
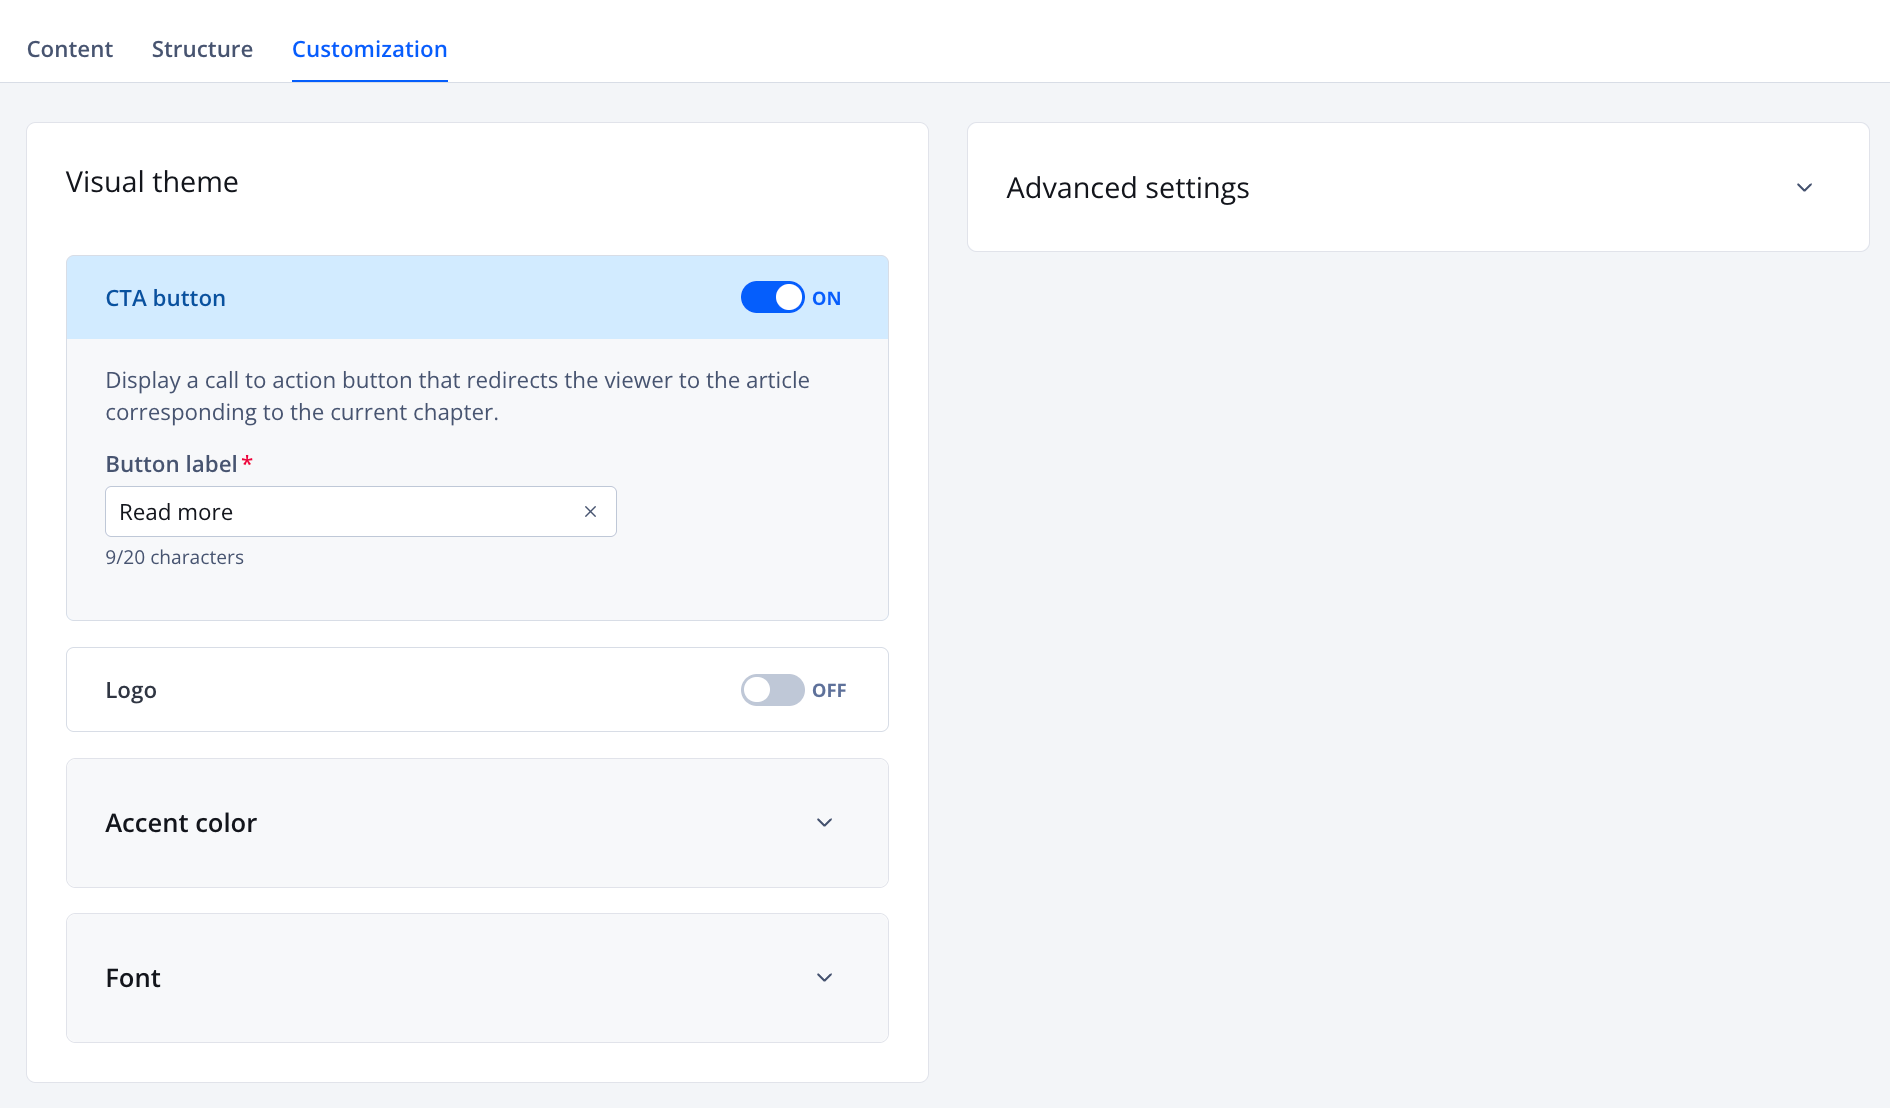
The Customization tab allows you to customize the discovery video to align with your company branding, style, and tone.
Customization tab
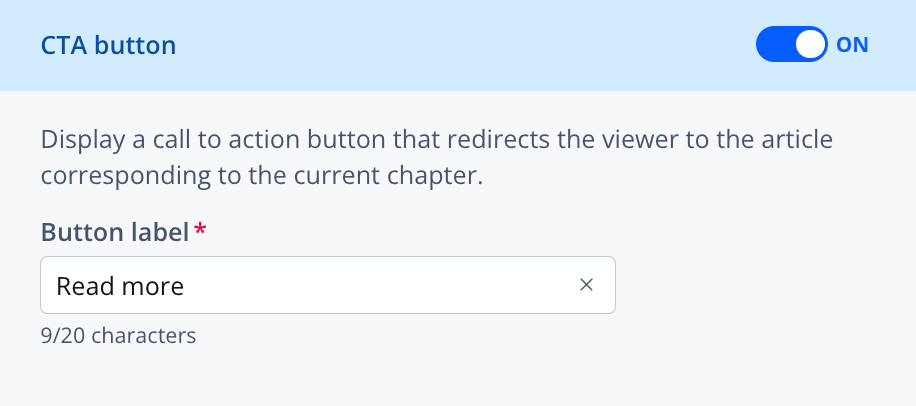
CTA button
Add a call-to-action button that links to the article or video for the current chapter. By default, the CTA button is enabled and labeled Read more.
CTA button section
Follow these steps:
- Toggle CTA button to ON. The section expands.
- (Optional) Change the Button label to a custom call to action. The default value is Read more.
Logo
The logo appears at the beginning and end of each chapter to support branding. It must be a .png, .jpeg, or .webp file and less than 4.2 MB.
The discovery video logo is different from the player logo.
Logo section
Follow these steps:
- Toggle Logo to ON. The section expands.
- Click Choose file to open your computer's file picker.
- Select a logo image.
You can also drag and drop a logo file directly from your computer.
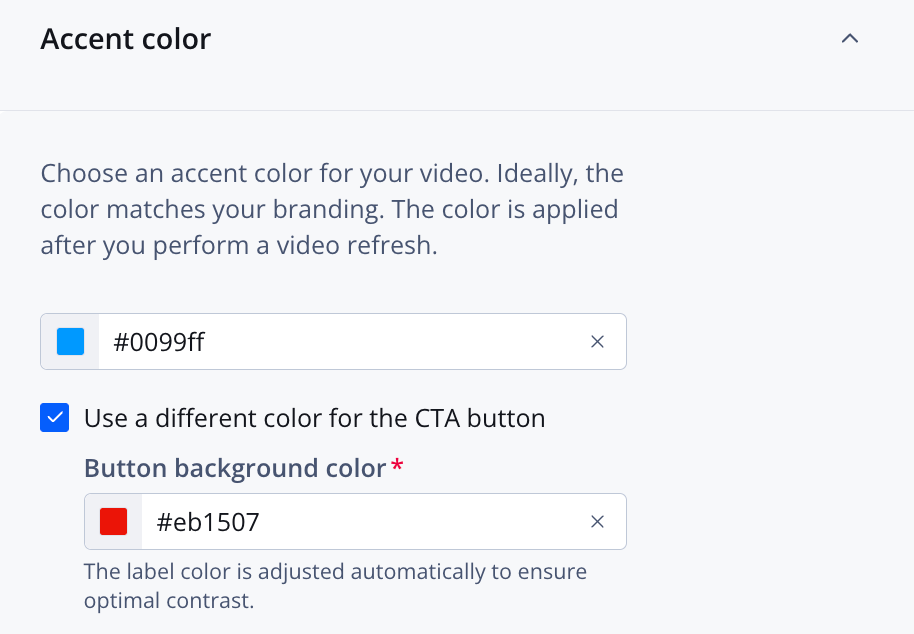
Accent color
The accent color controls the vertical bar that appears beside the title of each chapter. This color is also used for the CTA button, unless a different color is selected.
The position of the accent bar may shift slightly based on how the color contrasts with the background.
Accent color section
Follow these steps:
- Expand the Accent color section.
- Click the colored square. The color picker appears.
- Pick a color from the palette.
- Press Enter to apply.
- (Optional) Click Use a different color for the CTA button.
- Repeat steps 2-4.
If you know the HEX code, you can enter it directly instead of using the color picker.
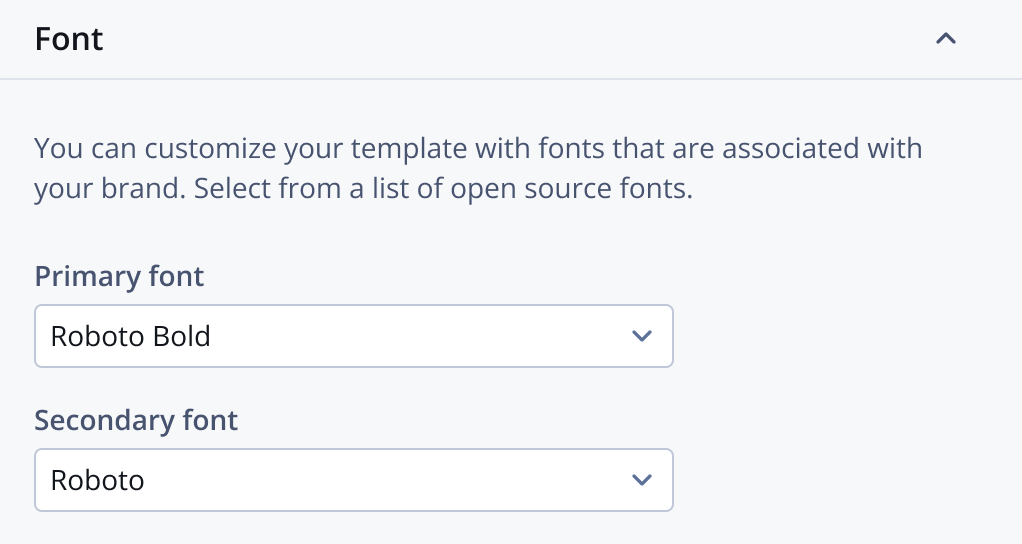
Font
Customize your video template with fonts that align with your brand. Choose from a list of open-source options for both chapter titles and descriptions.
Font section
Follow these steps:
- Expand the Font section.
- Select the Primary font for the titles.
- Select the Secondary font for the author name, publish date, and descriptions.
Advanced settings
Advanced settings allow for fine-tuned customization, but changes are not previewable in the UI and can affect video behavior. For this reason, we recommend working with your JWX representative before making any edits.
FAQ
When will my discovery video be available in a player?
A discovery video becomes available in a player approximately 15 minutes after it has been set up.