Enable user login (BETA)
This is a beta offering.
By using this documentation, you are agreeing to abide by the terms of the JWX Beta Program Agreement.
You can require a user to create an account to view your content. When enabled, a popup window appears on the content landing page prompting the viewer login into an existing account account or create a new account to view your videos.
After signing in or signing up, your viewers have access to the following features:
- Watching app content
- Accessing previously started (Continue Watching) and Favorites content
- Managing consent for various use cases
Depending on your app provider, unauthorized viewers may still be able to browse your library, but they will not be able to watch content.
Prerequisites
| Item | Description |
|---|---|
| App config entitlement | Entitlement to use the app config For more information, contact your JWX representative. |
| (JWX Service only) Active InPlayer account | Contact your JWX representative for more information |
Set up account creation
JWX allows you to enable account management services through either JWX's account service or a non-JWX third-party service.
Access and Subscriptions tab
JWX Service
Use the following step to enable account creation:
- From the Apps page, click the name of the app config. The settings for the app config appear.
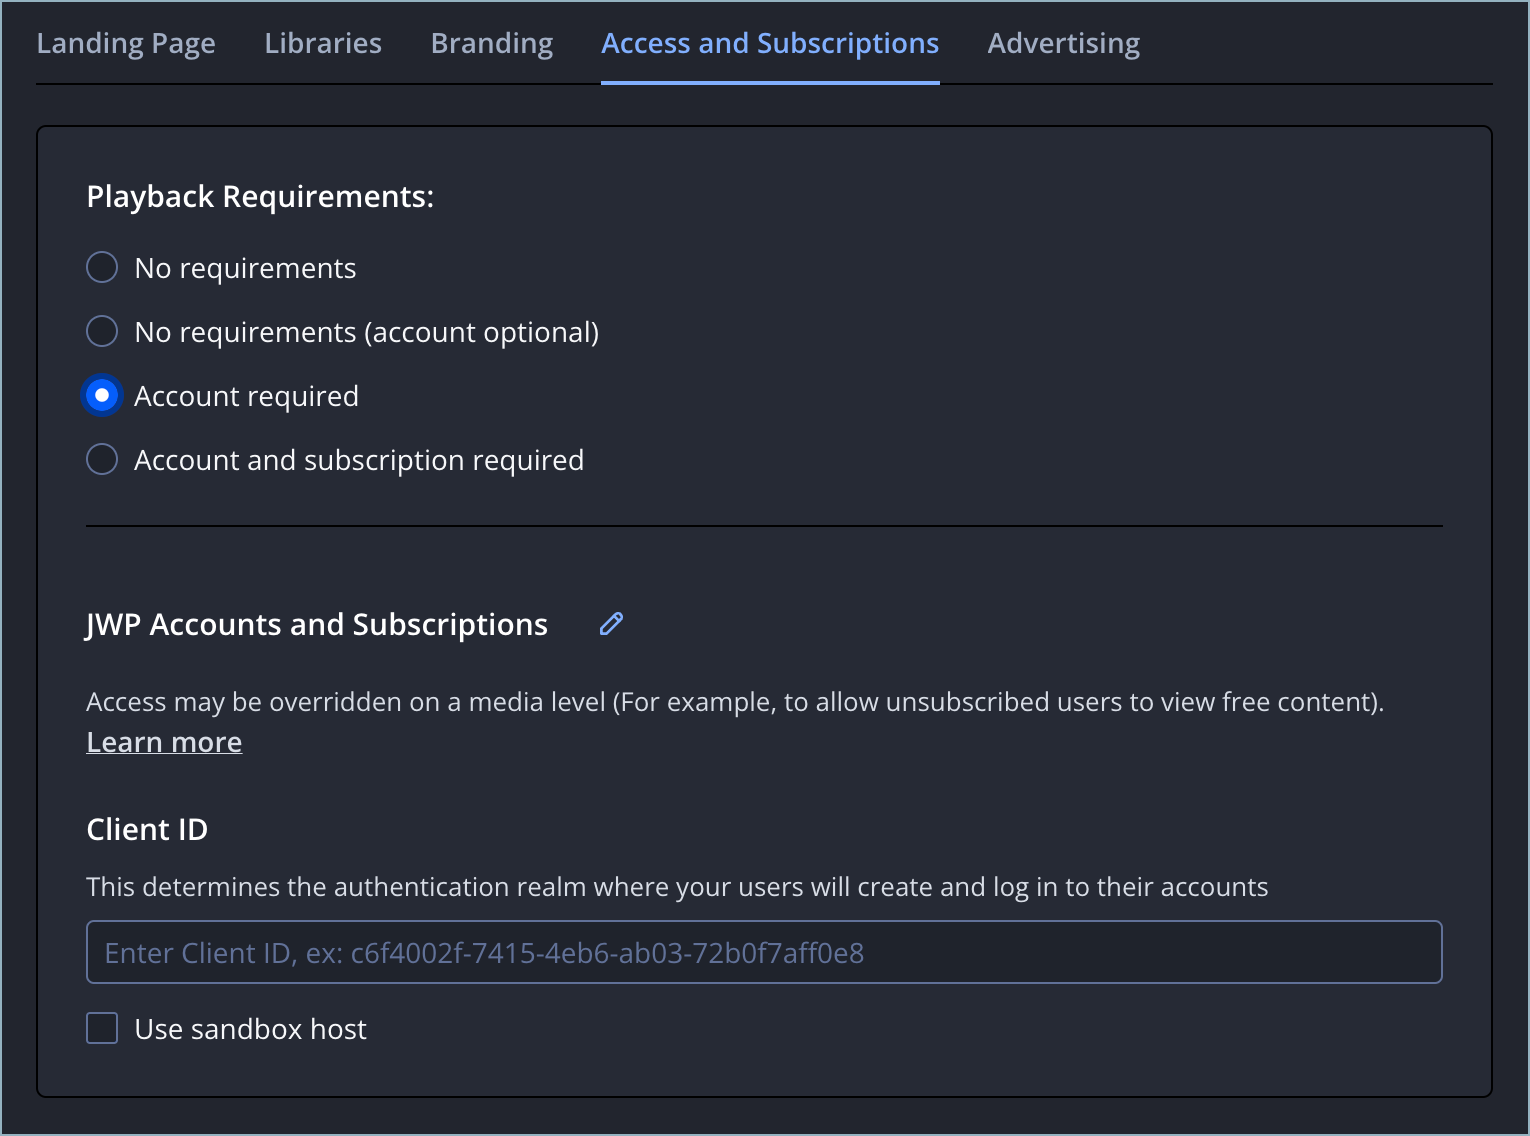
- On the Access and Subscriptions tab, under Playback Requirements, select Account required.
- Under JWX Accounts and Subscriptions, in the Client ID section, enter your Client ID.
- (Development only) Click the checkbox next to Use sandbox host.
- Click Save.
Non-JWX Service
When enabling account creation with a non-JWX service, contact your JWX representative for additional information about managing logins using a non-JWX system.
Use the following steps to enable account creation:
- From the Apps page, click the name of the app config. The settings for the app config appear.
- On the Access and Subscriptions tab, under Playback Requirements, select Account required.
- Under JWX Accounts and Subscriptions, click the pencil icon. The Edit Payment and Subscription Service popup window appears.
- From the Edit Payment and Subscription Service dropdown menu, select Other Service.
- Click Proceed. The popup window disappears and the page updates.
- Under Non-JWX Service, in the Service Environment ID section, enter your service environment ID.
- (Development only) Click the checkbox next to Use sandbox host.
- Click Save.