Add a movie
Learn how to upload movie content
With movies, you can create, upload, and host long-form video content directly within the JWX dashboard.
Movies offer publishers various benefits:
- Deliver and host long-form videos
- Streamline content management through easy uploads and integration within the JWX dashboard
- Enhance viewer engagement by uploading a trailer and associating images with your movie
- Tailor viewing experience to match audience preferences


Add media menu
Prerequisites
| Item | Description |
|---|---|
| App config entitlement | Entitlement to use the app config App config entitlement also enables the content types feature. For more information, contact your JWX representative. |
| Content types loaded to property | Type of media based on shared custom parameters To access the Movie content type, load default content types into your JWX property. |
Upload a movie
Use the following steps to upload a movie of more than 2 seconds duration to the dashboard:
- Prepare your video content.
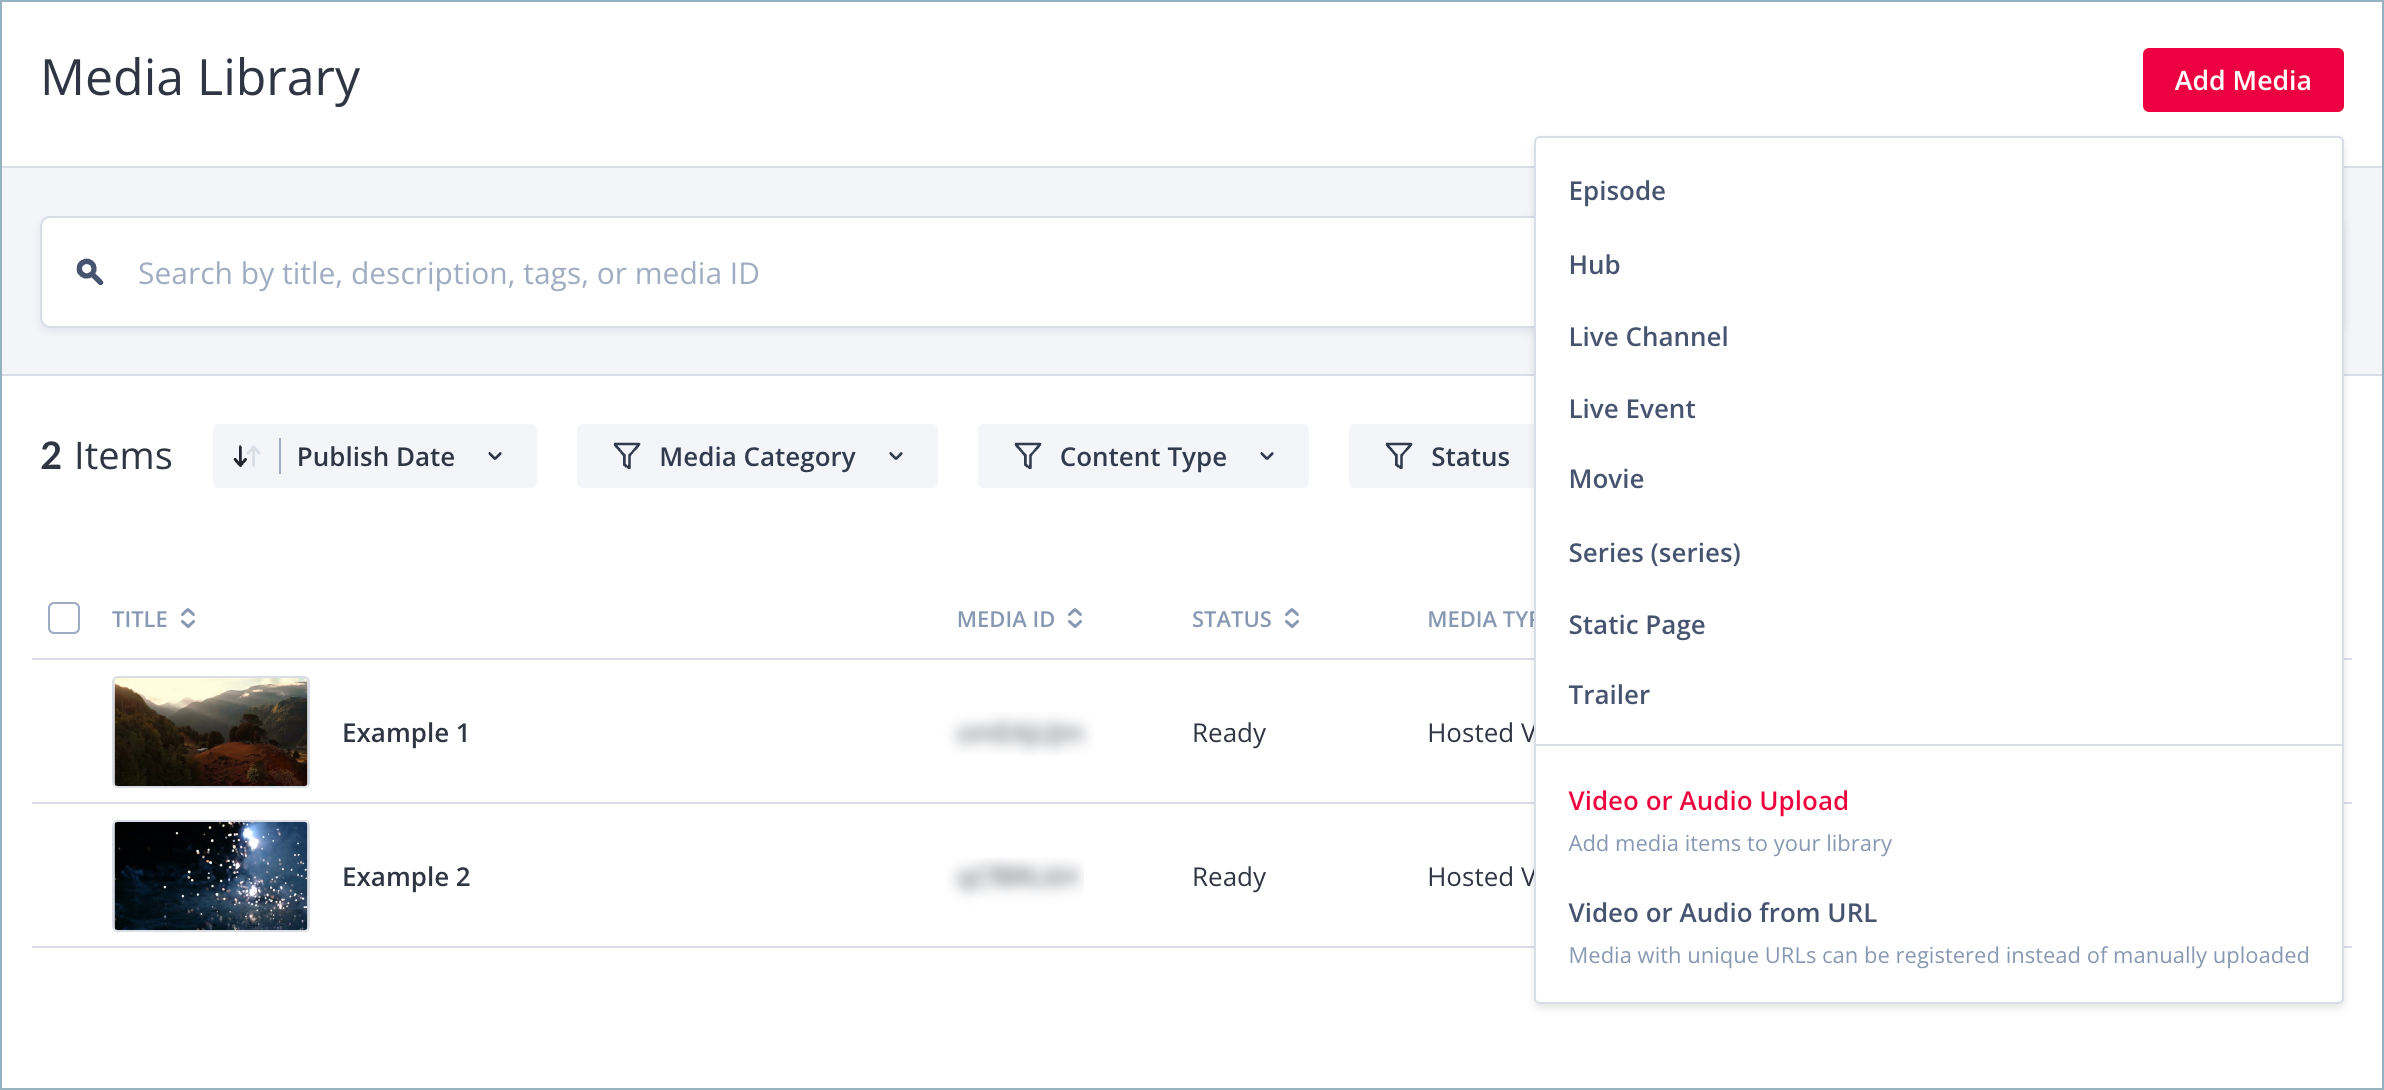
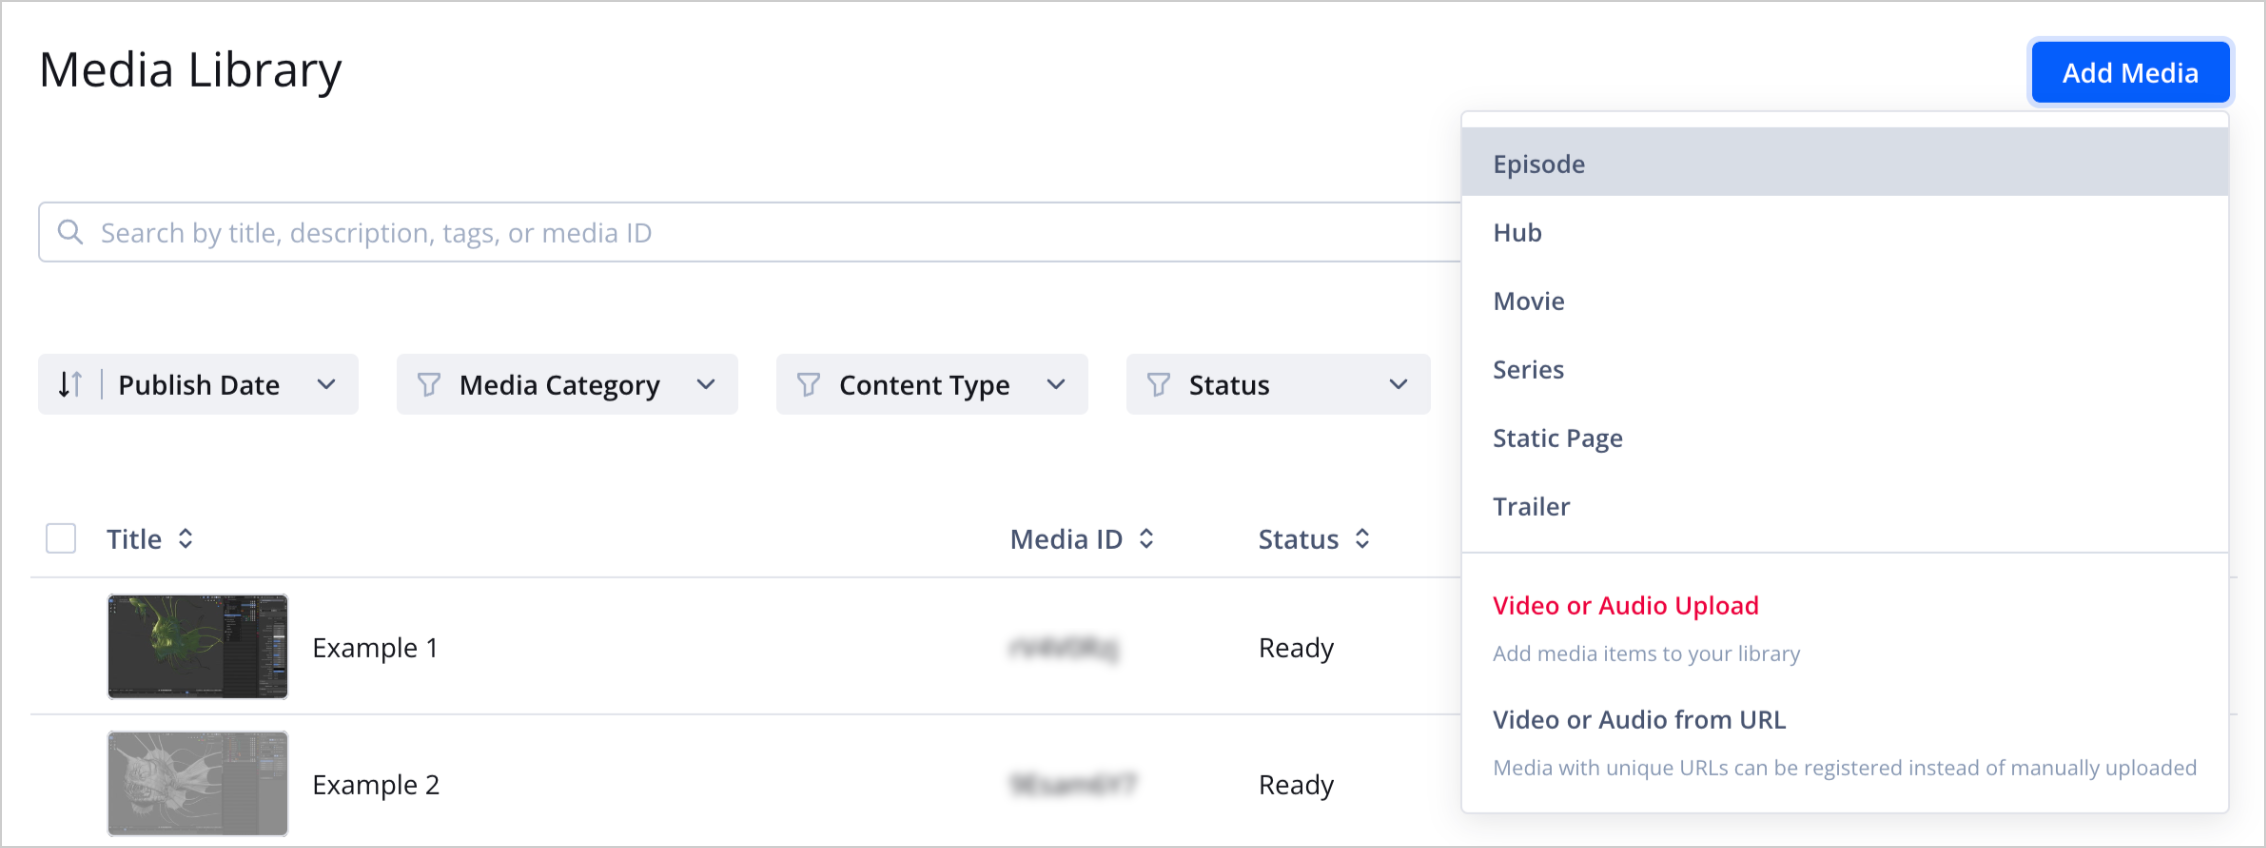
- From your Media Library, click Add media > Movie. The media upload page appears.
- In the file picker, drag and drop a video file or choose a file from the selector. The Upload in progress tile displays a progress bar. Upon a successful upload, the panel reads Upload complete.
- Click Exit. The Media library reappears.
Now that your content has been uploaded, you can add metadata to the movie.
Add movie metadata
Follow these steps to add metadata to your movie:
-
From your Media Library, select a movie. The media details page appears.
-
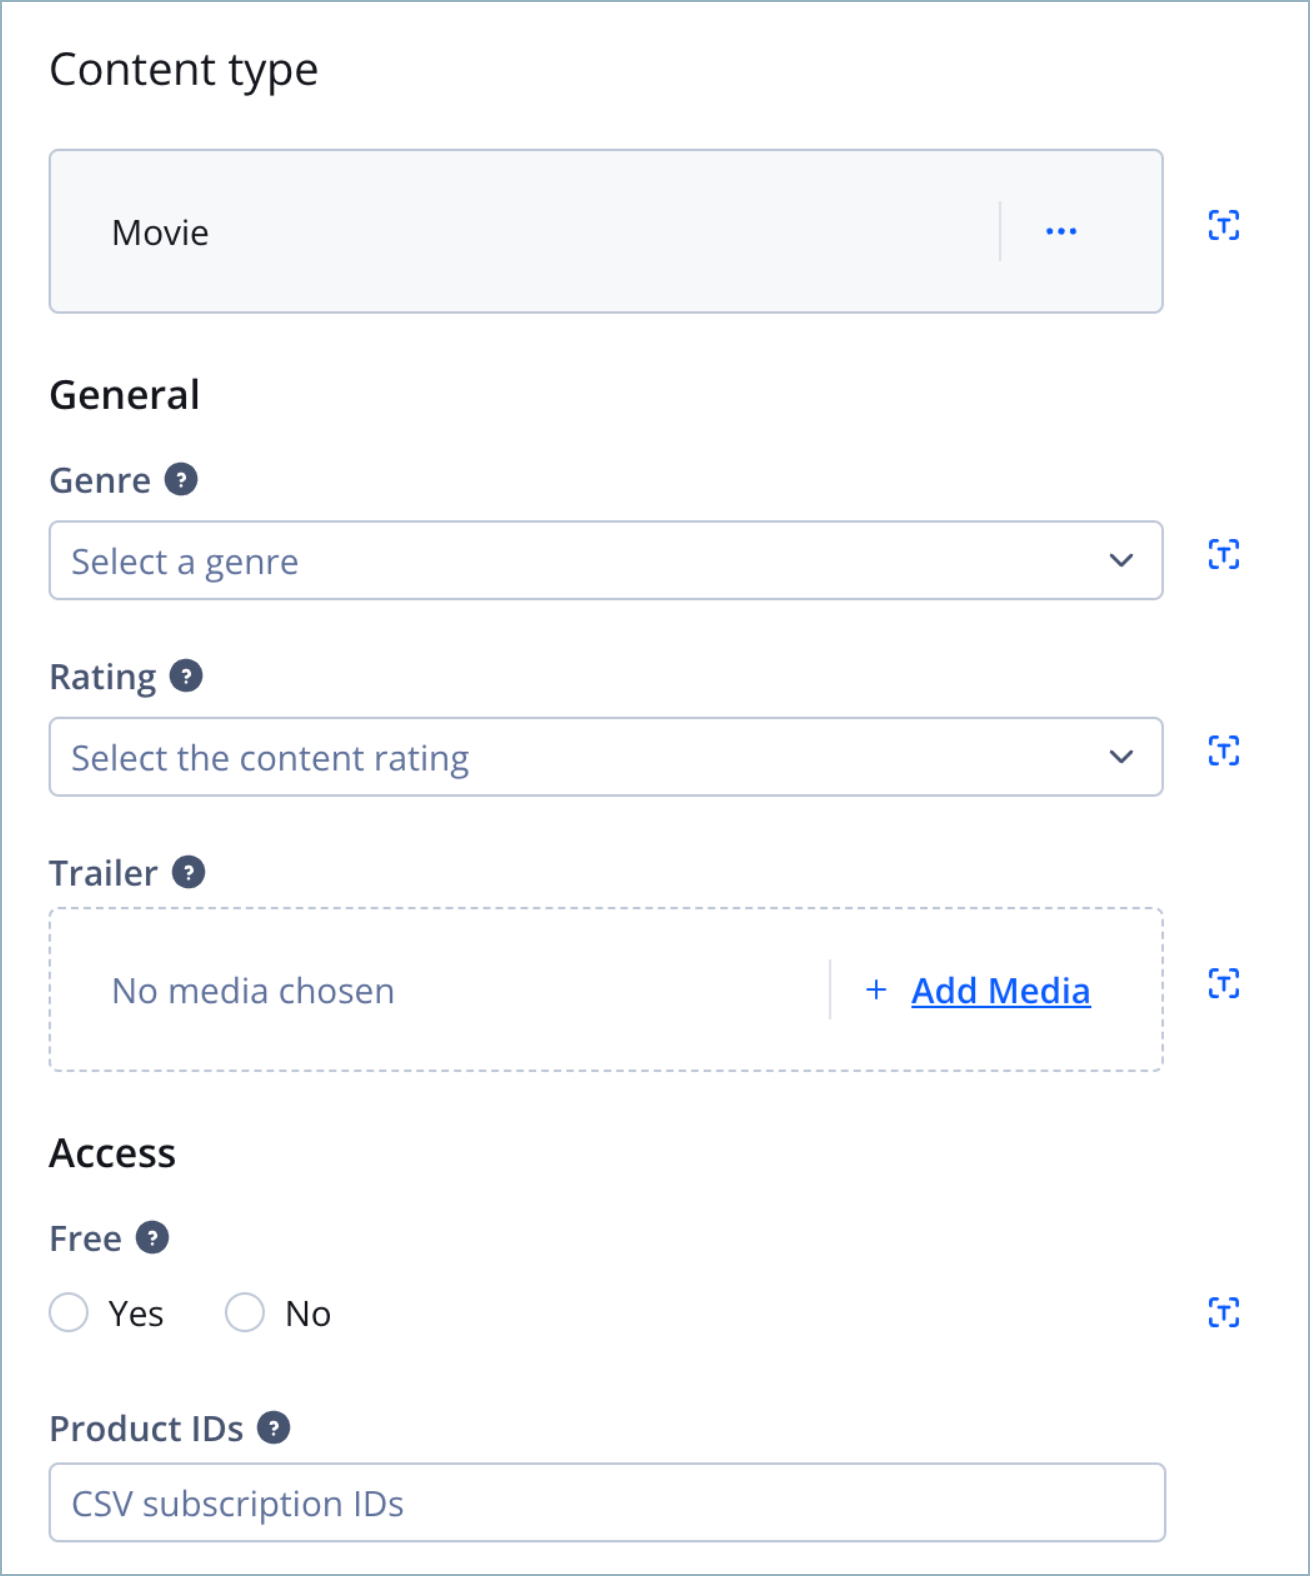
Under the Content type section, fill out the related Movie fields.

Field Description Genre Genre used to categorize content
Use the following step to configure this field:- Select an option from the dropdown menu.
Rating Motion picture rating of the content to determine the intended audience
Use the following step to configure this field:- Select an option from the dropdown menu.
Trailer Preview video file for the content
Use the following step to configure this field:- Add a trailer or highlights video in the Trailer field.
Free Flag indicating whether content access is free or paid
Use the following step to configure this field:- Click the Yes or No radio button.
Product IDs JWX identifiers of subscription and pay-per-view assets that allow access to the content
Use the following step to configure this field:- In the textbox, enter a comma-separated list of all assets with content access.
-
Click Save.
Updated about 2 months ago
What’s Next
