Translate content metadata
Add and manage translations for your content title, description, and other fields
In addition to captions and subtitles, JWX enables you to translate your content metadata into any language when using content types. Content metadata is visualized in your app to provide the viewer with more information about a media item.

Translated description of video in the JW Web App
Translating metadata offers you a host of benefits:
- Expanding to a global market of viewer groups
- Improving user experience in the native languages of viewers
- Increasing revenue opportunities through language support
Prerequisites
| Item | Description |
|---|---|
| App config entitlement | Entitlement to use the app config App config entitlement also reveals the Translations tab on the media details page. For more information, contact your JWX representative. |
| Content type associated with media item | Type of media based upon shared custom parameters For more information, learn how to add a content type. |
| Updated content type schema | Content type schema with translations enabled Enabling translation requires two components:
(1) Adding a language: To add a language, you must create a content type schema with a languages object nested under the metadata. You can add up to 15 languages per schema. See the following example: NOTE: You may use any two- or three-letter code to denote a language. You may also include a two-letter or three-number regional marker after a hyphen (en-US). (2) Marking translatable fields: Upon adding a language, you must include a translatable property to mark all fields that you would like to translate. See the following example: NOTE: You can only translate fields that accept a text input (a field_type of input or textarea). Auto-populated values or preset values selected from a menu cannot be translated. |
Add a translation
The app provider is responsible for displaying specific translations to the viewer and setting the default language. You may set any language as the default for your app.
Follow these steps to translate your content metadata:
-
From your Media library, select a media item. The media details page appears.
-
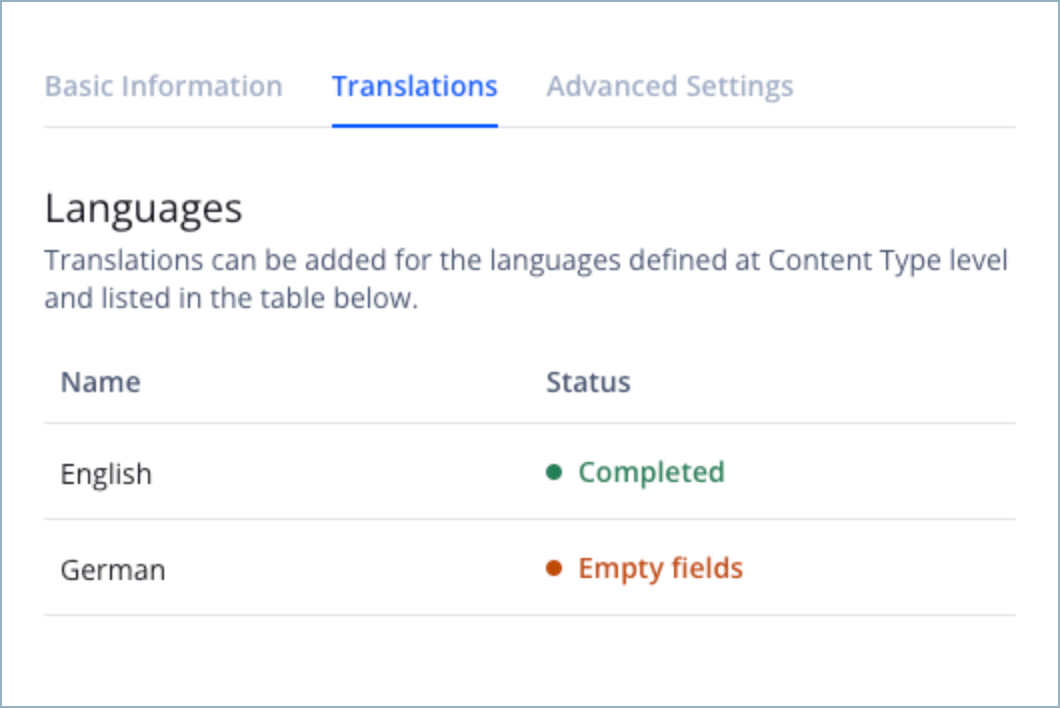
Click the Translations tab. Your loaded Languages appear.
If you have not added any languages to your content types schema, a callout appears noting that No languages are available.

Translations tab with loaded languages
-
Select a language. The Translation panel opens and displays your translatable fields.
By default, the Title and Description fields will appear in the panel.
To add any additional fields, you must set the
translatableproperty of the content type schema field totrue.All translatable fields that are not part of the default language will appear with a language code postfix (defined when adding the language).
-
Enter a translation into each text field.
-
Click Apply. The Translation panel closes.
The Status column of the Languages section will alert you whether a translation is Completed or still has Empty fields.
-
Click Save.
Edit a translation
You can edit an existing translation at any time. Follow these steps to update a translation:
- From your Media library, select a media item. The media details page appears.
- Under the Translations tab, your translated Languages appear.
- Select a language. The Translation panel opens and displays your translatable fields.
- Enter a new translation into your desired text field.
- Click Apply. The Translation panel closes.
The Status column of the Languages section will alert you whether a translation is Completed or still has Empty fields.
- Click Save.
Delete a translation
Your translation definitions are associated with your content type schema. The deletion of a content type from a property or media item does not affect translation metadata. The translation definitions will be stored as custom parameters. Deleting a content type only affects the visualization of metadata in apps and the validation of metadata in the JWX dashboard.
Changing the content type schema may alter the appearance of the Translations tab for a media item. Deleting a language from the content type schema will remove the language from the Translations tab.
Follow these steps to delete a translation:
- From your Media library, select a media item. The media details page appears.
- Under the Translations tab, your translated Languages appear.
- Select a language. The Translation panel opens and displays your translatable fields.
- Delete the text from your desired translatable field.
- Click Apply. The Translation panel closes.
The Status column of the Languages section will alert you whether a translation is Completed or still has Empty fields.
- Click Save.
Updated 2 months ago
