Add menu items
Create and configure a library of media items in an app
While the landing page showcases your top platform content, menu items provide access to complete libraries or individual media items.

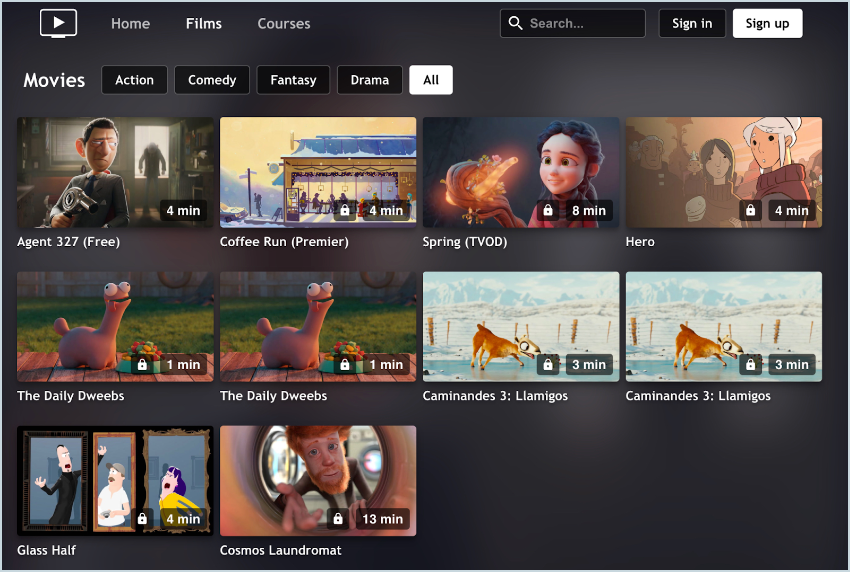
Menu item screen for Films
You can use menu items to group similar content. The following table provides some guidance for using menu items.
| Use case | Guidance |
|---|---|
| Less than 50 movies or series | Create a single menu item named Library |
| Content grouped by format | Create a menu item for each content category, such as the following:
|
Add a menu item
A maximum of ten menu items can be added to an app.
Follow these steps to create a menu item for your app content:
-
From the Apps page, select an app config. The settings for the app config appear.
-
On the Menu items tab, click + Add menu item. The Add menu item panel appears.
-
Enter a unique Name. This name will identify the menu item on the app landing page.
-
Select a Type of app content to associate with the menu item.
List type Description Playlist (Default) Associates the menu item with a specific playlist
Follow these steps to select a playlist:- Click the Playlist radio button.
- From the dropdown menu, select a playlist.
Media Associates the menu item with a single media item
Follow these steps to select a single item:- Click the Media radio button.
- From the dropdown menu, select a media item.
-
(Optional) Set Tags to associate with the content.
In the app, these tags appear as buttons or options in a dropdown menu that enable a viewer to filter the videos on a screen.
- For a Single tag, enter the tag name and click Add.
- For Multiple tags, enter a comma-separated list of tags and click Add.
-
(Optional) Add Custom parameters.
When retrieving custom parameters via the Delivery API, snake case (enable_sharing) is automatically converted to camel case (enableSharing). Be sure to use the camel case format when referencing these parameters in your implementation.
-
Click Add to top or Add to bottom.
Adding a menu item to the top places it first in your app menu (top left), while adding it to the bottom places it last (far right).
You can preview the order of your menu items in step 9.
-
Click Save.
-
(Optional) Click Preview. A new browser tab opens displaying an interactive preview of the app.
Updated 7 months ago
