Manage account users
Add users and configure access for each user
If you are an admin for a JWX account, you can add and manage users, and assign each user either full or limited access to the properties in your account.
Create a new user account

Users page and Add user panel
Follow these steps to create a new user account:
- On the Users page, click + Add user. The Add user panel appears.
- Enter the Email address of the new user.
The user email cannot be associated with another JWX account.
- Select a User role from the dropdown menu.
- (For accounts with multiple properties) Choose one or more Properties for the user to access.
- Click Save. The new user account appears in the Pending users section.
A JWX invitation email is sent to the new user. Once the new user has followed the instructions in the invitation email, the account will appear in the Existing users section.
If the new user does not receive an invite, you can resend the email.
User roles
| Permission | Read Only* | Editor* | Manager* | Admin |
|---|---|---|---|---|
| View all content on specific accounts | ✓ | ✓ | ✓ | ✓ |
| Edit content | ✓ | ✓ | ✓ | |
| Edit advertising configurations | ✓ | ✓ | ||
| Edit player configurations | ✓ | ✓ | ||
| View all accounts | ✓ | |||
| Billing | ✓ | |||
| Properties | ✓ | |||
| User management | ✓ |
*If an account manages multiple properties, users with these roles can only operate in properties to which they have been given granted access.
Manage pending user accounts
You can resend a user invite, edit a pending user account, or delete an invite from the dashboard.
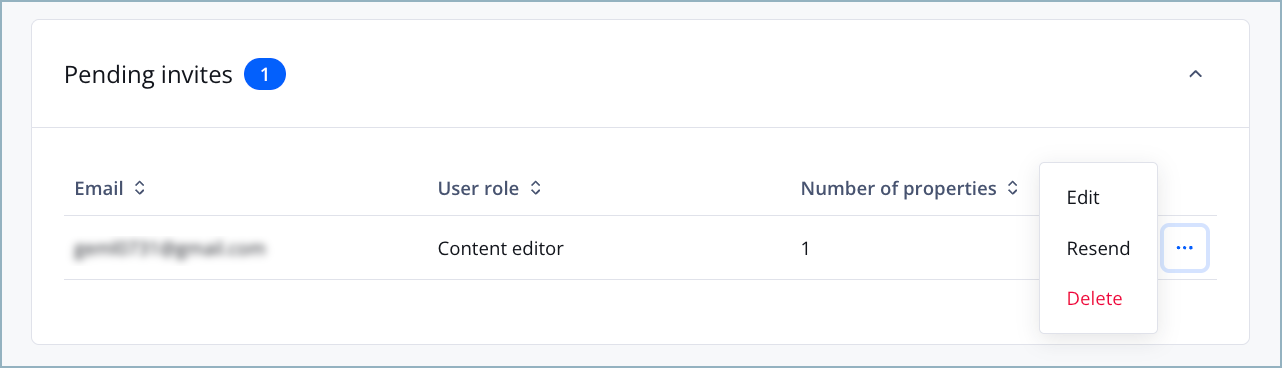
Pending invites section
Resend a user invite
Depending on the email provider for the new user, the invite email may take a few minutes to arrive. Please ensure the new user checks the spam folder.
If a new user invite does not arrive within a few minutes, follow these steps to resend the email:
- On the Users page, in the Pending invites section, click ˅ (down arrow icon) to expand the list of pending invites.
- In the row of the invited user, click ⋯ > Resend invite. A new invite email is sent to the user’s address.
Edit a pending user account
Follow these steps to edit a pending user account:
- On the Users page, in the Pending invites section, click ˅ (down arrow icon) to expand the list of pending invites.
- In the row of the invited user, click ⋯ > Edit. The Edit user panel appears.
- Select a User role from the dropdown menu.
- (For accounts with multiple properties) Choose one or more Properties for the user to access.
- Click Save. The changes take effect when the user activates the account.
Delete a user invite
Deleting a user invite voids the activation link sent to the user. This action is irreversible.
Follow these steps to delete a pending user account:
- On the Users page, in the Pending invites section, click ˅ (down arrow icon) to expand the list of pending invites.
- In the row of the invited user, click ⋯ > Delete. The Delete invite warning popup appears.
- Click Delete. The user invite is voided.
Manage existing user accounts
You can edit or delete existing users from the dashboard.
You cannot make changes to your own user account. The Current user label will block your account settings.
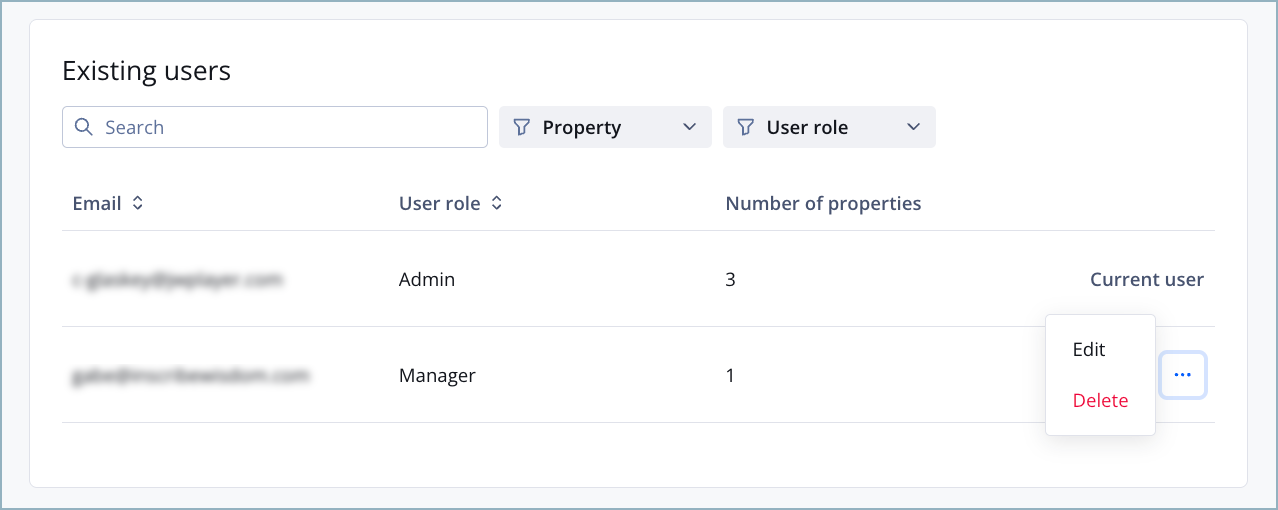
Existing users section
Edit an existing user account
Follow these steps to edit an existing user account:
- On the Users page, under Existing users, in the row of the user, click ⋯ > Edit. The Edit user panel appears.
- Select a User role from the dropdown menu.
- (For accounts with multiple properties) Choose one or more Properties for the user to access.
- Click Save. The changes take effect the next time the user signs in to the account.
Delete an existing user account
This action is irreversible. Deleted accounts cannot be recovered.
Follow these steps to delete an existing user account:
- On the Users page, under Existing users, in the row of the user, click ⋯ > Delete. The Delete user warning popup appears.
- Click Delete. The user is deleted from the account.
FAQ
Can I use the same email address for more than one JWX account?
No. An email address cannot be associated with more than one account JWX account.
Free accounts and paid accounts
An email address that is associated with a free JWX account cannot be associated concurrently with a paid JWX account. Accepting an invitation to join a paid account will remove access to your free account.
For example, let us imagine that Meghan has a free JWX account. When she set up this account, she used her personal email address: [email protected]. As part of a consulting project, John would like to give Meghan access to his company's enterprise JWX account. If John sends an invitation email to [email protected] and Meghan accepts the invitation, the following events will occur:
- Meghan's email address will be associated with the enterprise JWX account of John's company.
- Meghan's email address will be removed from her free JWX account.
- Meghan's free JWX account will no longer have an owner.
To maintain access to a free JWX account, always provide the administrator of a paid account with an email address that is not associated with your free JWX account.
Two paid accounts
An email address cannot be associated with more than one paid JWX account. To accept an invitation to join another paid JWX account, you must remove your email from the existing paid JWX account.
If you are the only user on an existing paid JWX account, you must either use a different email address on your existing paid JWX account or provide a different email address to the administrator of the other paid JWX account.
Updated 7 months ago