Solve an issue
JWX Support aims to help you quickly resolve issues with our JWX Support AI and request submission tools.
JWP Support AI
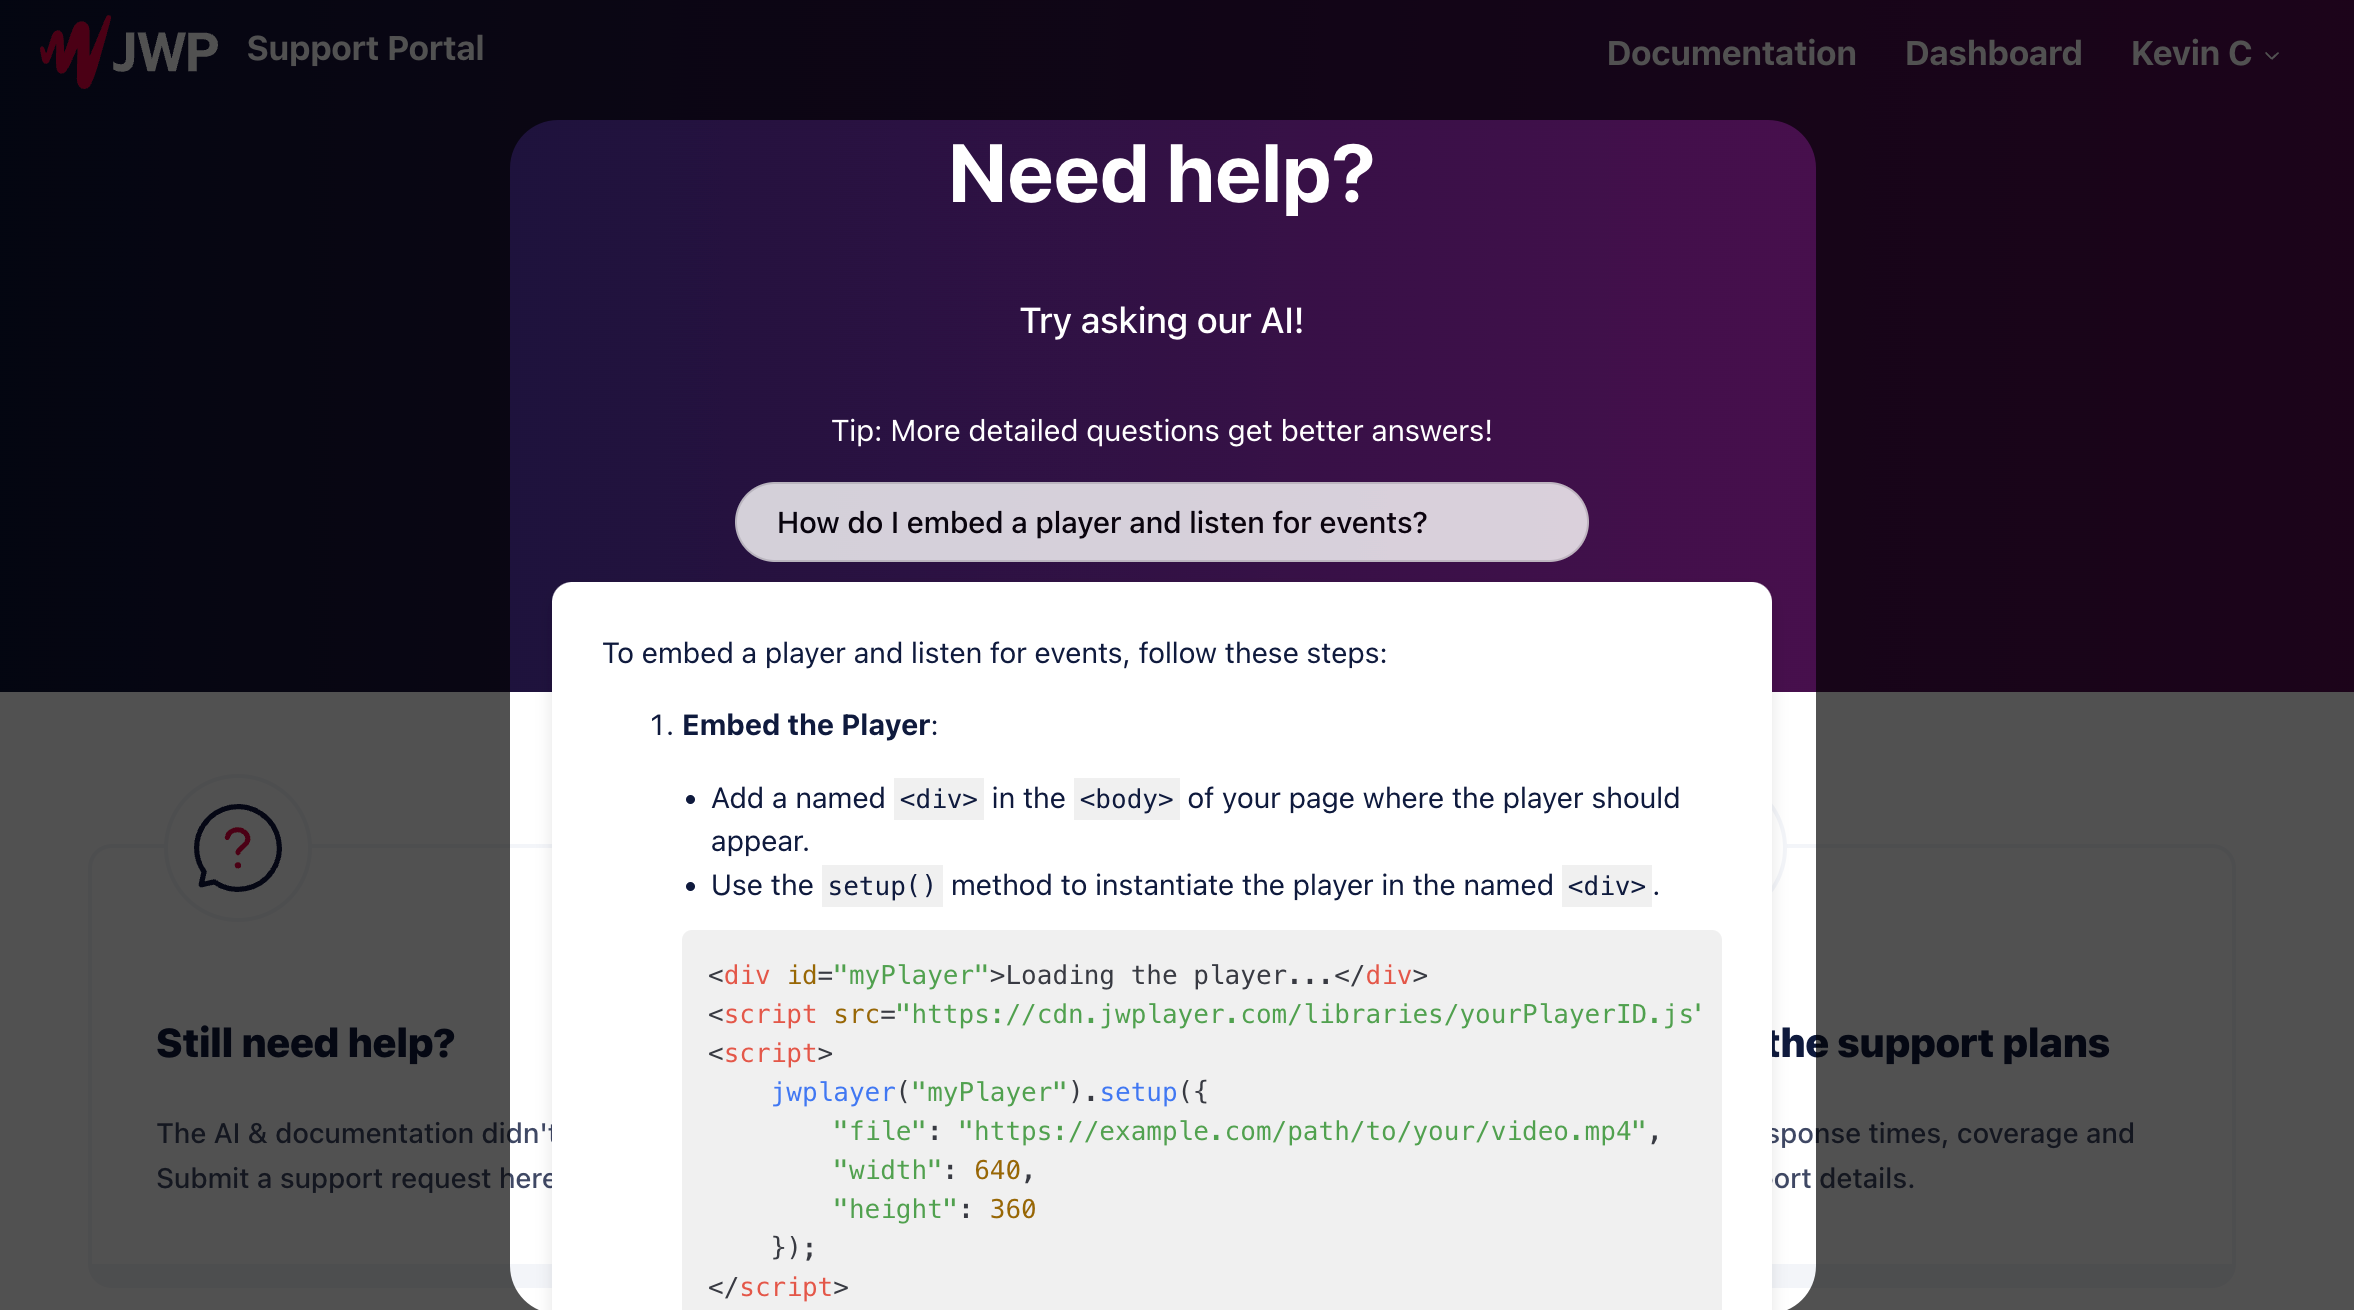
JWX Support AI can generate effective solutions based on our documentation to quickly resolve many common issues.

JWX Support AI
Follow these steps to search for an answer:
- On the Support Portal page, enter a detailed issue in the text box.
- Click Enter on your keyboard. JWX's support AI will attempt to provide a comprehensive solution with relevant links to JWX's documentation.
Requests
Submit a request
If the JWX Support AI does not return a satisfactory answer, you can submit a request.

Submit a request page
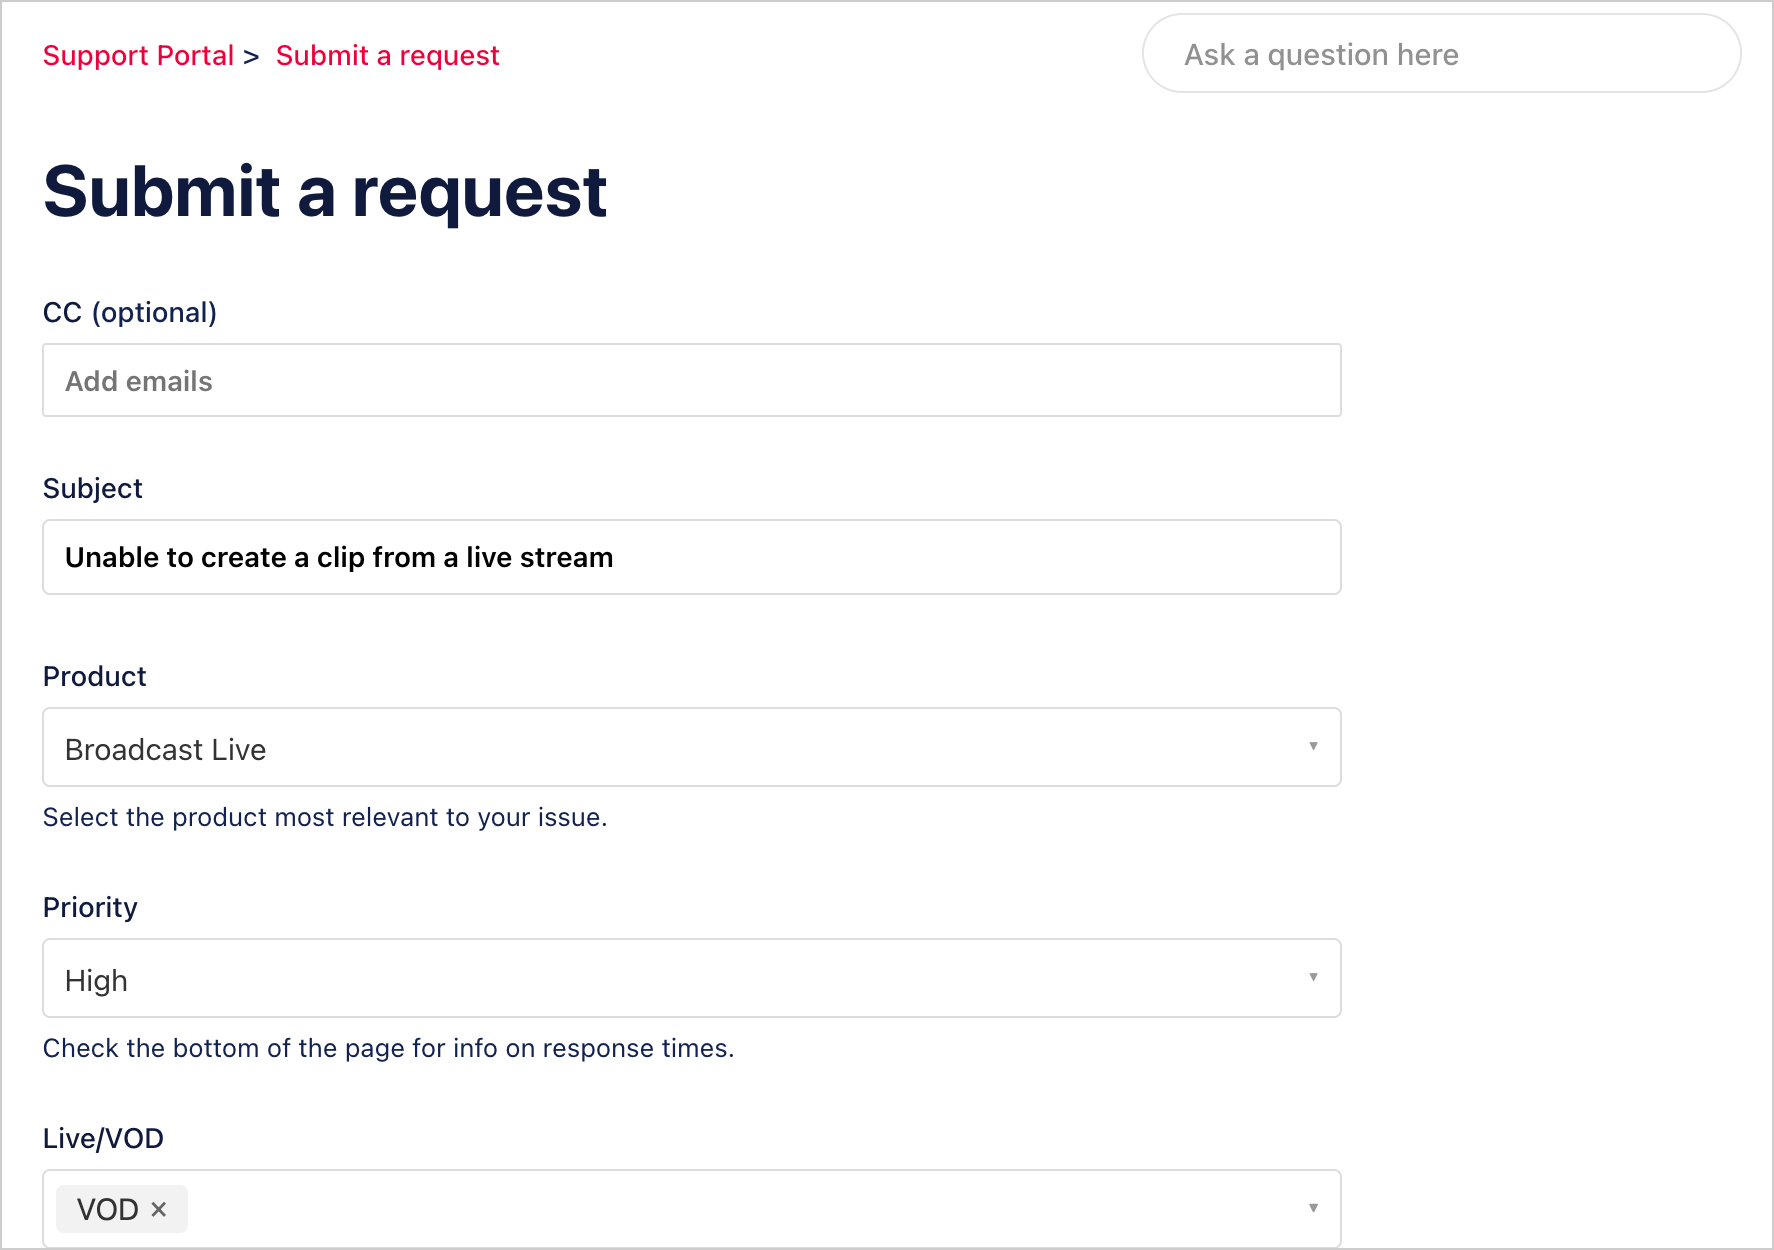
Follow these steps to submit a request:
- On the Support Portal page, click New request.
If you are a registered user, you can click your name > Requests. On the Requests page that appears, click New request.
- (Optional) In the CC field, enter one or several email addresses of recipients to be notified of request updates.
To enter multiple email addresses, press any of the following keyboard keys after typing an email address:
- Enter
- Space
- Tab
- Enter a concise Subject for your request.
- From the Product dropdown menu, select the area related to your issue. Additional product-specific fields will appear.
- (Registered Users) From the Priority dropdown menu, select the urgency of the issue.
Under Response times at the bottom of the page, you can review the response times associated with each priority for your Support Plan.
- Fill out the remaining product-specific fields.
- Click Submit. If you are a registered user, the submitted request information will appear. Otherwise, you'll be redirected to the Support Portal homepage.
After submitting your request, you will receive a confirmation email.
Respond to an existing request
When the JWX Support Team responds to your request, you will receive an email. Replying to the email will update the request with additional information for the JWX Support Team.
Manage an existing request
As a registered user, you can review all your existing requests created as of 3 October 2022, view the progress of an active request, or reply to a request within the JWX Support Portal.
You will receive an email whenever an update has been made to a request. You can reply to the email to update the request without logging into the JWX Support Portal.

Request page
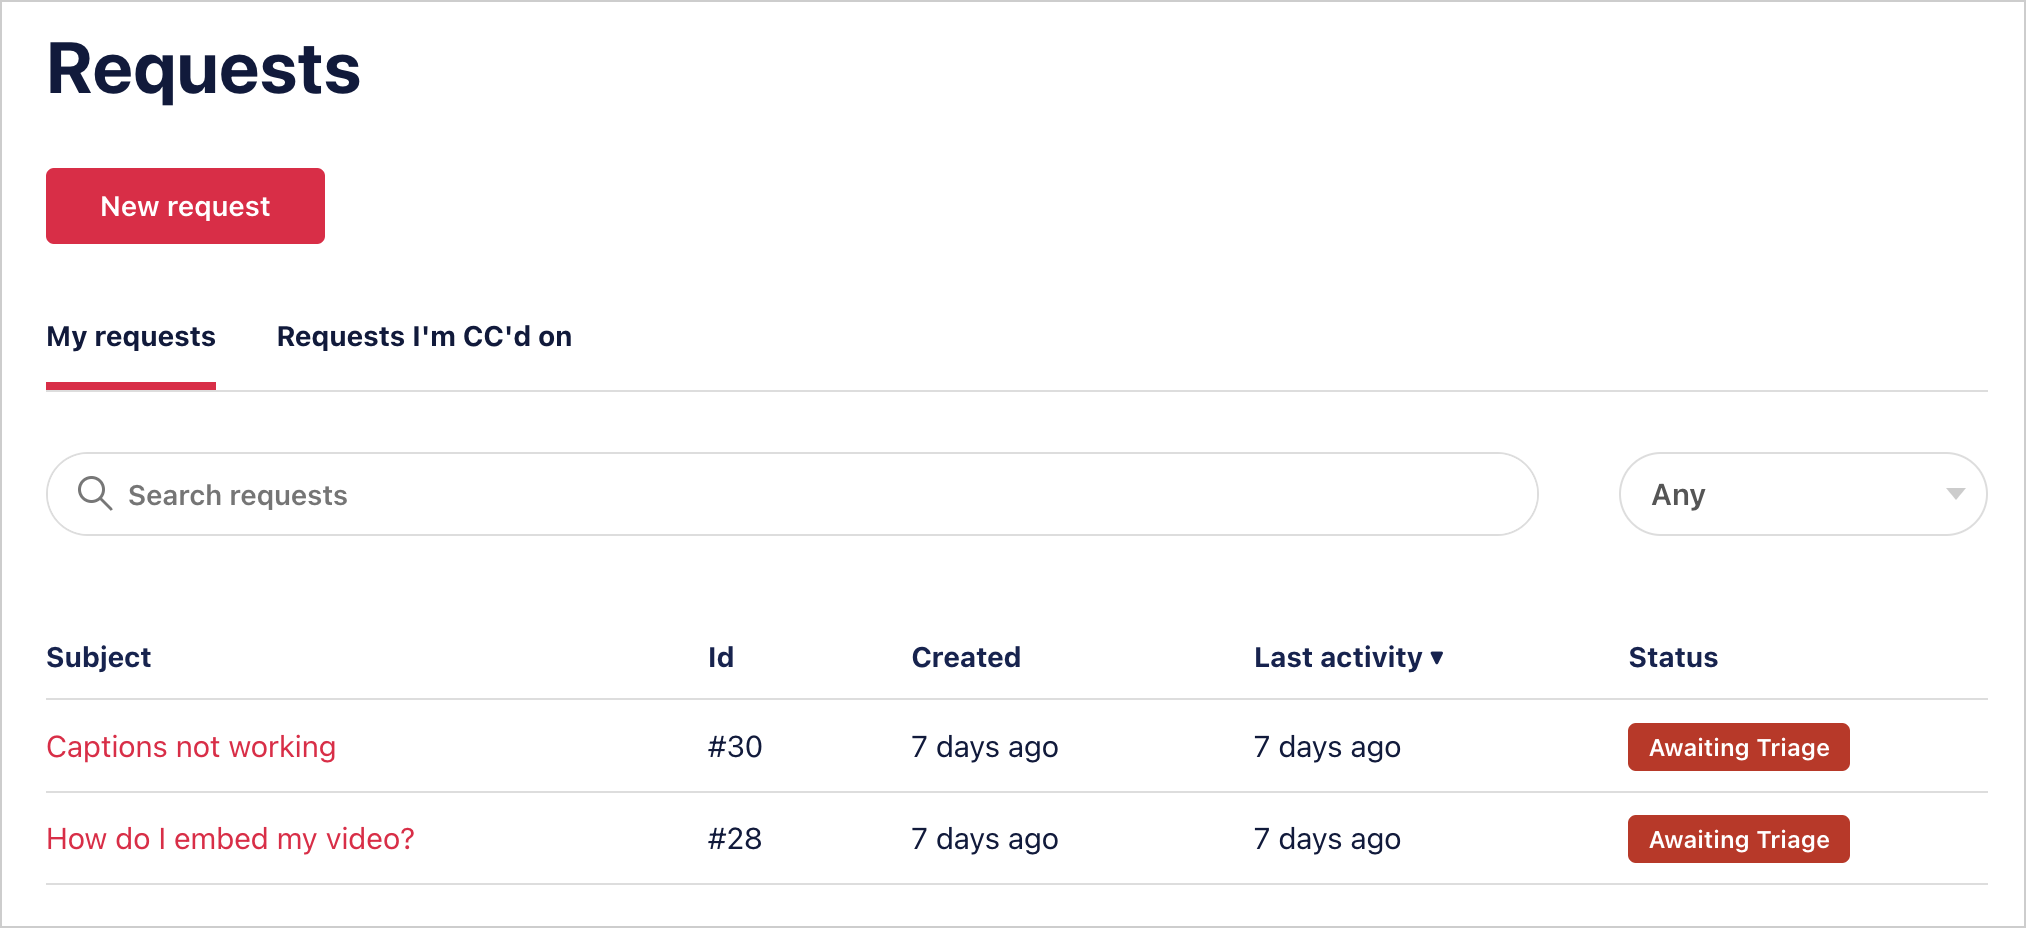
Follow these steps to view and reply to an existing request:
- Click your name > Requests. The Requests page appears.
When you are logged into the Support Portal, you can also access the five most recent requests from the homepage:
- On the Support Portal homepage, under Your recent requests, click See more requests. The details of the Requests page appear.
-
Click the My requests or Requests I'm CC'd on tab to view a list of existing requests.
If your company has requested organization-wide sharing, you can also view requests created by anyone within your organization on the Organization requests tab. To enable organization-wide sharing, contact your JWX Account Manager.
-
(Optional) Refine the results.
Approach Guidance Search requests Enables locating a specific request
Follow these instructions to search for a specific request:- In the Search requests search box, type a term.
- Click Enter. Only matching requests will be displayed.
Filter requests Enables filtering requests by broad status categories
Follow this step to filter your requests:- From the Any dropdown menu, select an option. Only matching requests will be displayed.
Filter requests by organization (Organization requests tab) Enables viewing all requests made from your organization
If you belong to multiple organizations, use the following step to filter requests by organization:- Next to the Search requests search box, select an organization from the dropdown menu.
- In the Subject column, click the subject of the request to view the request details.
- (Optional) Reply to a request.
When you are logged in to the Support Portal, you can also access a specific request from the homepage.
Follow these steps to view a specific request:
- On the Support Portal homepage, under Your recent requests, click the subject of the request. The details of the request appear.
- Optional) Reply to a request.
Reply to a request
Follow these steps to provide more information on a request:
- Click New reply. A form appears.
- (Optional) In the CC field, enter one or several emails to copy on your reply.
- In the main text field, enter and format a reply.
- (Optional) Click Add file to add a file from your computer.
- Click Submit.
Updated 12 months ago
