[ARCHIVE] Create a plan (BETA)
Create property-specific, reusable, pricing options for an app
This is a beta offering. You can request access to this beta feature through your JWP Account Manager.
By using this documentation, you are agreeing to abide by the terms of the JWP Beta Program Agreement.
Plans provide property-specific pricing options, enabling you to offer your viewers tailored choices for accessing content within your app. Created and managed through your JWP dashboard, you can customize plans to suit your unique requirements.
Key features of plans include the following:
- Free and paid pricing models to align with your content strategy
- Multiple currency support to cater to a global audience with diverse currency options.
- Free trial period option to attract new viewers
Once set up, you can associate a plan with multiple apps to streamline your content monetization.
You can only associate one plan with an app. This limitation ensures that each app has a clear and consistent pricing strategy, enhancing the viewer experience.
Prerequisite
| Item | Description |
|---|---|
| Payment and Subscriptions Entitlement | Contact your JWP representative for more information. |
Create and define a plan
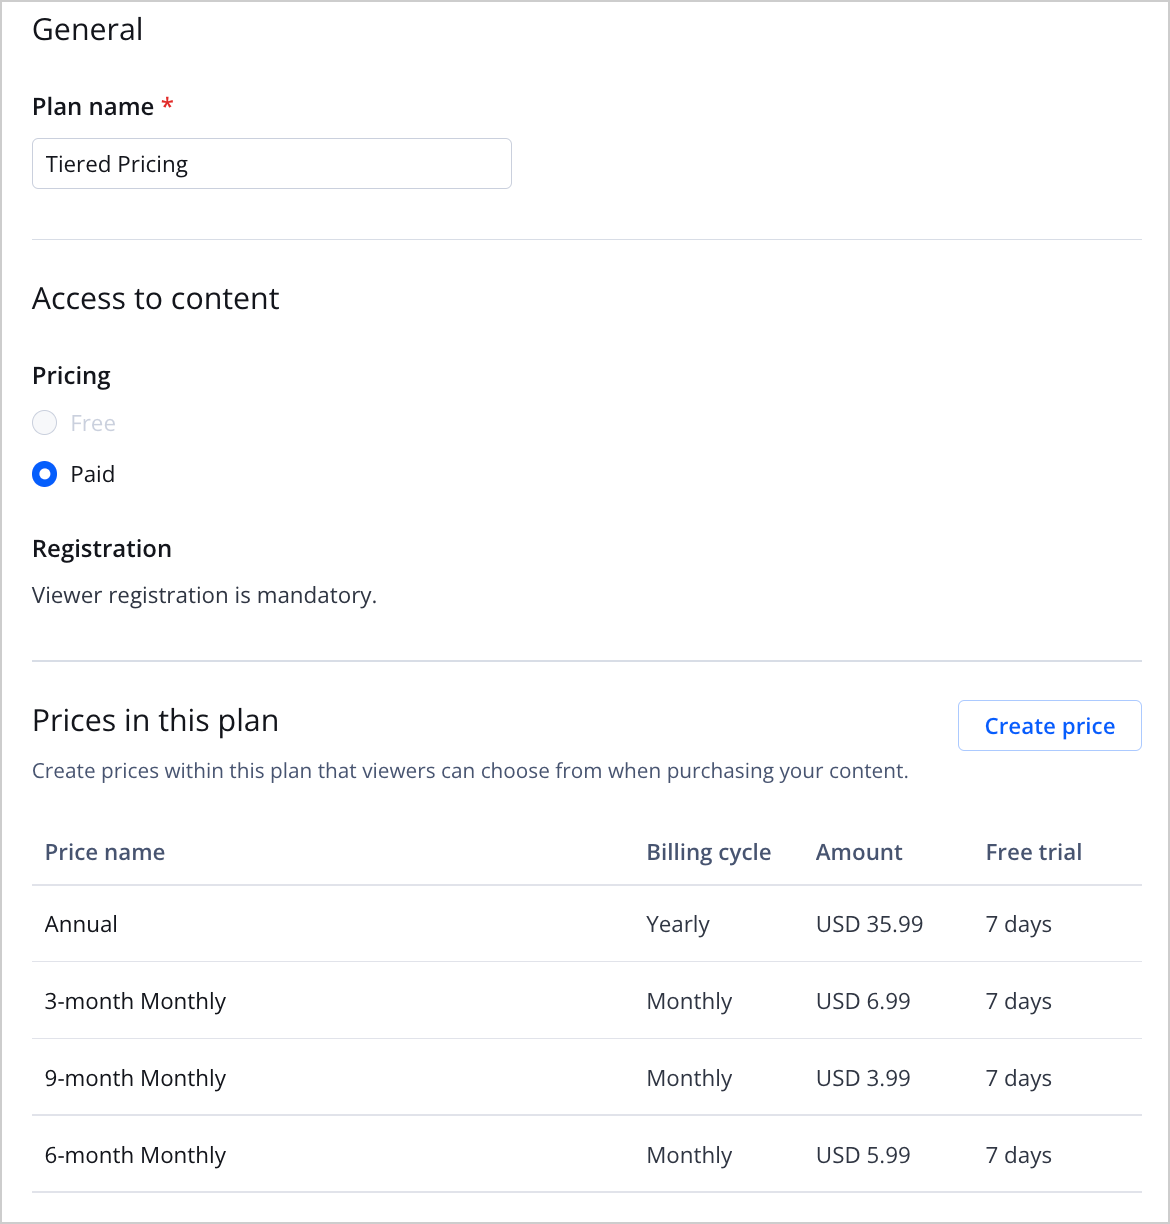
A plan with tiered pricing
Use the following steps to create a plan:
- On the Access & Pricing list page, click Create Plan.
- Enter a Plan name.
- Select a Pricing model:
- Free: Content accessible without payment
- Paid: Content accessible after subscribing to a monthly or annual subscription
- (Paid only) Create a price.
- Click Save. The new plan will appear on the Access & Pricing list page.
Create a price
A plan can contain one or several pricing tiers.
When setting up multiple pricing tiers for your plan, you can offer an annual subscription for long-term viewers seeking value and multi-tiered monthly options, such as 3-month, 6-month, and 9-month plans.
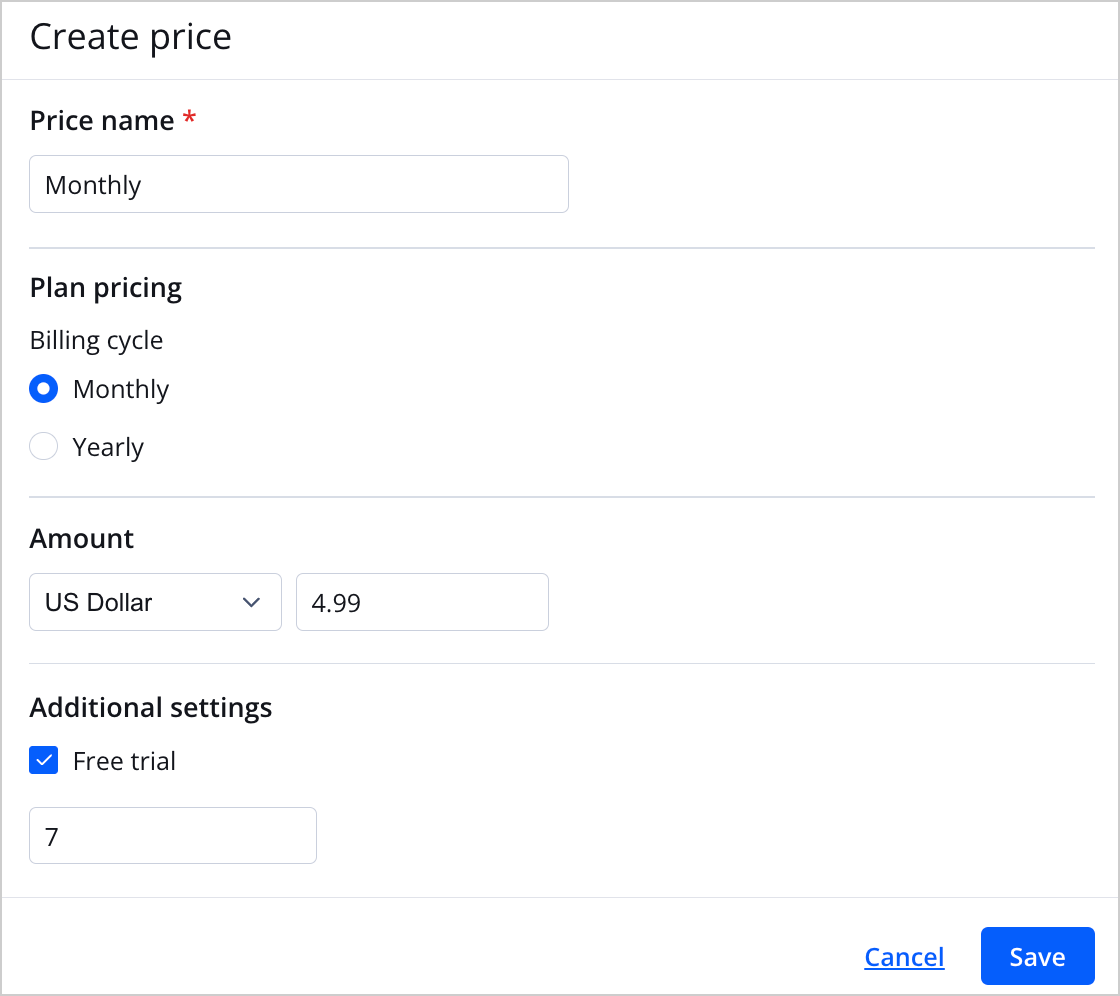
Create price panel
Use the following steps to create a price:
- Click Create price. The Create price panel opens.
If this is the first price you are adding, the Create price button will be toward the bottom of the screen.
- Enter a Price name for the price plan.
- Select the Billing cycle.
- Set the Amount of the plan:
- From the dropdown menu, select the currency.
- In the text box, enter the value charged to the viewer for each billing cycle.
- (Optional) Click the Free trial check box. In the text box that appears, enter the number of free trial days. Free trial periods give your viewers an opportunity to explore your content risk-free.
- Click Save. The panel closes. The new price appears under Prices in this plan.
Updated over 1 year ago