Create new properties
Learn how to create multiple properties
With multiple properties, you can organize your content by grouping related players and media, isolating analytics, and assigning access by team or client. All properties exist under a single parent account, which keeps management centralized and scalable.
A multi-property structure provides clear boundaries for access and performance tracking:
- Group related players and media by company unit or purpose
- View analytics for each individual property
- Limit user access to specific properties
- Switch between properties from the side navigation
Prerequisites
| Item | Description |
|---|---|
| High-volume hosting and streaming account | Contact your JWX representative to update your account, if needed. |
| Admin permissions | User account with admin role permissions |
Create a new property
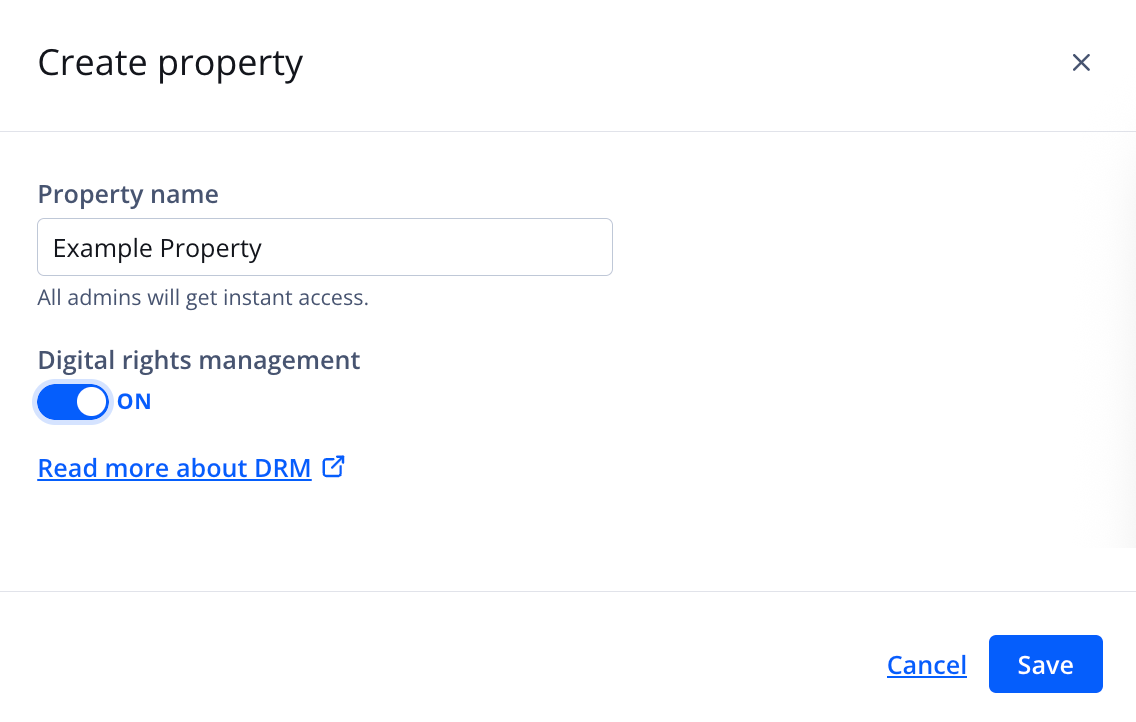
Create property panel
Follow the steps to create a new property:
- On the Properties tab, click Create property. The Create property panel appears.
- Enter a Property name.
- (Optional for users with DRM entitlement) Toggle Digital Rights Management to ON.
Learn more about DRM-enabled properties.
- Click Save.
Admin users will immediately have access to the new property.
Now that you have created a new property, you can do any of the following:
- Manage account users
- Add videos to your Media Library
- Set DNS masking
- Enable georestricting rules or URL signing
- Define default custom parameters
Updated 5 months ago
What’s Next
Did this page help you?