Get started with Dynamic Strategy Rules
Learn how to create tailored viewer experiences
In a defined placement, a strategy is a decision tree that dynamically controls which experiences are displayed based on contextual information, such as details about the website visitor and the page being viewed.
The decision tree serves as a routing mechanism, using branches (traffic splits or condition groups) to direct visitors to specific experiences.
You can define each experience with configurations for player behavior, media curation, and advertising, and manage the experience in the Dynamic Strategy Rules library.
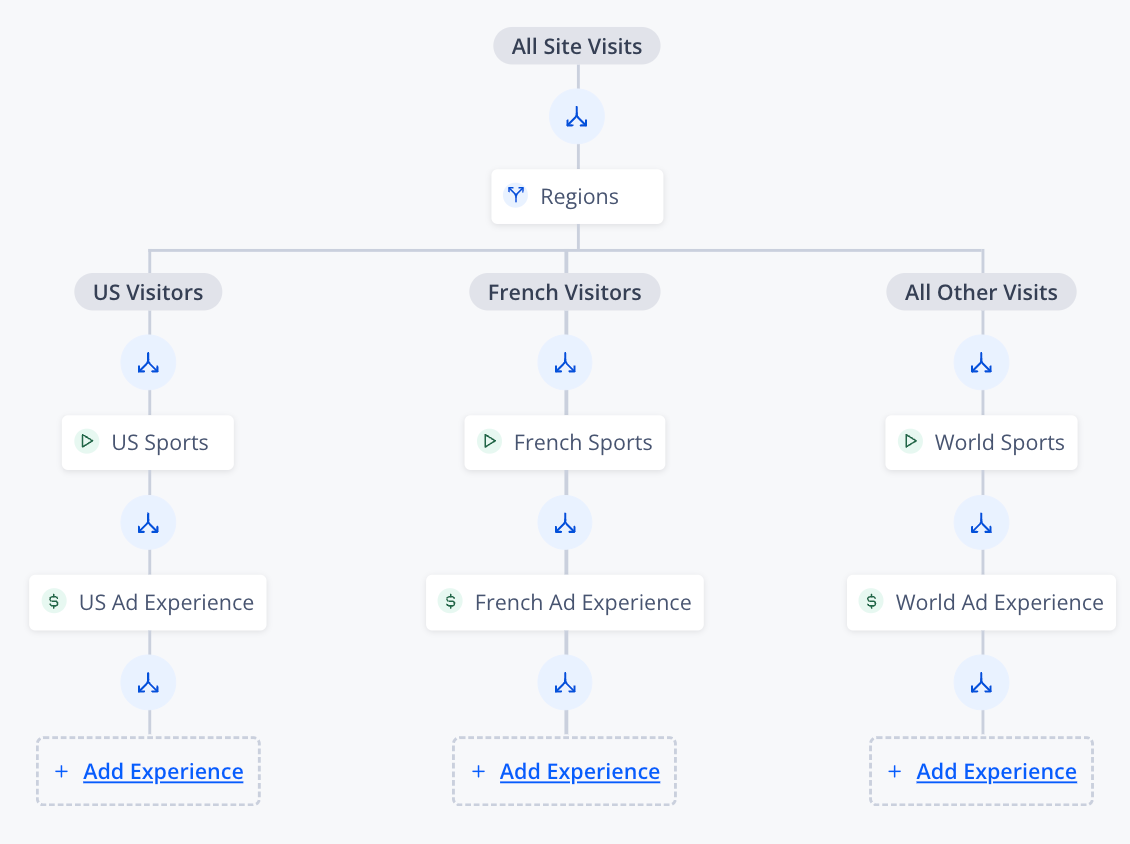
Dynamic Strategy Rules decision tree
Prerequisite
| Experience | Description |
|---|---|
| Placement | (Recommended) Container embedded on your site where a visitor's video experiences occur
If you do not have an existing placement, you can create one when building a strategy below. |
Create a new strategy
Follow these steps to create a strategy:
-
On the Dynamic strategy rules page on the Strategies tab, click Create strategy. The Create strategy panel opens.
-
Enter a Name.
-
Click Create. An empty state decision tree appears.
-
(Optional) Create one of the following types of branches:
-
Add an experience. If you create a condition group or traffic split, you must add an experience for each branch.
Experience Description JW video experience Combines new or existing content, player, and ad configurations into one experience Partnership experience Combines new or existing content and an ad into a unified viewer experience Max RPM Adds a revenue-optimized, ad-focused video experience to a strategy Vertical video discovery Configures player, content, and advertising Audio experience Combines a JWX Studio article audio with player configurations into one experience Triggers Creates event rules that initiate actions Custom code Injects custom JavaScript into a strategy Hide player Hides the video player from the viewer's display
You can also create another condition group or traffic split. Then, add an experience for each branch.
-
(Triggers only) After adding a trigger, repeat step 3.
-
Click Save.
FAQs
Can a strategy be linked to more than one placement?
Yes.
How can a strategy be unlinked from a placement?
- On the Placements page, click the name of the placement. The placement details page appears.
- Under Link a Strategy, click Unlink Strategy next to the selected strategy.
You will need to associate another strategy. Without an associated strategy, this placement will be disabled (Not Deliverable) and render an empty <div> on all pages where it is deployed. If a different deliverable placement exists on one of those pages, that placement will still work.
How quickly will end users notice any changes made to a strategy?
Because strategies are cached, it may take up to one hour for changes made to a strategy to become visible to end users.
Updated 3 months ago