Get started with Apps
While JWX app partners can help you develop and maintain your app, the JW Platform enables you to independently manage app content and monetize through advertising and subscriptions on mobile, connected TVs, and the web.
You can manage all of your app’s content from the JWX dashboard, including:
- VOD and live media
- App landing pages and menus
- Subscriptions and advertising
- Search and Recommendations
- Favorites and Continue Watching
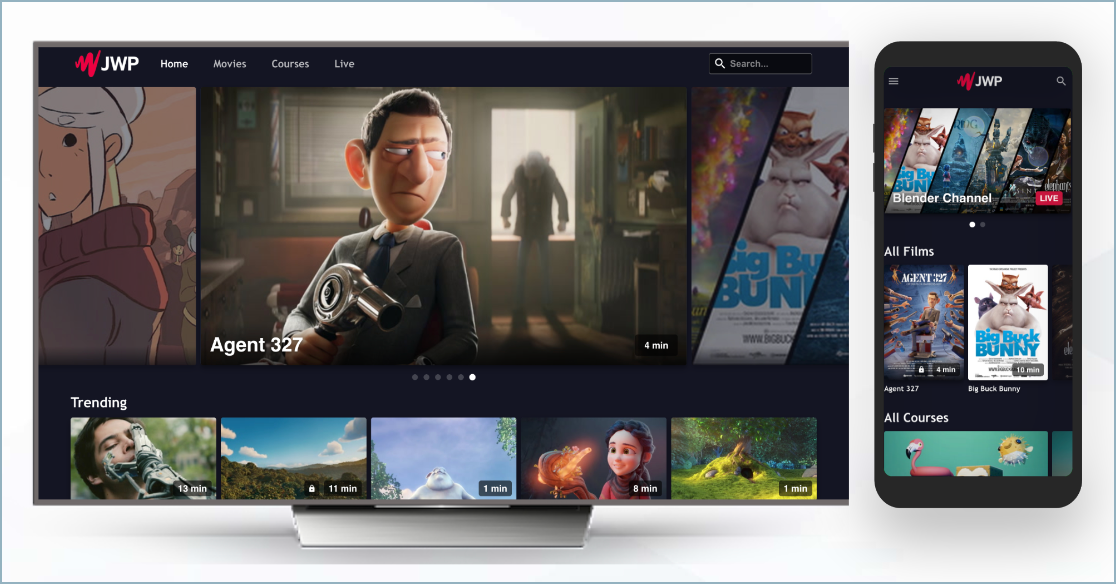
Video landing page on CTV and mobile devices
Prerequisites
| Item | Description |
|---|---|
| Apps Feature | JWX OTT Apps feature enabled on your account For more information, contact your JWX representative. |
Get started with apps
Follow these steps to get started with apps:
- Load content types to the property.
- Add app content.
- Create an app config.
- Position content on the landing page.
- Enable monetization:
- Share the app config ID from the Config ID column on the Apps page with your app partner. Your partner can assist you with hosting and customizing your app.
- Set up analytics to monitor and gain insights into the performance of your app content:
Updated 3 months ago