Get started with Instant Live
An Instant Live channel is a grouping of live event streaming settings. Each Instant Live Channel that you create corresponds to a specific encoder. Unless you replace your encoder or increase the number of encoders you use for streaming your events, you only need to create an Instant Live Channel once for each encoder.
If you are a developer or have developer resources, you can set up a live event with the Platform Management API.
Prerequisite
- Live streaming entitlement (Contact your JWX representative for more information.)
Create a channel
Creating a channel
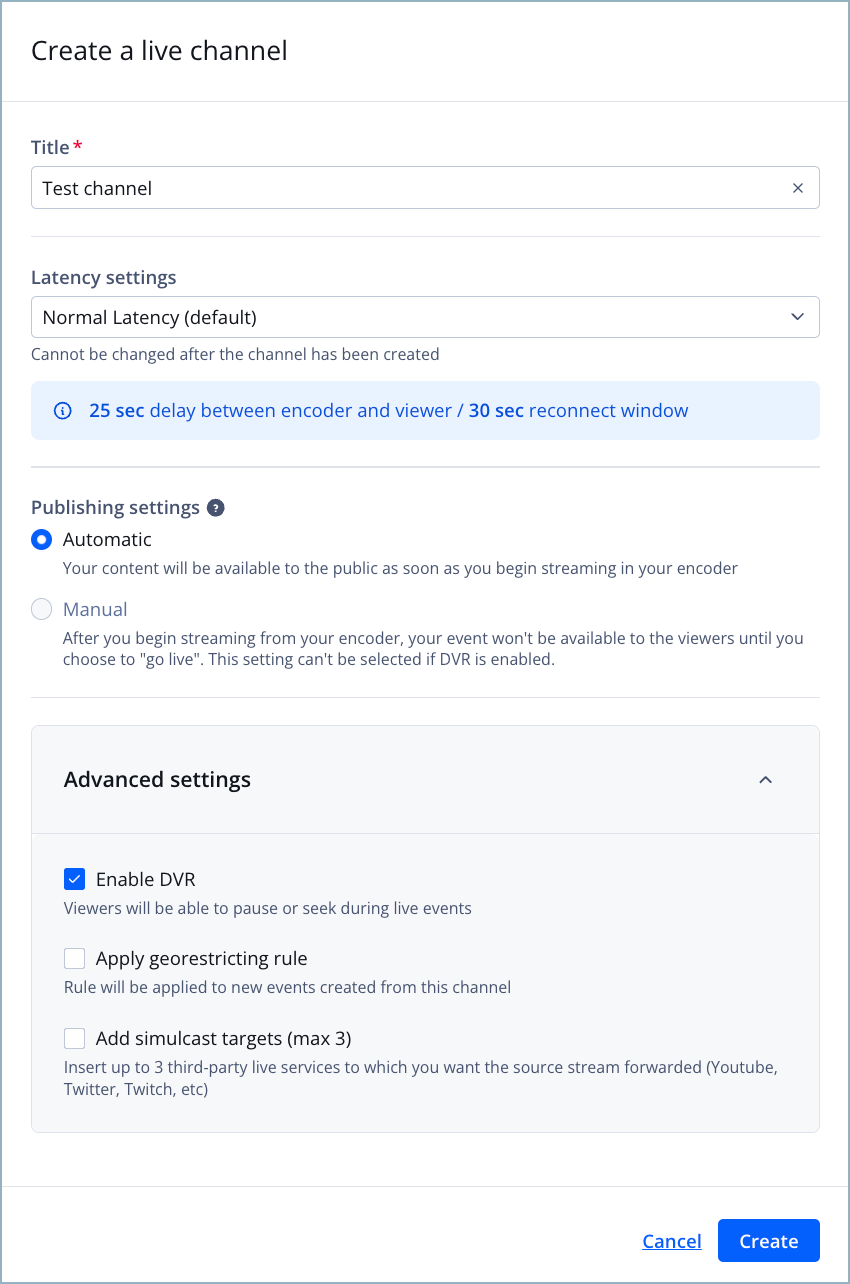
Follow these steps to create an Instant Live channel:
- From the Instant Live page, click Create channel. The Create a live channel panel appears.
- Enter a Title.
- Under Latency settings, select a latency setting from the dropdown menu:
- Normal latency: (Default setting) A single frame of video takes approximately 25 seconds to be transferred from your live stream encoder to a viewer's display. If your encoder disconnects from the RTMP entry URL, it has up to 30 seconds to reconnect before the live event stream is ended for all viewers.
- Reduced latency: A single frame of video takes approximately 10-15 seconds to be transferred from your live stream encoder to a viewer's display. If your encoder disconnects from the RTMP entry URL, the live event stream is immediately ended for all viewers.
- Low latency HLS: Video latencies are lowered into the range of standard television broadcasts.
- Under Publish settings, choose how to control the stream:
- Automatic publish: Use this approach if you want the event to start and be available to your viewers when your encoder connects to the Live Channel RTMP service.
- Manual publish: Use this approach if you want to preview the event before it is available to your viewers. When the encoder starts, you can preview the Live Event in your JWX dashboard without streaming the event to your viewers. Then, you can publish the stream to allow your viewers to watch the live event stream.
- (Optional) Expand the Additional settings and click the checkbox next to each setting that should be enabled for the channel:
- Enable DVR: This option enables your viewers to return to the start of the stream if they join the live event late. This option should only be enabled for events that are under 4 hours.
- Add georestricting rule: When selected, you must also select a rule from the dropdown menu. If you do not have existing georestricting rules or need to create a new georestricting rule, you can create a new georestricting rule.
- Add simulcast targets (max 3): When selected, you must enter the Title of the target, the Stream URL, and the Stream key. You can add a maximum of three simulcasting targets.
- Click Create. The Instant Live Channel is created and the details page of the new Instant Live Channel appears.
FAQ
What is the difference between Normal Latency and Reduced Latency for an Instant Live Channel?
The following table details the differences between these two latency options.
| Option | Description |
|---|---|
| Normal Latency | (Default) A single frame of video takes approximately 25 seconds to be transferred from your live stream encoder to a viewer's display. Suggested use case: • Networks with potential connectivity issues If your encoder disconnects from the RTMP entry URL, it has up to 30 seconds to reconnect before the live event stream is ended for all viewers. |
| Reduced Latency | A single frame of video takes approximately 10-15 seconds to be transferred from your live stream encoder to a viewer's display. Suggested use cases: • News events • Sports events • Networks with high-speed, reliable connectivity If your encoder disconnects from the RTMP entry URL, the live event stream is immediately ended for all viewers. |