
Manage ad optimization experiences
Edit and delete ad optimization experiences and audience segments
After creating an ad optimization experience, you can update its settings, manage its audience segments, copy its ID, or delete it at any time. Changes take effect after you save the experience.
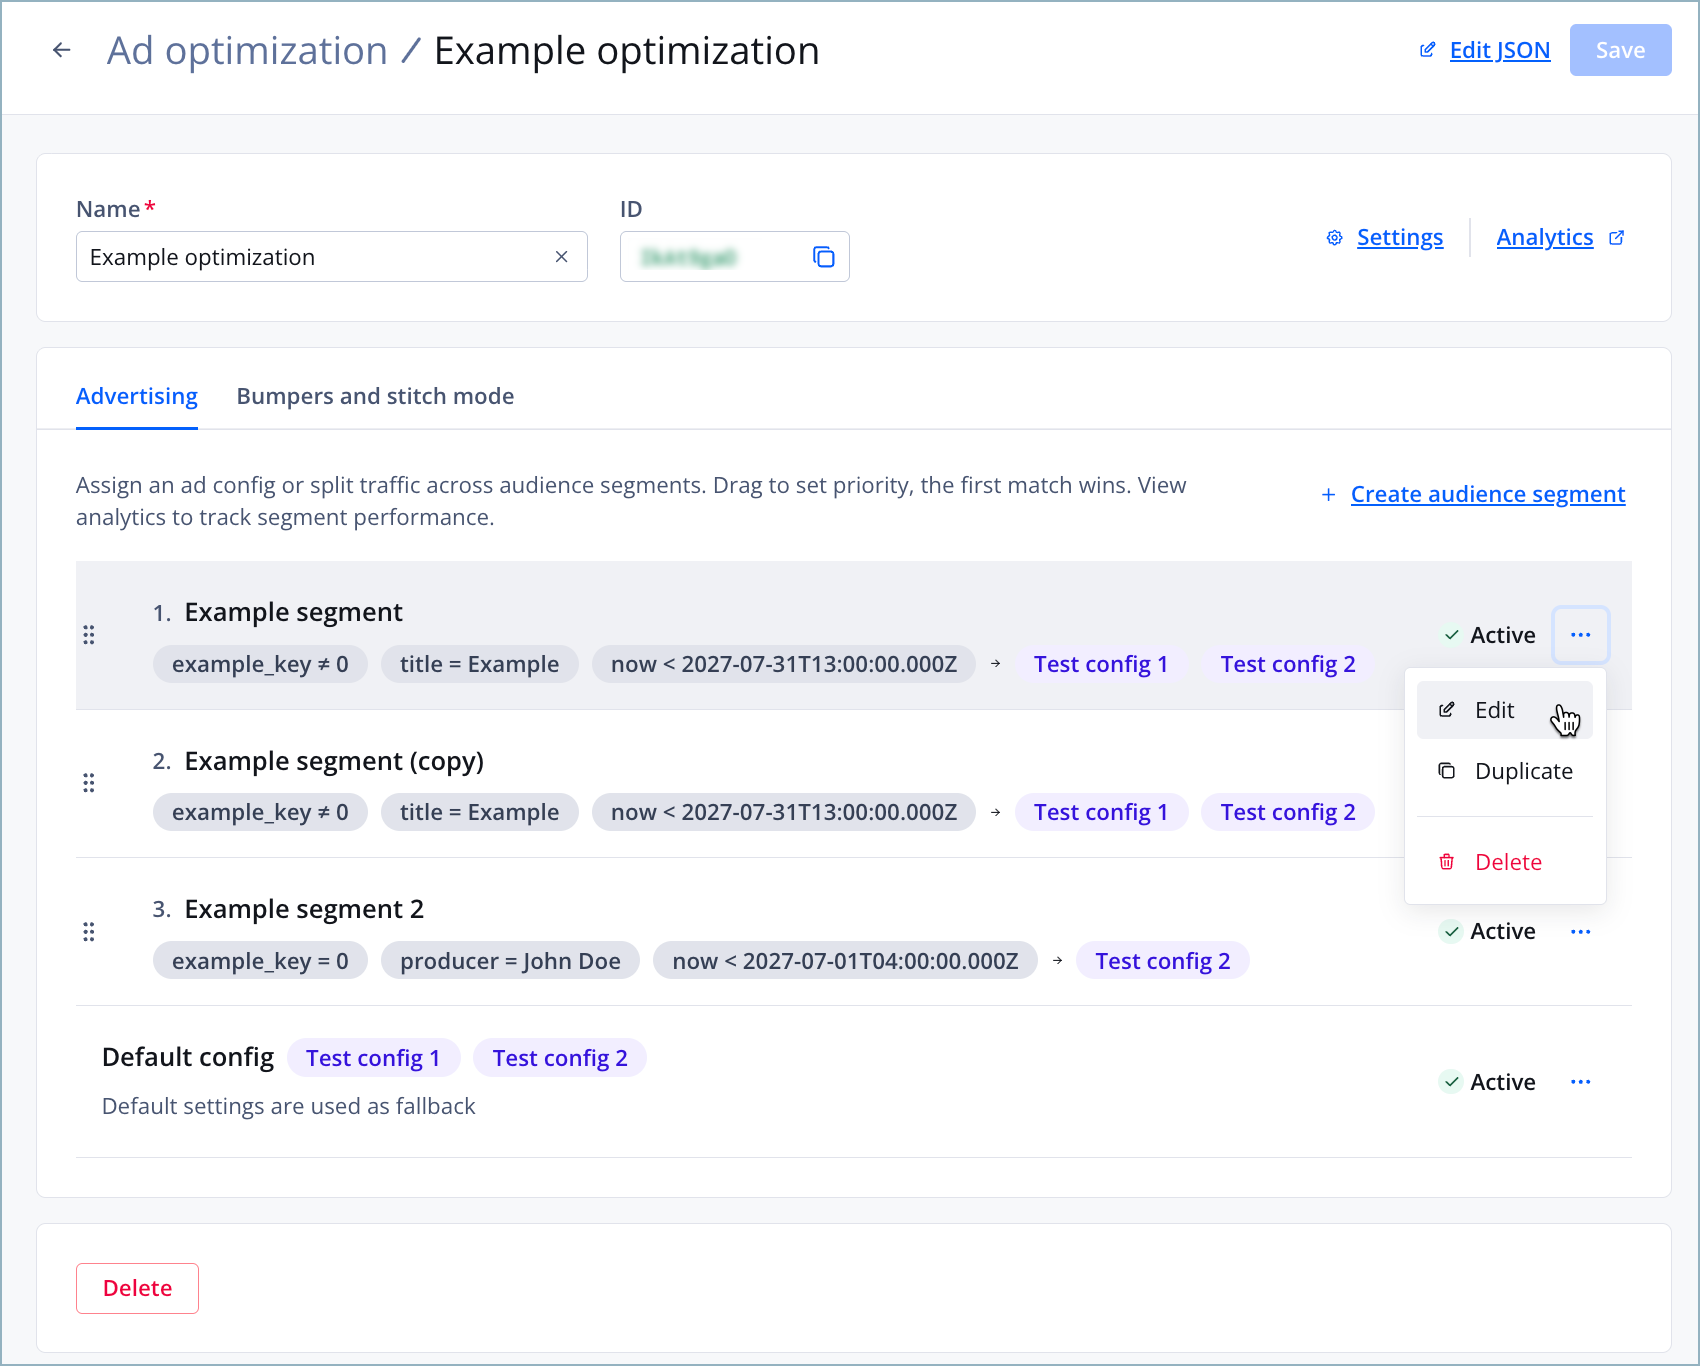
Managing audience segments from the ad optimization details page
Edit an ad optimization experience
Follow these steps to edit an ad optimization experience:
- On the Ad insertion page, click the Ad optimization tab. A list of existing experiences appears.
- In the row of an experience, click ⋯ > Edit. The ad optimization details page appears.
- Update the experience (steps 2–5). You can change the experience's name, audience segments, advertising outcomes, bumper behavior, stitch modes, advanced settings, or JSON configuration.
- Click Save.
Manage audience segments
Audience segments are managed separately for advertising, bumpers, and stitch mode. Within each area, JWX evaluates segments from top to bottom and applies the first matching segment. After changing a segment or its priority, save the experience to publish your changes.
Add an audience segment
Follow these steps to add an audience segment to an existing experience:
- On the Ad insertion page, click the Ad optimization tab. A list of existing experiences appears.
- Select an ad optimization experience. The ad optimization details page appears.
- On the Advertising or Bumpers and stitch mode tab, click + Create audience segment. The Create audience segment panel appears.
- Define the segment (steps 5–13 for advertising | steps 1–7 for bumpers | steps 1–7 for stitch mode).
- On the ad optimization details page, click Save.
Edit an audience segment
Follow these steps to edit an audience segment:
- On the Ad insertion page, click the Ad optimization tab. A list of existing experiences appears.
- Select an ad optimization experience. The ad optimization details page appears.
- On the Advertising or Bumpers and stitch mode tab, in the row of the segment, click ⋯ > Edit. The Edit audience segment panel appears.
- Update the segment (steps 7–13 for advertising | steps 2–7 for bumpers | steps 2–7 for stitch mode).
- On the ad optimization details page, click Save.
Duplicate an audience segment
Duplicating a segment copies its conditions and outcome, giving you a starting point for a new audience segment.
Follow these steps to duplicate an audience segment:
- On the Ad insertion page, click the Ad optimization tab. A list of existing experiences appears.
- Select an ad optimization experience. The ad optimization details page appears.
- On the Advertising or Bumpers and stitch mode tab, in the row of the segment, click ⋯ > Duplicate. A duplicated segment appears immediately after the original with (copy) appended to its name.
- Edit the duplicated segment.
- Click Save.
Reorder audience segments
Segment order determines priority. JWX evaluates audience segments from top to bottom and applies the first match.
Follow these steps to reorder audience segments:
- On the Ad insertion page, click the Ad optimization tab. A list of existing experiences appears.
- Select an ad optimization experience. The ad optimization details page appears.
- On the Advertising or Bumpers and stitch mode tab, use the drag handle to move each segment into the order JWX should evaluate it.
- Click Save.
The default advertising segment remains the fallback for requests that do not match another advertising segment.
Delete an audience segment
Deleting a segment is irreversible. Once deleted, a segment must be recreated.
Follow these steps to delete an audience segment:
- On the Ad insertion page, click the Ad optimization tab. A list of existing experiences appears.
- Select an ad optimization experience. The ad optimization details page appears.
- On the Advertising or Bumpers and stitch mode tab, in the row of the segment, click ⋯ > Delete.
- Click Save.
Delete an ad optimization experience
This action is irreversible. Once deleted, an ad optimization experience cannot be recovered, and an SSAI manifest request that references its ID will be served without ads.
Follow these steps to delete an ad optimization experience:
- On the Ad insertion page, click the Ad optimization tab. A list of existing experiences appears.
- In the row of an experience, click ⋯ > Delete. The Delete ad optimization modal appears.
- Click Delete. The ad optimization experience is deleted.
Updated about 1 hour ago