Manage playback custom reports
Learn how to schedule, download, edit, and delete playback custom reports
After creating a playback custom report, you can schedule, download, edit, or delete it.
Schedule a report
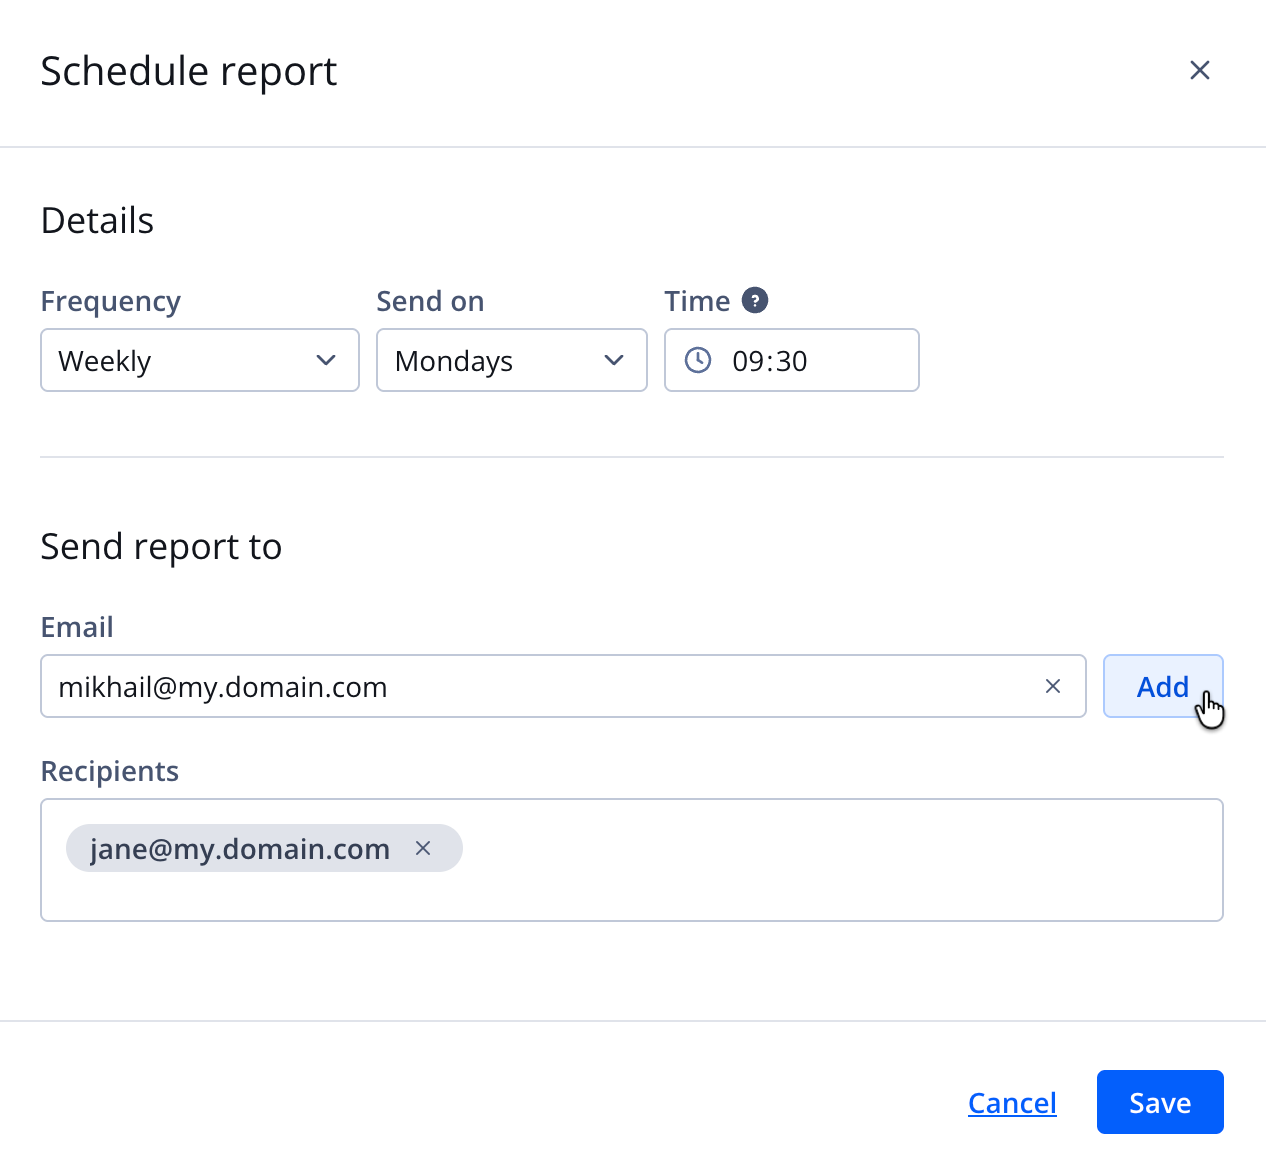
Schedule report panel
Create a schedule
Follow these steps to schedule a report:
- On the Custom reports page, on the Playback tab, click the name of the report. The report opens.
- Click ⋯ > Create schedule. The Schedule report panel opens.
- Define the schedule frequency Details of the report.
Daily
Follow these steps to schedule the report to run daily:- From the Frequency dropdown menu, select Daily.
- Enter the Time in HH:MM, 24-hour format.
Weekly
Follow these steps to schedule the report to run weekly:- From the Frequency dropdown menu, select Weekly.
- From the Send on dropdown menu, select the day of the week.
- Enter the Time in HH:MM, 24-hour format.
Monthly
Follow these steps to schedule the report to run monthly:- From the Frequency dropdown menu, select Monthly.
- From the Send on dropdown menu, select the day of the month.
- Enter the Time in HH:MM, 24-hour format.
- Choose the recipients who will receive the report:
- Enter a single Email address.
- Click Add. The recipient name appears under Recipients.
- Repeat steps 4a-b to add multiple recipients.
- Click Save. The report is scheduled, and the panel closes.
Edit a schedule
Follow these steps to edit a schedule:
- On the Custom reports page, on the Playback tab, click the name of the report. The report opens.
- Click ⋯ > Edit schedule. The Schedule report panel opens.
- Follow steps 3-5 of Create a schedule to finish editing the schedule settings.
Remove a schedule
Follow these steps to remove a schedule:
- On the Custom reports page, on the Playback tab, click the name of the report. The report opens.
- Click ⋯ > Remove schedule.
Download a report
Follow these steps to download a report:
- On the Custom reports page, on the Playback tab, click the name of the report. The report opens.
- Click ⋯ > Export as CSV.
- Save the .csv file to your device.
Edit a report
Follow these steps to edit a report:
- On the Custom reports page, on the Playback tab, click the name of the report. The report opens.
- In the left pane, on the All Fields tab, select one or more DIMENSIONS or MEASURES. The fields will appear in the main pane.
Follow these steps to learn about a specific dimension or metric:
- Hover over the dimension or metric.
- Click ⓘ (information icon). A pop-up window appears defining the value.
- (Optional) In the main pane, expand the Filters section to filter or limit data for the report.
- (Optional) Define a visualization or graph.
- Click Run to generate the report results.
- Click Save. The changes to the report will be saved.
Delete a report
Deleting a report from your account is irreversible.
You can remove reports individually or in bulk:
- Single report: Delete one report directly from the report list
- Multiple reports: Select and delete several reports at the same time
Single report
Follow these steps to delete a report:
- On the Custom reports page, on the Playback tab, click ⋯ > Delete in the row of a report. The Delete report pop-up window opens.
- Click Delete. The report is deleted and removed from the report list.
Multiple reports
Follow these steps to delete multiple reports:
- On the Custom reports page, on the Playback tab, hover over a report row to reveal the checkbox.
- Click the checkbox.
- Repeat steps 1-2 to select additional reports.
Above the list of reports, you can click the checkbox next to Title to select all reports.
- Click Delete. All selected reports are deleted.
Updated about 1 month ago
Did this page help you?